This section will look into how to
•Filter data in ShipWeight
•Sort data in ShipWeight
•Change weight data and perform calculation on weight data for multiple rows
In the tree-view on the main window, navigate to weight group E2.2 under LW – Lightship -> E – Equipment -> E2 – Ship equipment, and open the item window.
Step 2: Open the Filter Window, Set and Save a Filter
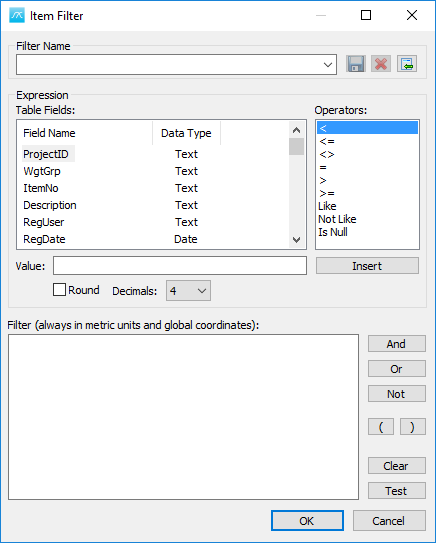
Press the ‘Apply filter’ button on the toolbar, or select Tools -> Filter -> Apply… on the Tools menu. The Item Filter window will pop up.
In the ‘Table Fields’ list, select VCG. Select the ‘>’ operator from the ‘Operators’ list. Set the ‘Value’ to 4, and press the Insert button.

Note that you can save the filter by giving it a name in the “Filter name” droplist and then click the “Save” button. All saved filters can be retrieved from the drolist in the Filter window and directly from the filter droplist of the Item window.
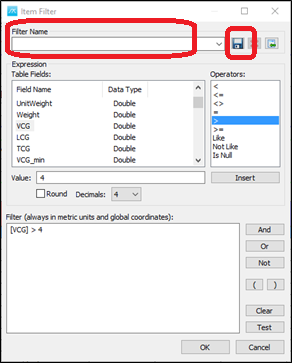
Press OK to apply the filter. All items which have VCG’s larger than 4.0 meters will be listed.

To remove the filter, select Tools -> Filter -> Clear, or press the ‘Clear Filter’ button.
Step 3: More on Filter and “Wild cards”
A “Wild card” can be used in a filter string the following way:
Use % to represent any character and any number of character.
Use _ to represent any character.
Use [ ] to specify “either” of values presented in the square brackets.
Use ^ to indicate NOT then followed by [ ] with the NOT characters inside the brackets.
To open the Sort window, select Sort -> Apply… on the Tools menu, or press the ‘Sort’ button on the toolbar.
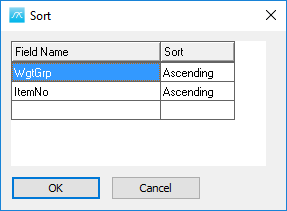
Click the ‘Field Name’ cell of the empty row. The cell will change to a combo box. Activate the dropdown list, and select Description.
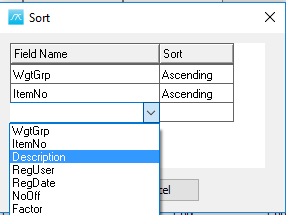
Click the ‘Sort’ cell. By default, the value will be set to ‘Ascending’.
On the next row, select Field Name: Weight.
Data Type: Ascending
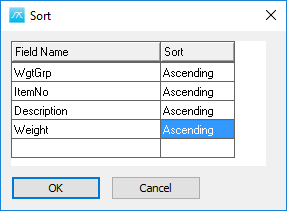
Press the OK button to apply the Sort.
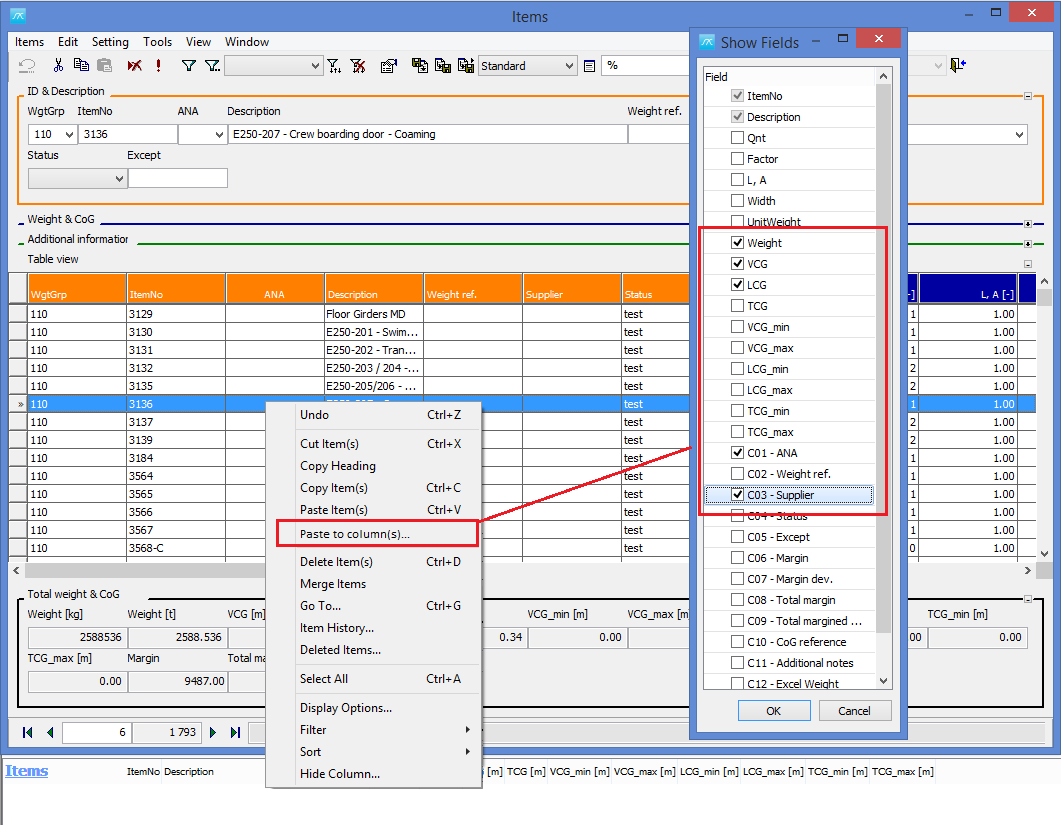
Step 5: Paste Values to Certain Columns
This function will allow to specify which columns to paste to from the clipboard. Pasting will happen to existing items and from the selected row and below (depending on how many rows are in the clipboard). Picture below shows how to do this in the table:
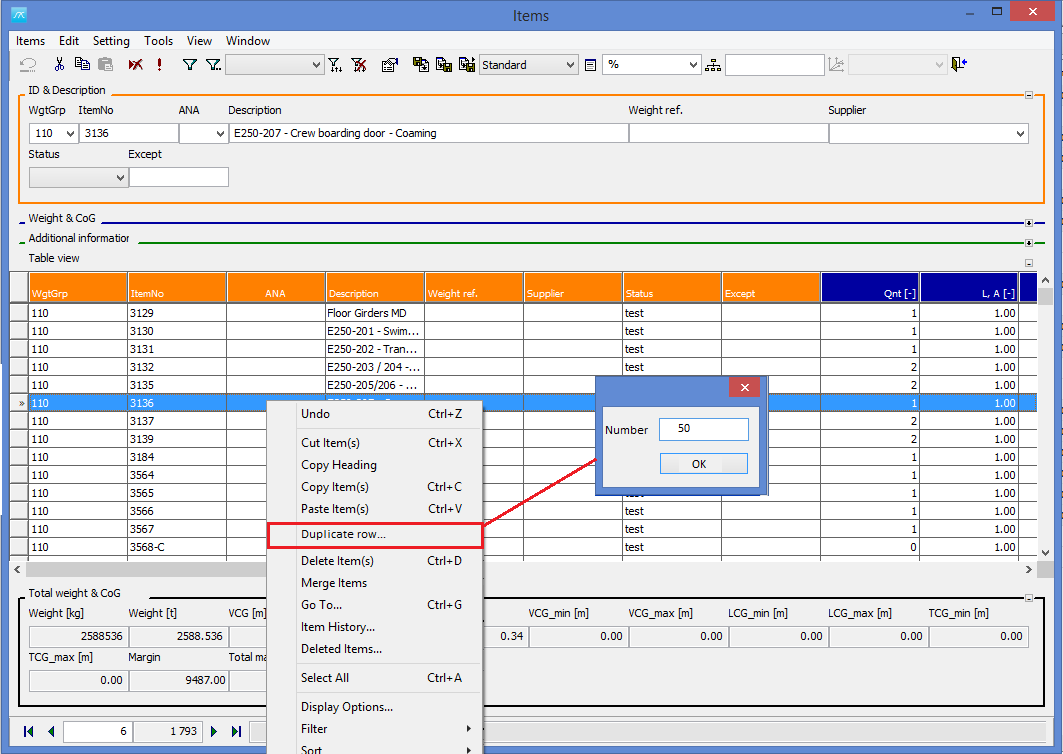
A function for easy duplication of a row into any number of copies.
ItemNo can follow the copied one, adding on a suffix to the item 3136_1, 3136_2, 3136_3,…
GUI shown here:
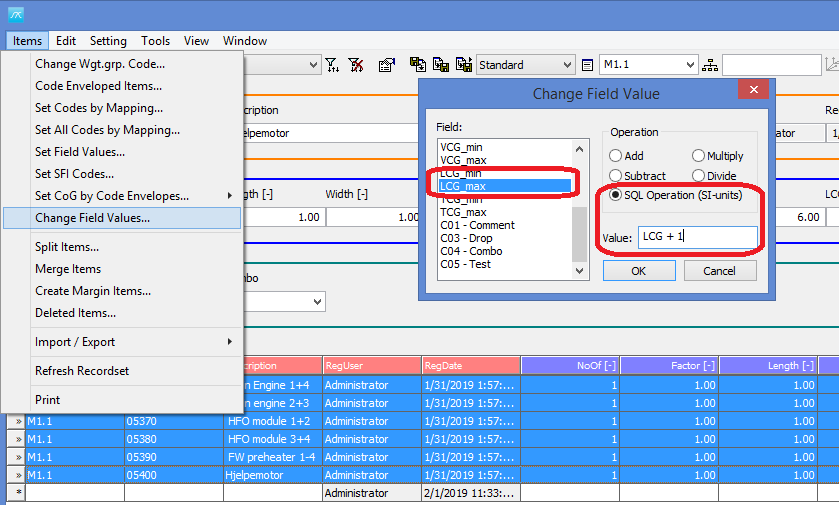
Step 7: Change Some Data Values by Calculation
The “Execute operation” window that can be opened from the Item Window has changed name to “Change Field Values…” and has a new option allowing for much greater flexibility than the Add/Subtract/Multiply/Divide options in version 12.
The new option “SQL Operation”, allows the user set a calculation formula to update a field. The calculation formula may refer to other fields. The simple example below shows setting LCG_max values for the selected items to the LCG value plus 1 meter (LCG +1). Note that these expressions should always be set in SI/metric units, even if project is in imperial units.
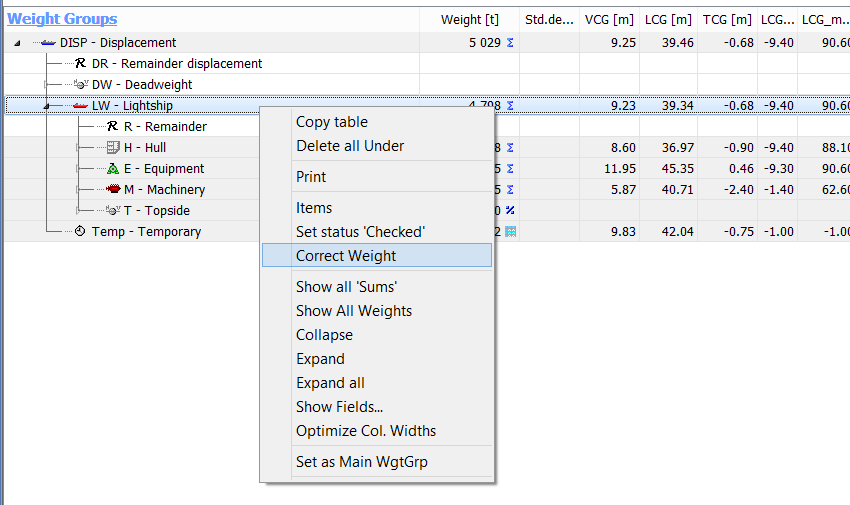
Step 8: Adding a Correction Weight to Adjust a Summary
Sometimes you want to adjust a summary to make it a specific set of values. As an example, you want to adjust the Lightship weight and center of gravity to match the results from a displacement and inclining test.
ShipWeight has a function to let you automatically accomplish this. First, right-click the weight group you want to adjust, and select “Correct Weight” in the submenu that appears.
In the “Add Correction” window that pops up, in row A; fill in the values (weight and CG) you want the summary to have after correction.
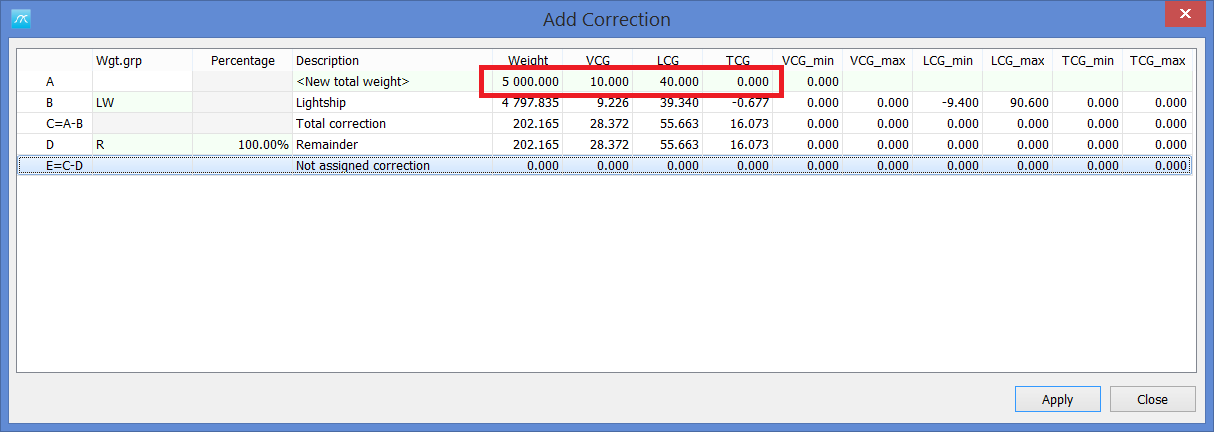
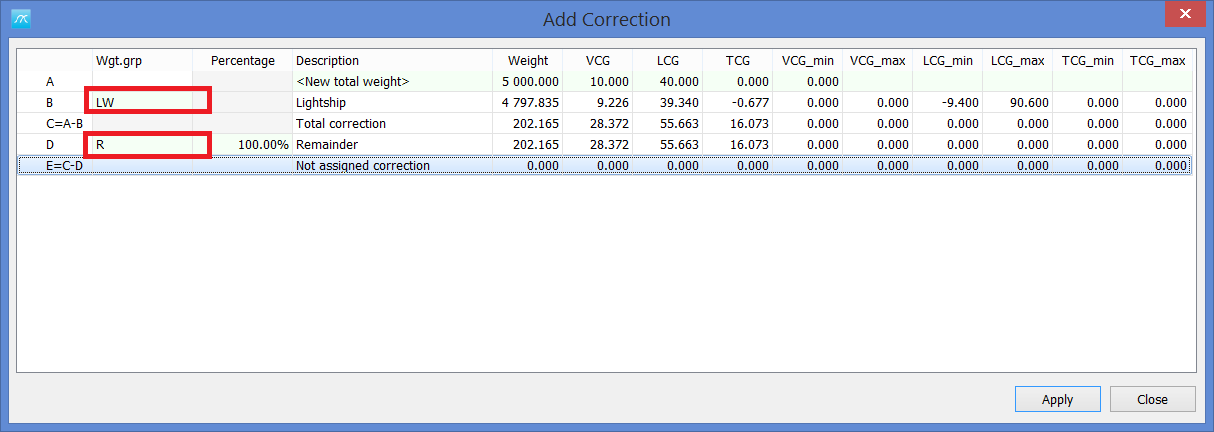
In row B, make sure it displays the correct summary that you want to change. If not correct, click the cell to change the to the correct weight group from the droplist.
In row D, ShipWeight is suggesting to add the correction to the remainder group. If you want the correction to be added to a different weight group, change this here by clicking the cell and select the desired weight group from the droplist.
Next, still in row D, set if all or only parts of the correction should be applied to the selected group in row D. The default is 100 % - that the full correction will be applied to the group. Click “Apply” button to transfer the calculated values to the main window.

The main window is now updated with the corrected weight.

Step 9: Create a UnitWeight Library
Create a custom code for the library (call it what you want). Make it a Combobox or a Listbox
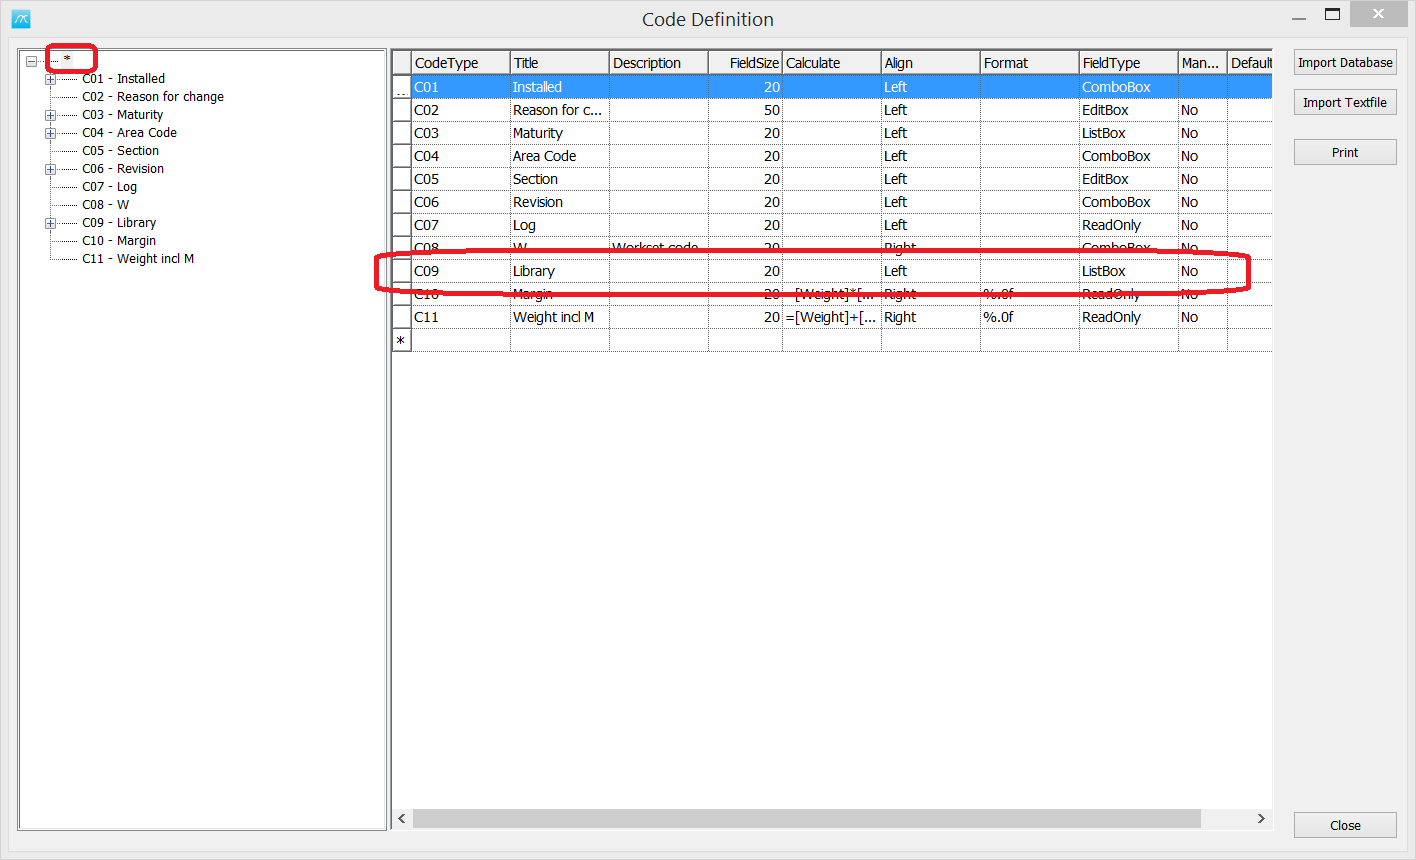
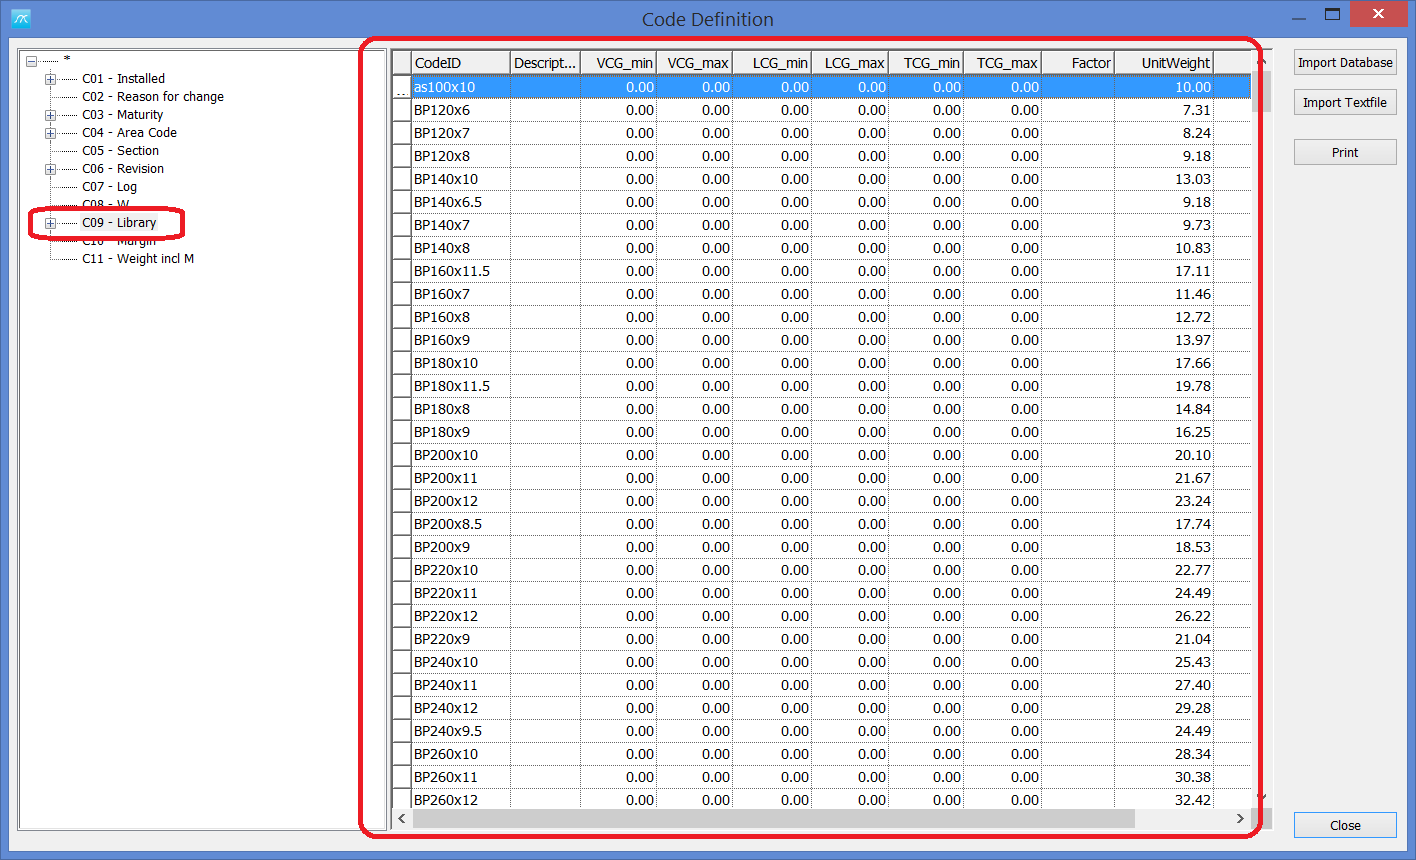
Fill the custom code with codes representing the library, remember you can to copy/paste from Excel
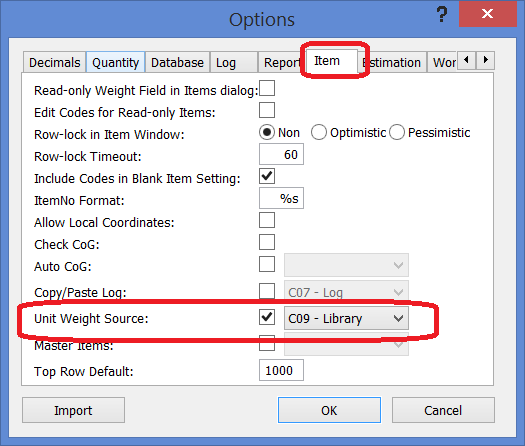
In the Options dialog (menu: View->Options in main window), go to the “Item” tabsheet and select your UnitWeight source.
Add your new item code to any Item Settings that have been made prior to the custom code.
Step 10: Create an Item Library.
Create a special project where you add equipment to the various weight groups.
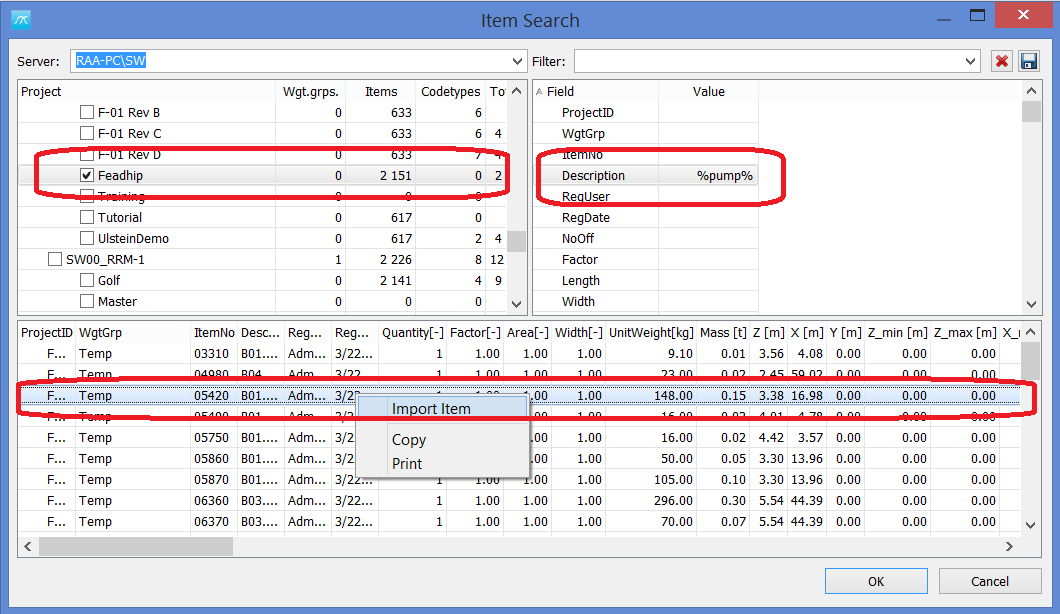
In the project you want to import, go to the Item Window with the item weights, go to menu View->Items on Server…
In the Items on Server window, select the library project (Feadship in this example), do any filtering needed to find the equipment (see Description filter example here), select the item in the list of item, rightclick and select “Import item”.