This section will into doing weight tracking for series production of vehicles with configuration changes raises some challenges. Using Phase Codes
Step 1: Define the Phase Code as Custom Code
Open the code definition:
The Code Definition window will open:

Define a custom code as shown below:
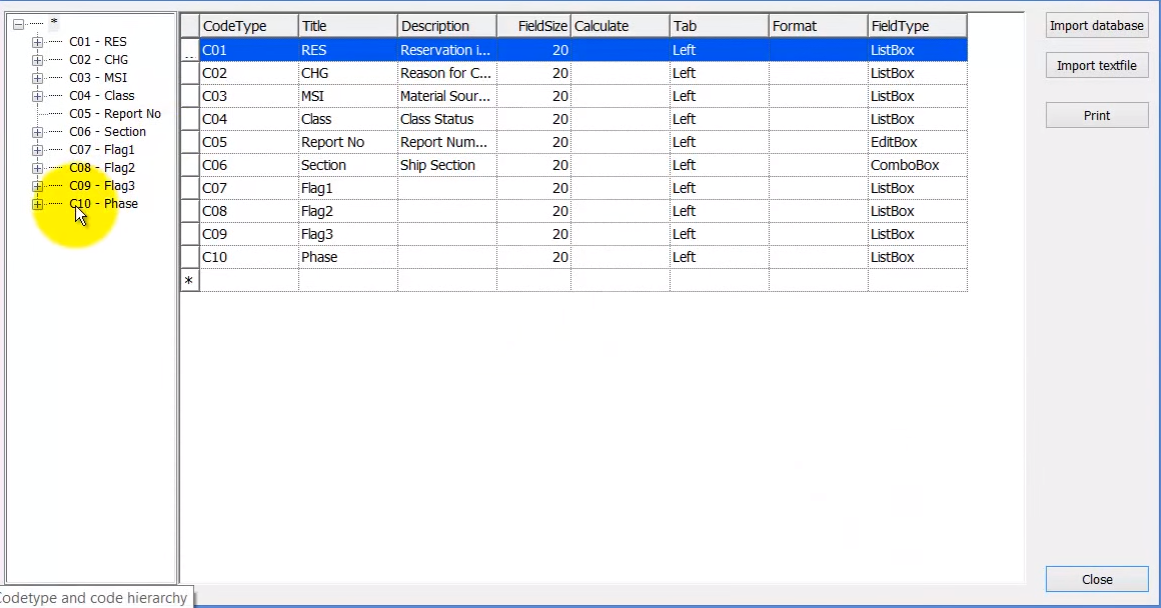
Next, define the Code ID for the custom code as shown below:
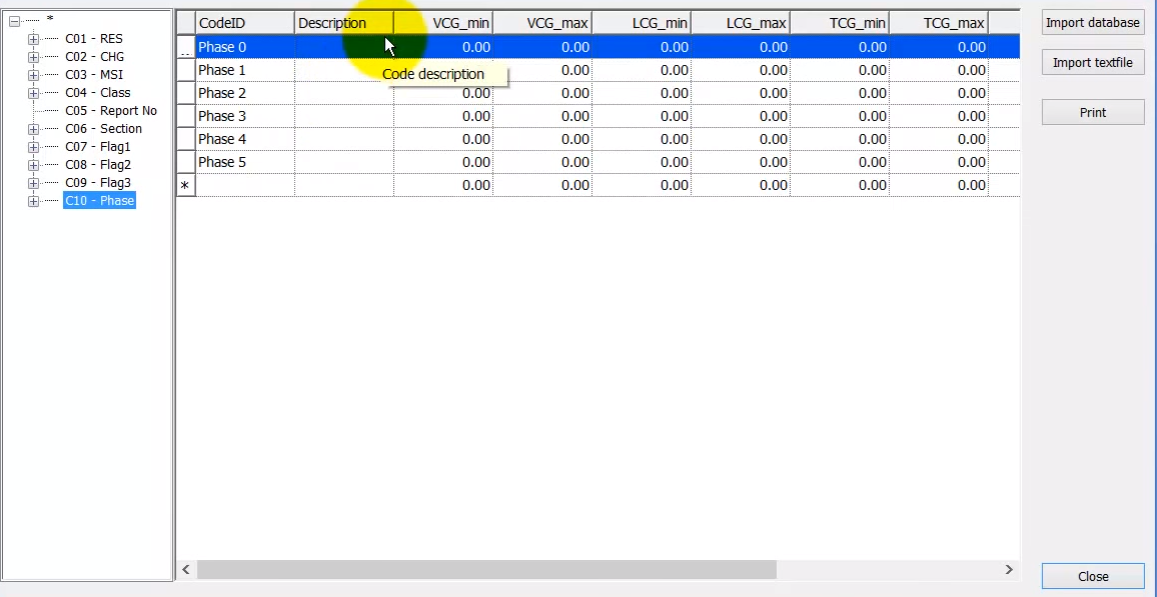
Step 2: Define the “Start” and “Stop” Entries for the Phases
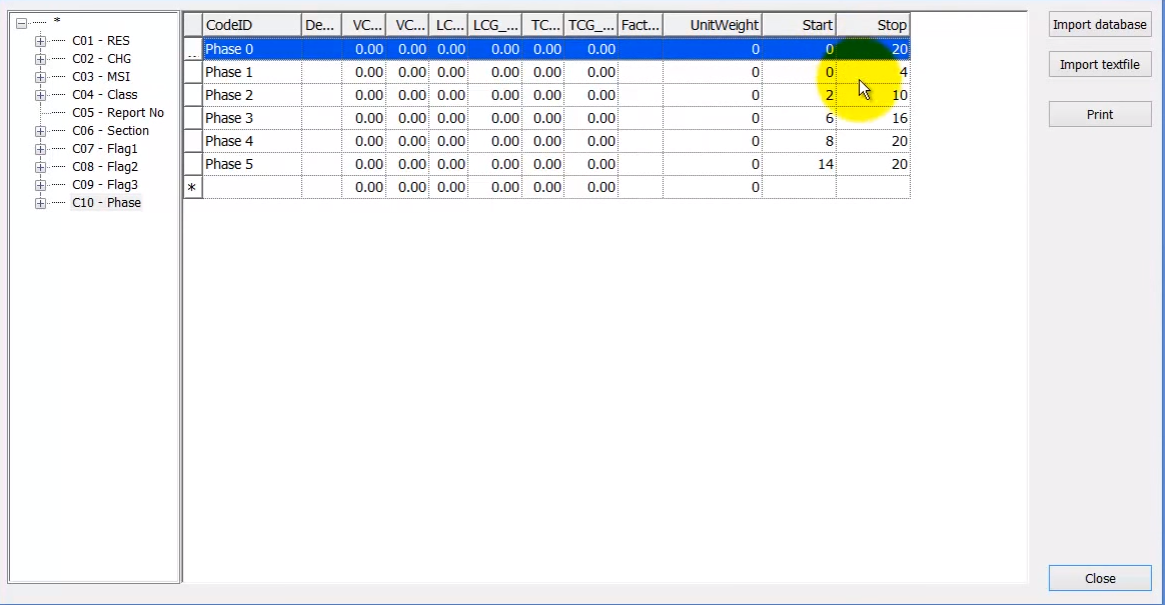
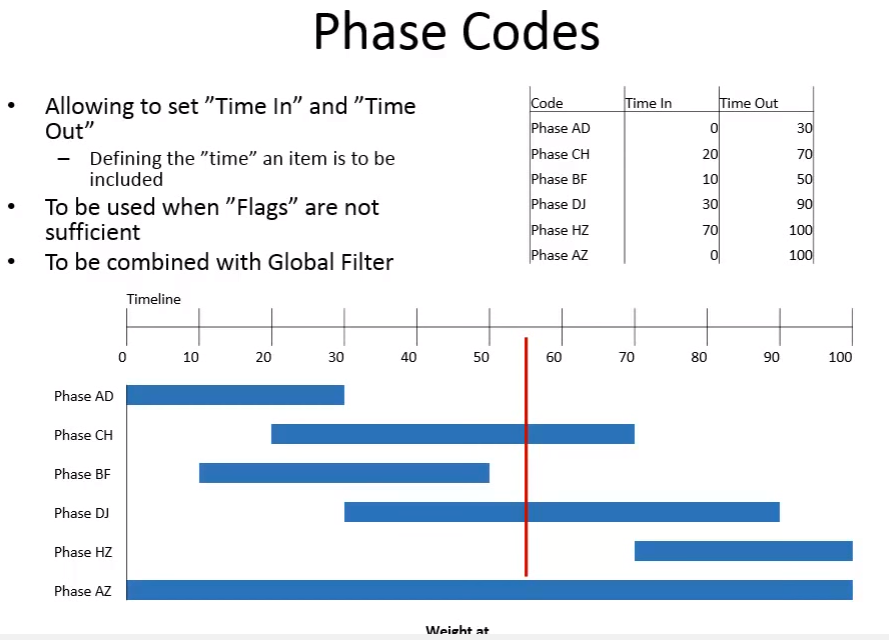
This is just like any normal custom code. But the special thing is that at the end of this table where we can define the codes we added two columns Start and Stop (which are the same values as in the previous example):
Now Close the Code Definition window.
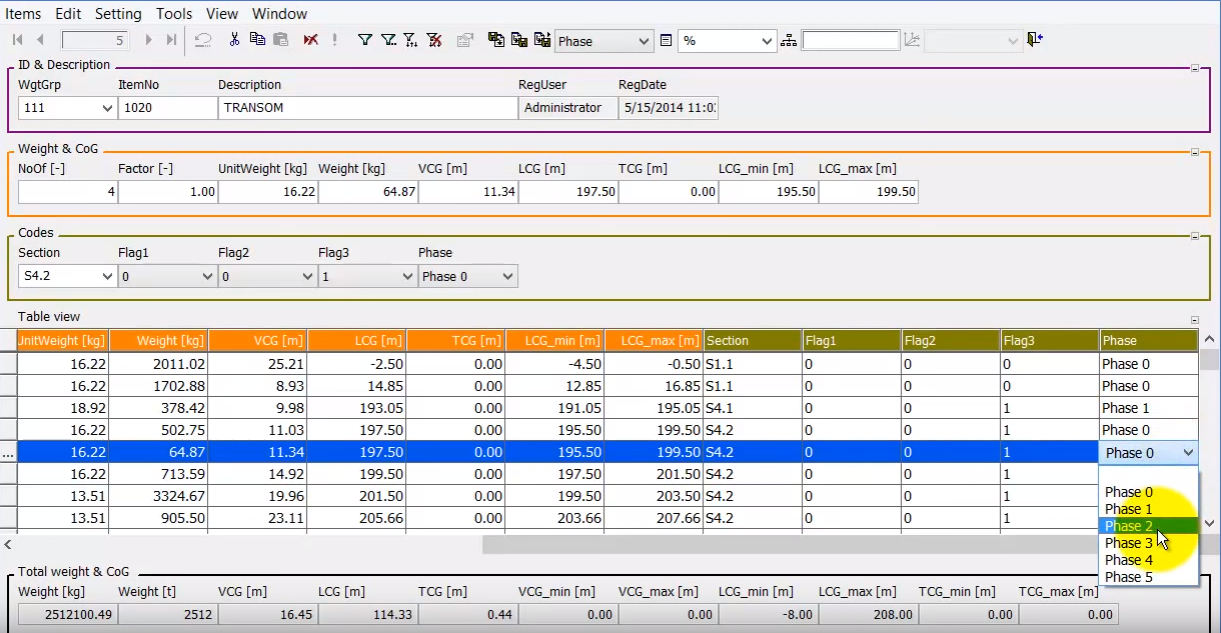
Step 3: Tag the Weight Items to the Phase Codes
In the Items window, items will be tagged to the phase code in a normal way:
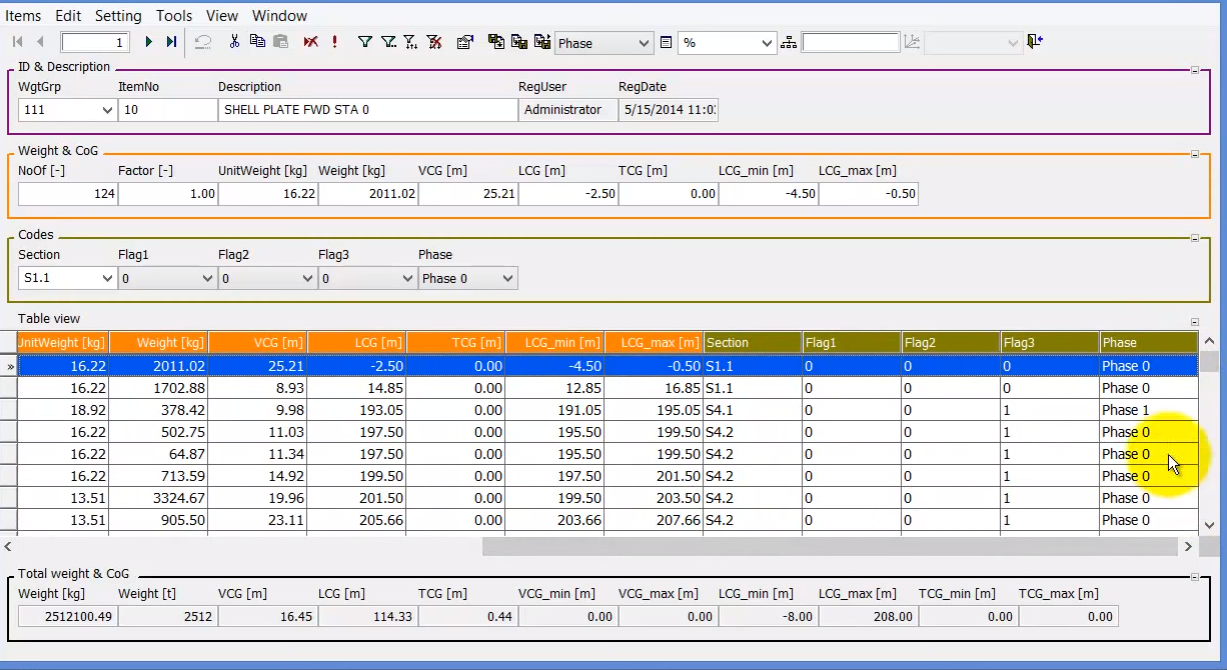
You can anytime set a different phase for any item:
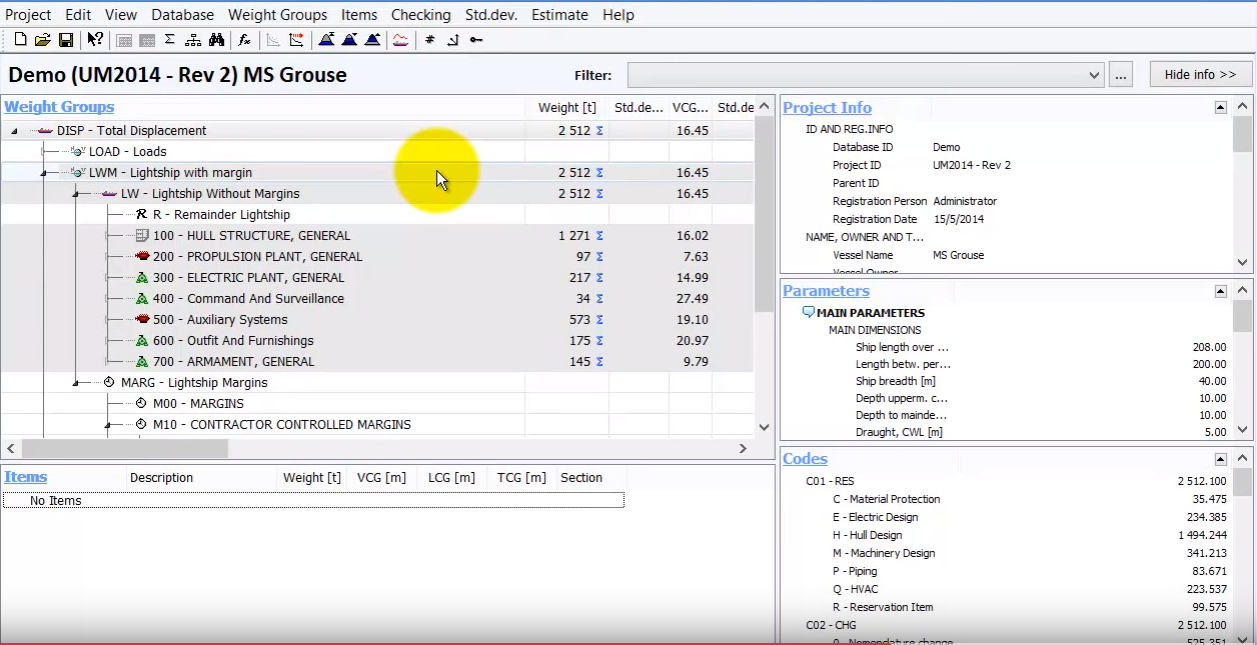
Now we have to do the “slicing”, menaing we have to filter out only the items relevant for the vessel we want to know the weight and CG of…
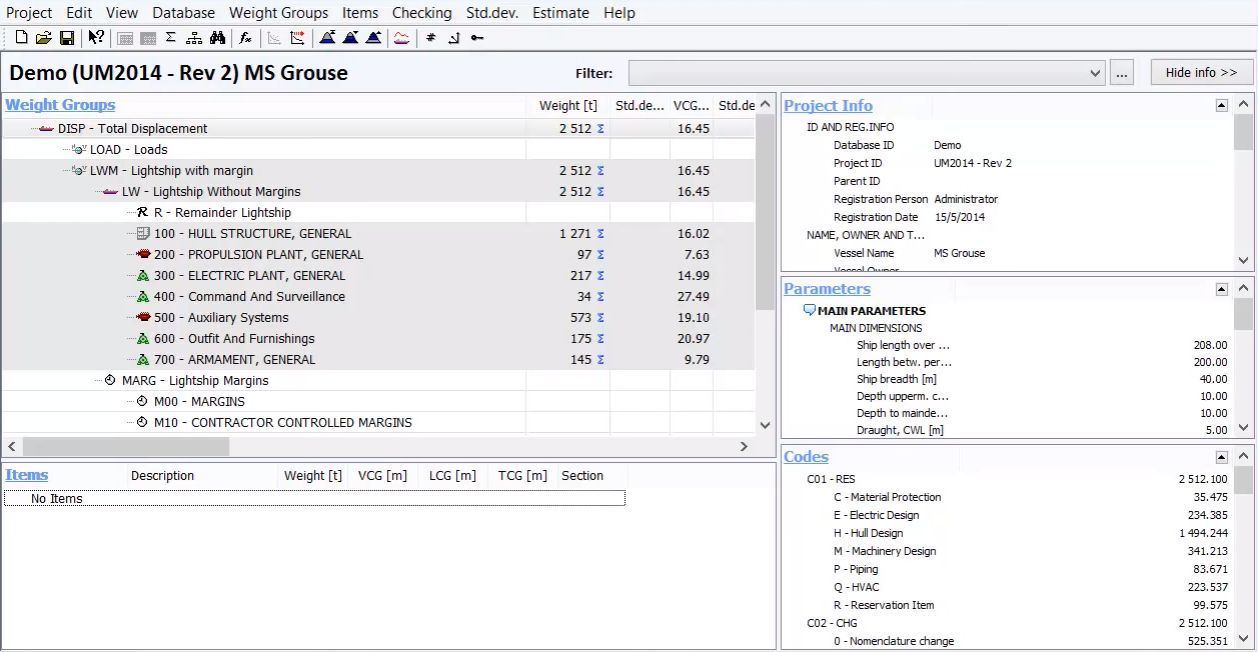
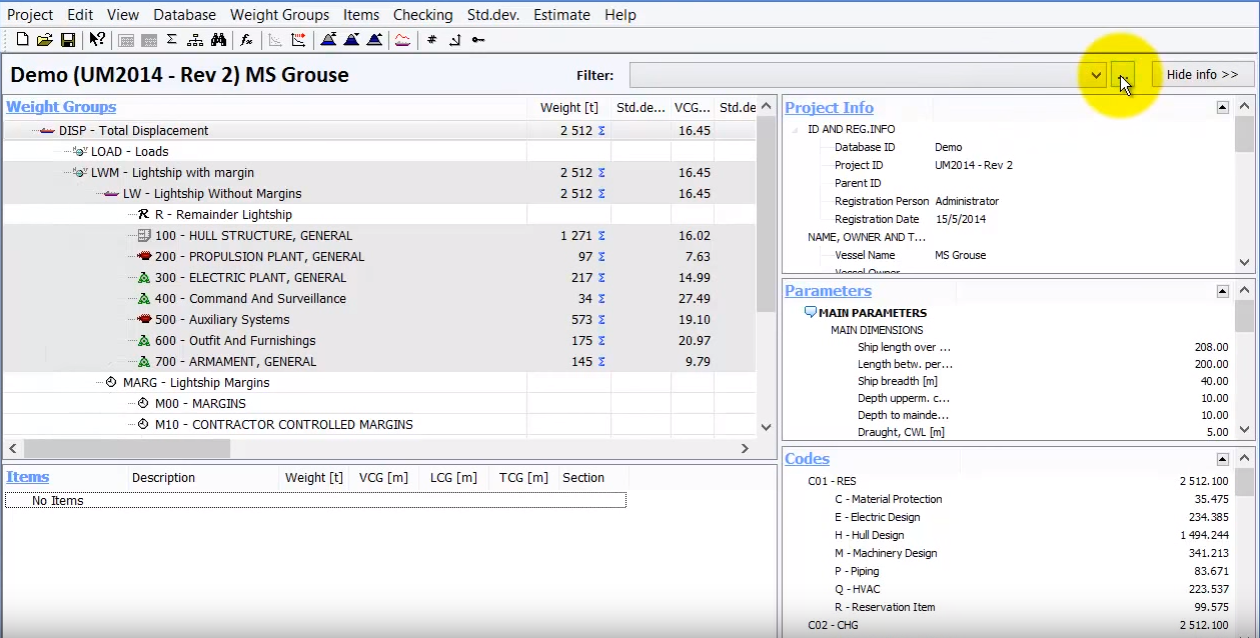
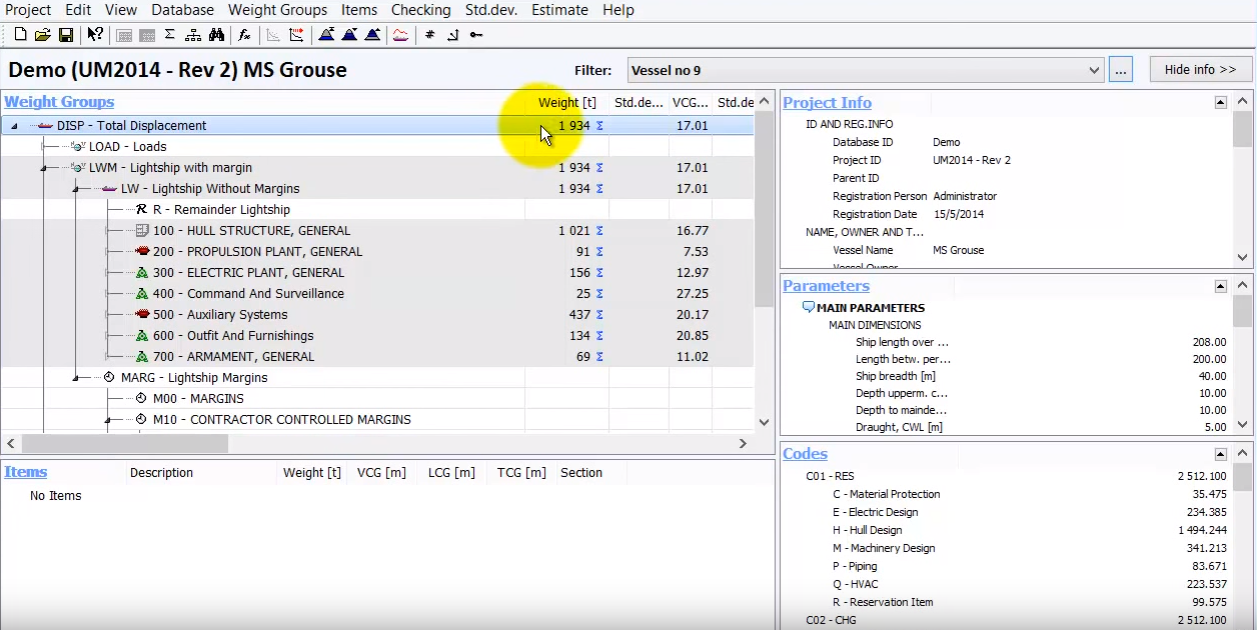
Because right now the total displacement shows 2512 tonnes, will be the summary of all items, meaning the summary of all phases, which is not any particular vessel:
Step 4. Define the Global Filters for the Phases
To get the weight and center of gravity for a particular vessel, we need to apply a global filter for this one vessel.
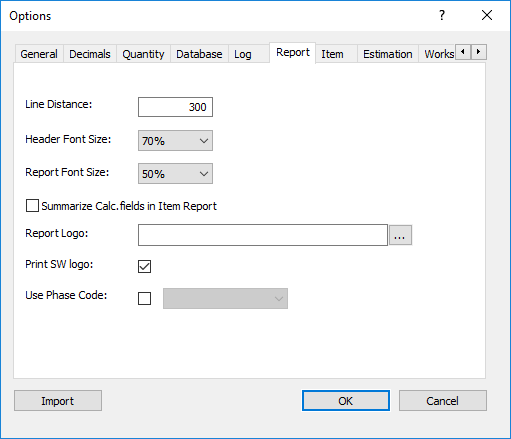
To be able to do that there is one thing we need to do first, to set in the options window (View -> Options), and go to the Report tab:
You will see that last option Use Phase Code. Check the box and select from the list C10 – Phase:
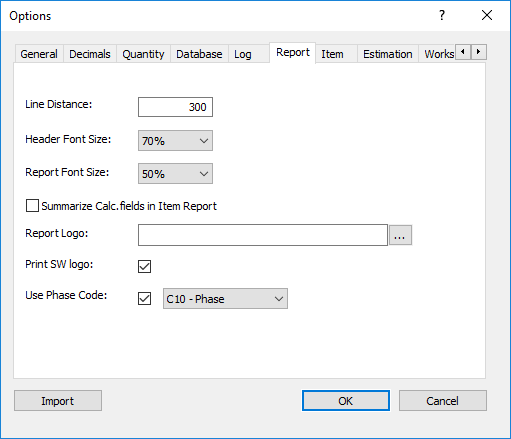
And then press OK.
Now we can set up a global filter for each individual vessel. And this is done in the global filter window:
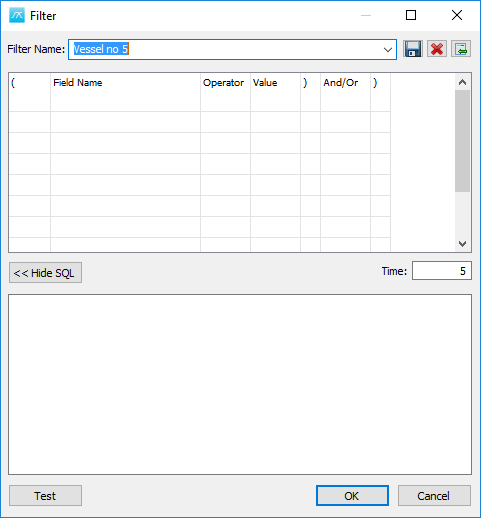
Click the browse button to get the filter window:
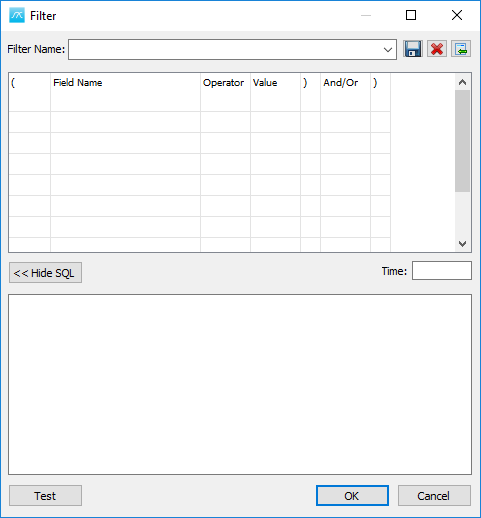
And in the global filter window, we can see we are able to define any type of filter.
Give a Time, then a Filter Name, and then press the Save button:

Then click OK.
Step 5: Activate the Global Settings for the Phase Code
The filter will be activated and we will see that now in the main window the weight will be reduced from 2510 to 1934 tones. And this is the weight for vessel number 9.
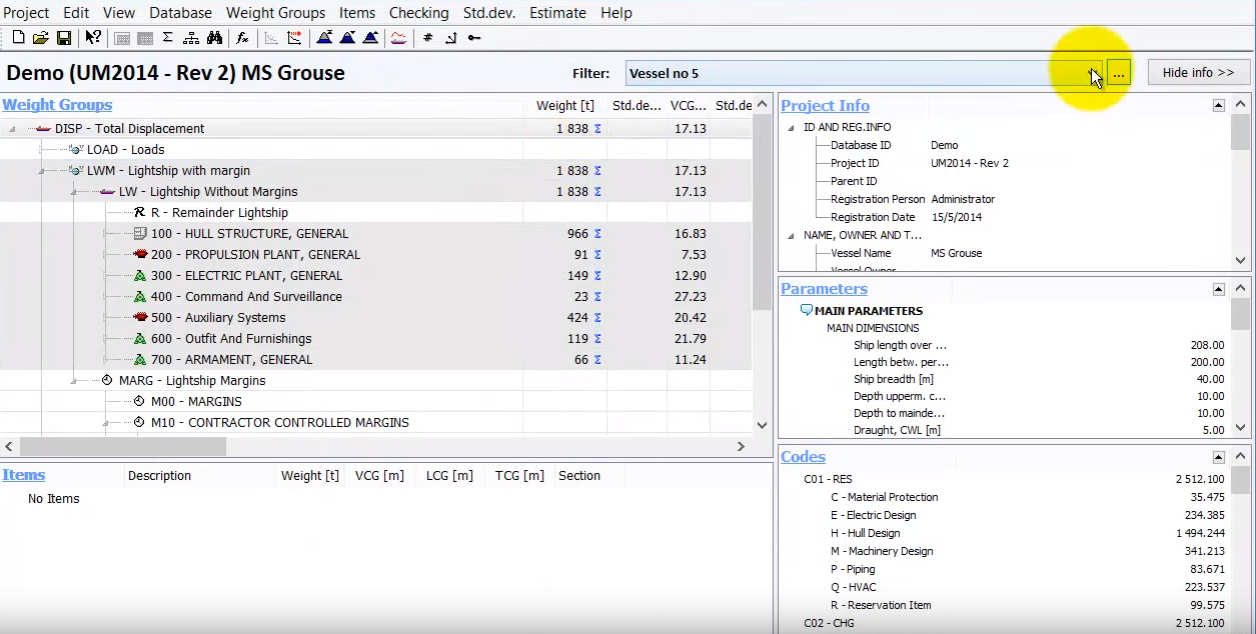
To change the vessel numer, press again on browse button and change the Time and Filter name:
Save and press OK. And now the weight and CG have changed based on vessel no. 5:
Now we have two existing filters:
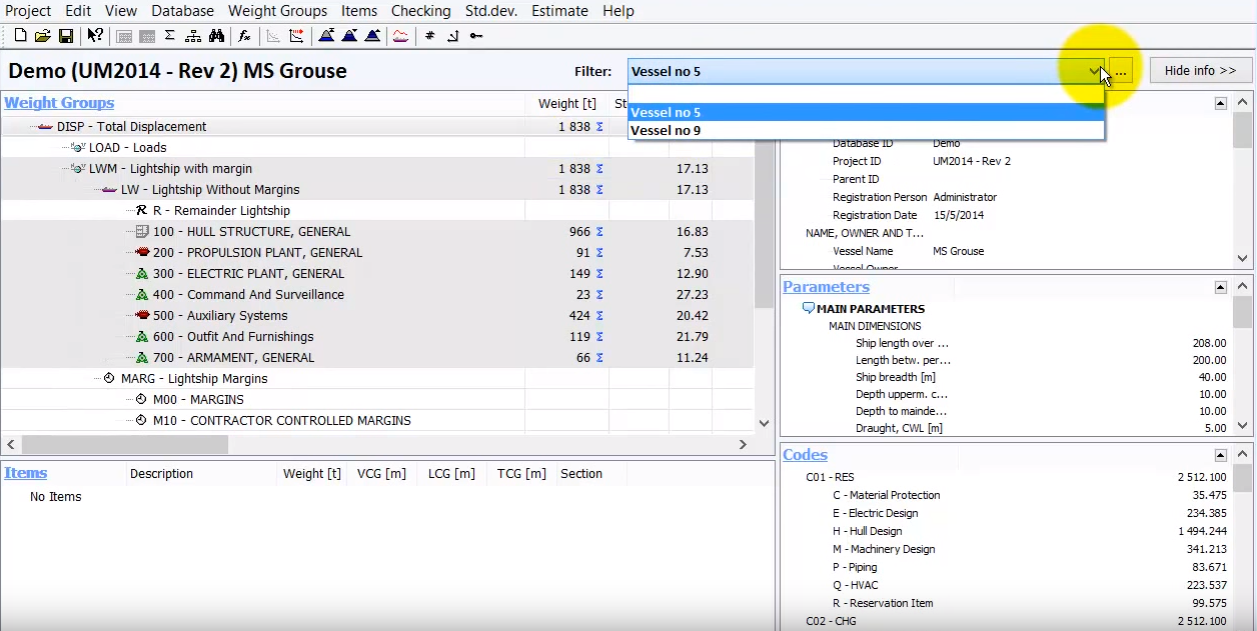
And we can change anytime between vessel no.5 and no.9.
When we enable filters, is not only the CG from the main window that changes, but now everything in ShipWeight changes according to this filter. So, if we go to the Items window we will see items belonging only to vessel no. 5 if the filter is Vessel no 5.
More on the Phase Code Concept
Phase coding means looking at the series production as a timeline, where:
•The timeline is starting with vessel 1 and ending at vessel n.
•The user defines the necessary phases, ranging from any start and endpoint on the timeline
•Weight items are tagged to a phase, meaning that they are to be included for vehicles in this phase
The total weight of an individual vehicle is the sum of all items tagged to the phases that the time of the vehicle corresponds to.
The advantages of the Phase Code Approach can be summaries in these points:
•Items are only needed once (one row) in the database regardless of how many vehicles are in the production line
•It is easy to deploy weight items to a range of vehicles, and to change the extent of the range
•You can easily find the weight of an individual vehicle by slicing through the phases at the time of the vehicle
•Same approach can be used for multiple phases of a single vehicle throughout its life-cycle
Examples:
Vessels: series of 10 monohull with modifications

Aircrafts: aircraft series production
Various configurations during production:

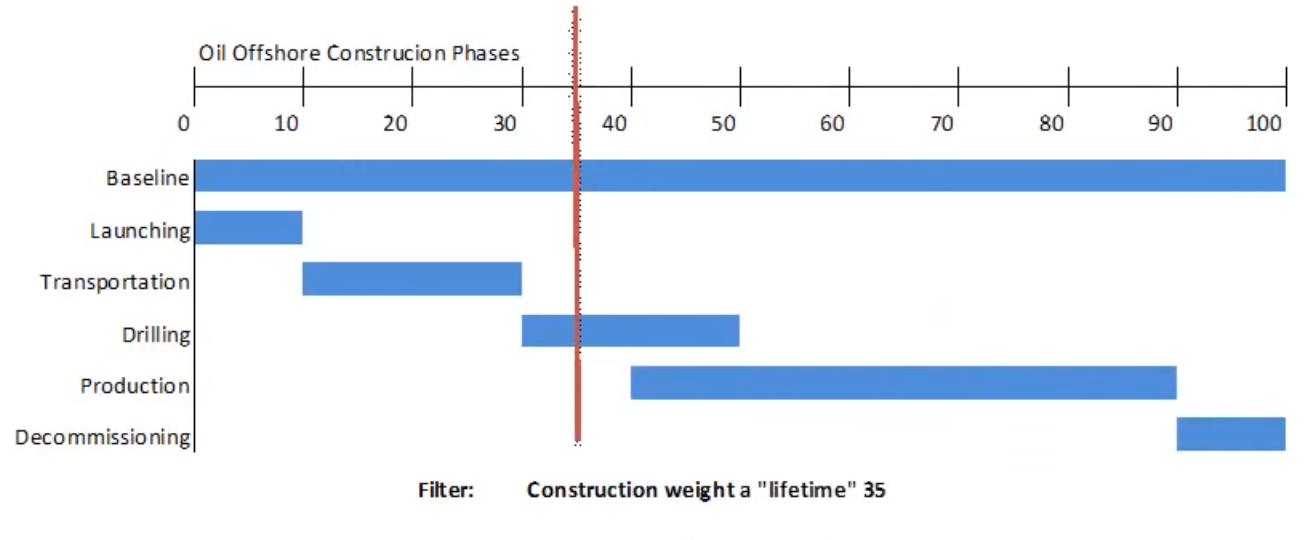
Offshore construction: lifecycle phases of an offshore construction
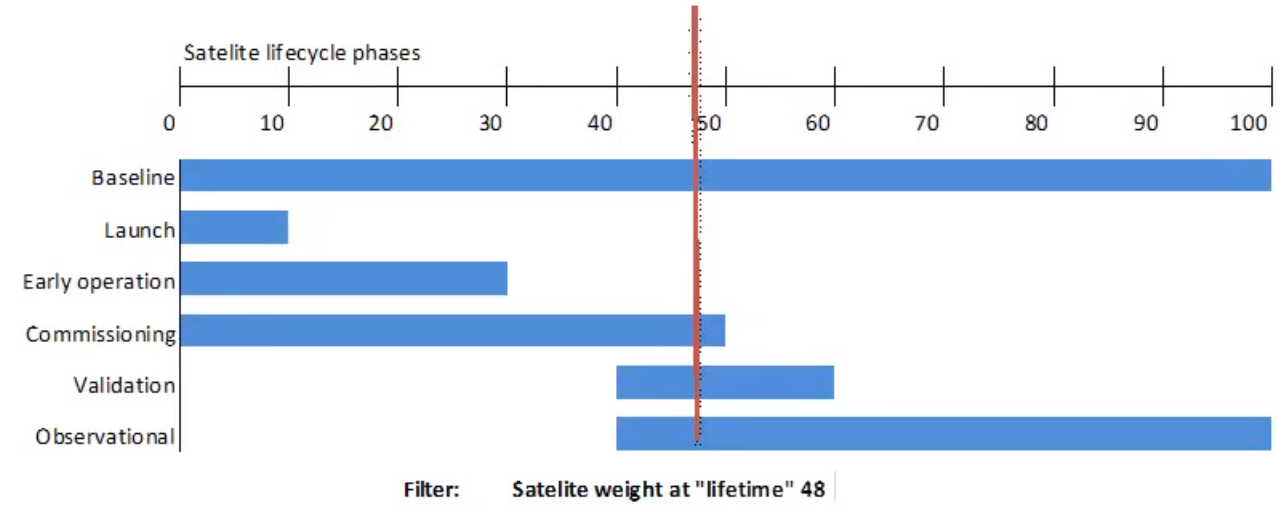
Satelite: satelite phases
We consider the building of 20 vessels of the same class. Now this 20 vessels will not be completely identical, so we can not have them in only one project, but we can define phases containing the differences and use the phase codes to handle all 20 vessels still in one project.
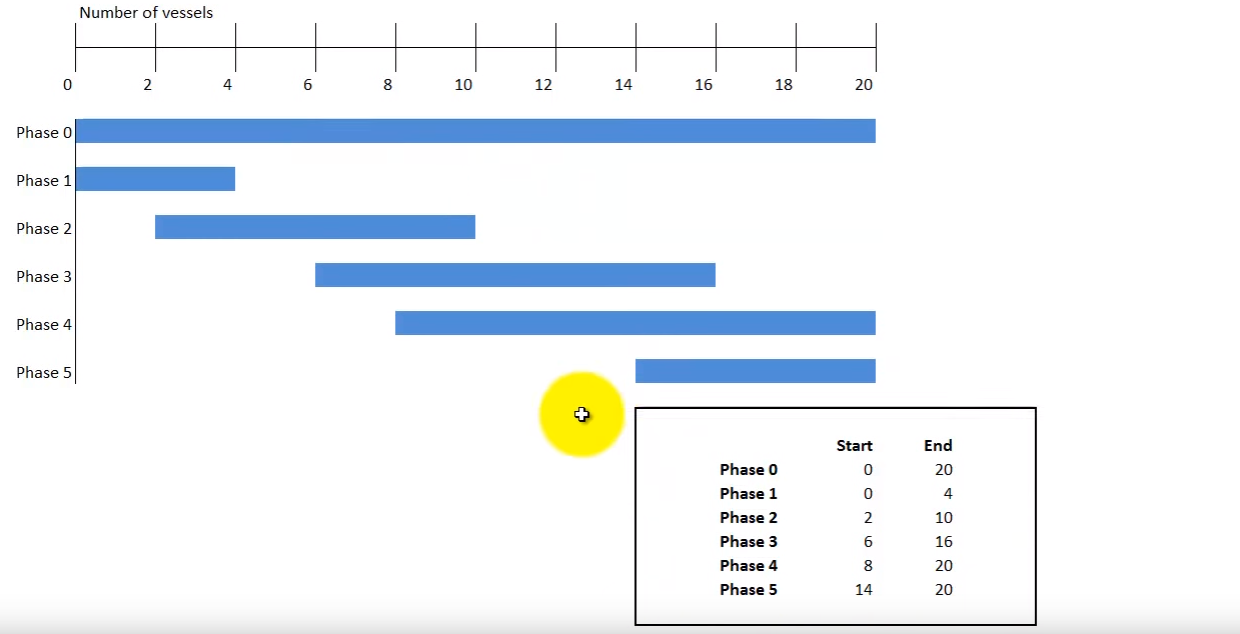
So, we imagine we have a timeline, representing the number of vessels, going from 0 to 20:
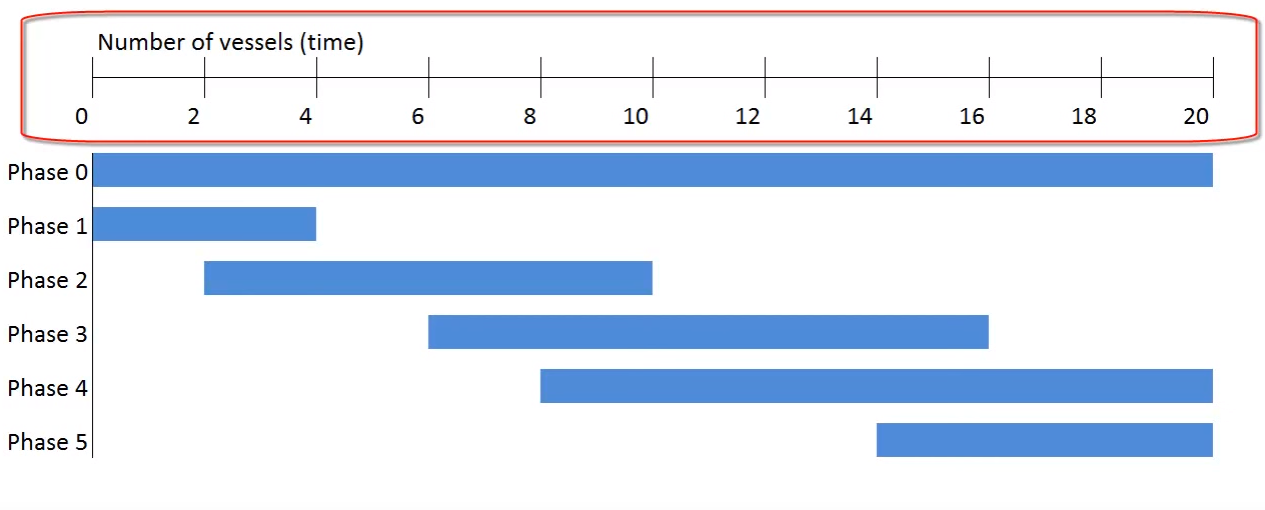
Then we can imagine we have an initial phase (Phase 0), which defines all weight items that will belong to all 20 vessels. So Phase 0 will stretch from 0 to 20:

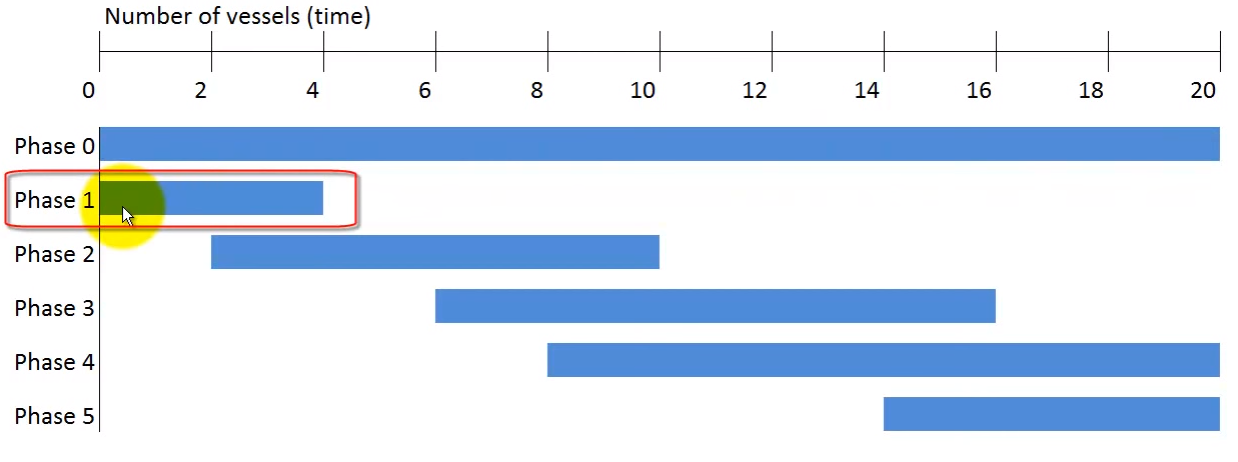
And then if there are modifications, or some special equipment that is valid for example only for the first vessels, then we define a new phase (Phase 1) for these vessels only:
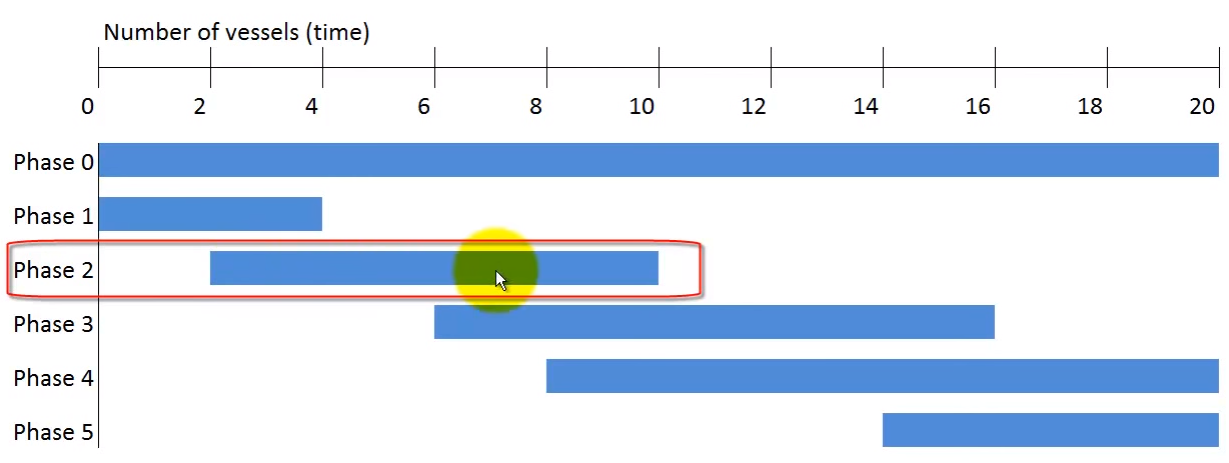
Another modification or change in design may happen at any time, so in this example we also have a Phase 2, going from vessel 2 to 10:
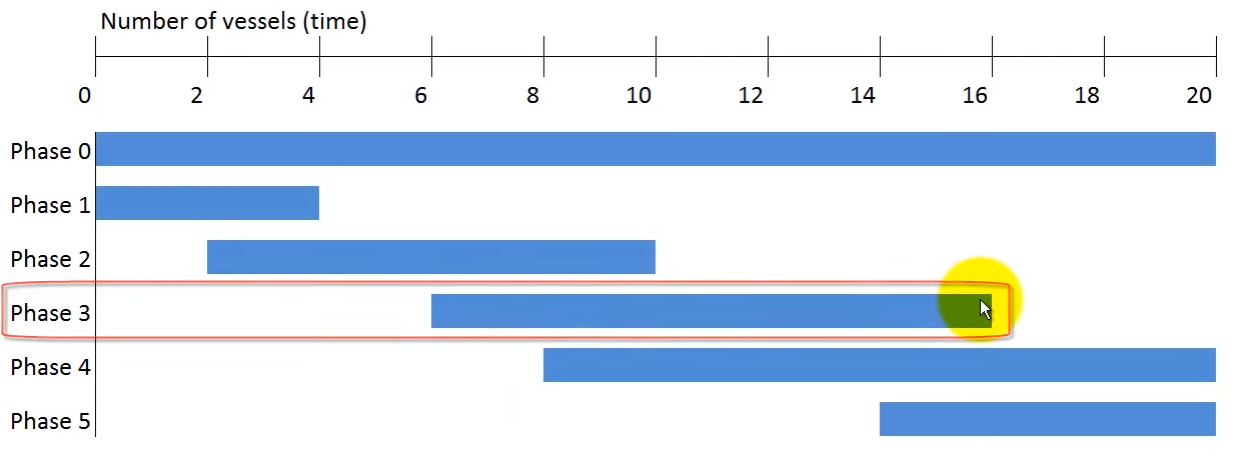
And another phase which indicates a modification or change, from vessel 6 to 16 (Phase 3):
Phase 4 going from 4 to 20:

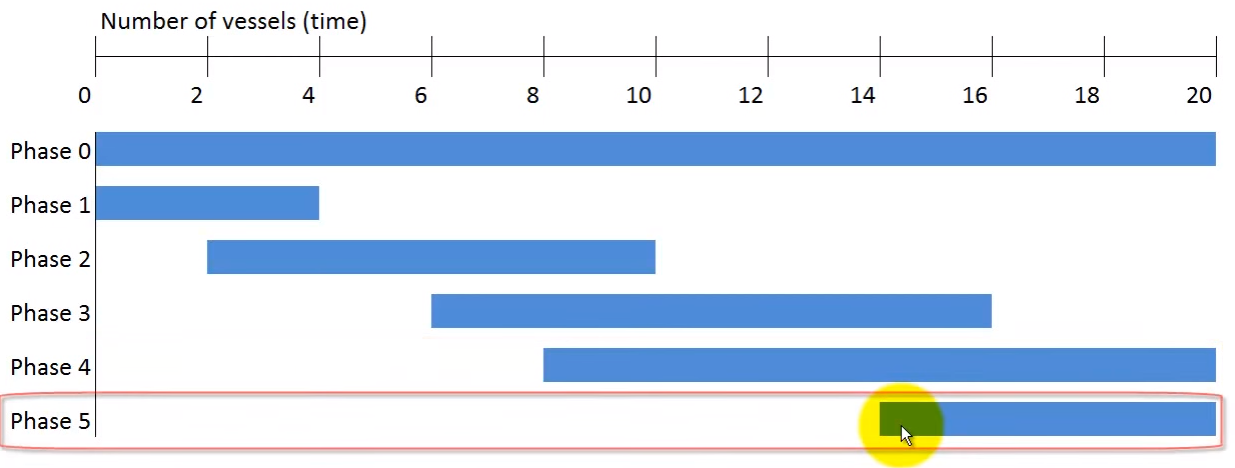
And finally, the last phase (Phase 5) goes from 14 to 20:
We combine all of this weight items in one project, and tag items to the phases and then if we need to know the weight of for example vessel number 9, we slice through the database at vessel number 9:

And only add up the items that are tagged to phases or modifications that are valid for that vessel or that time. In this case we can see that slicing through phases at vessel number 9, indicates that we need to include items tagged with Phase 0, Phase 2, Phase 3, 4 and leave out Phase 1 and 5 for this vessel.
Another way of representing this graph is to not use the bar, but just show the numbers for Start and End point.