Introduction to Crystal Reports > Upgrading Existing Reports to include ProjectID
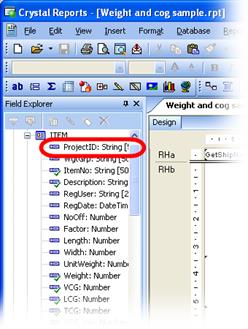
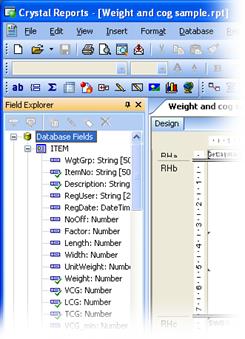
When you open an existing pre-ShipWeight 7.5 report in the Crystal Report designer and expand the Database Fields in the Field Explorer, you will notice that the ProjectID field is missing. To be able to create a Record Selection formula based on project ID, the ProjectID-field must be present in the Database Fields list.
To achieve this, the Datasource must be replaced with an updated database. On the database menu, select Set Datasource Location.
The Set Datasource Location window is used to change the location of the data source. This is done by selecting a database in the ‘Current Data Source’ list, and choosing a database to replace it with from the ‘Replace with’ list. Then click Update.
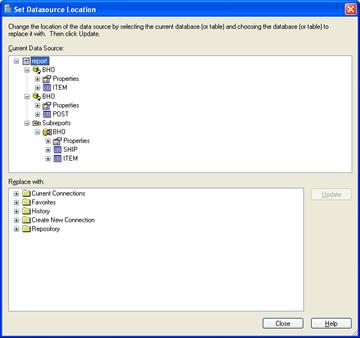
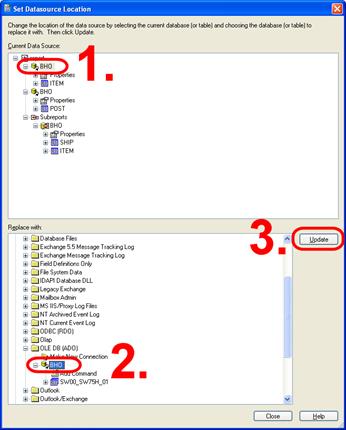
The report used in this example, is connected to three databases. To view the details of the database connection, please expand the Properties branch in the ‘Current Data Source’ list.
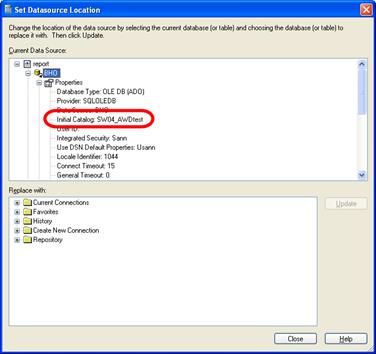
The Initial Catalog entry of in the properties list, shows the name of the database. In this case, the database name starts with SW0, indicating that this is a project database.
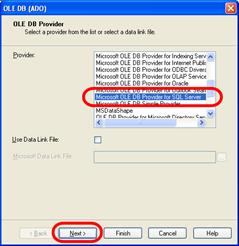
Next, you must locate a project database to replace it with. In the ‘Replace with’ list, please expand the ‘Create New Connection’ branch either by double-clicking it with the mouse or by clicking the plus sign next to it. Locate ‘OLE DB (ADO)’ in the list and double-click it with the mouse.

The ‘OLE DB (ADO)’ window will open. Select ‘Microsoft OLE DB Provider for SQL Server’ in the Provider list. Click the Next button.
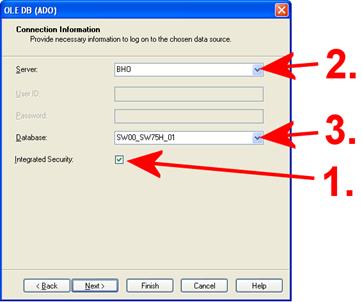
On the next screen, check the Integrated Security option. Select or type in the name of the SQL server and choose a database to replace the current database. Click the Finish button.
Back in the ‘Set Datasource Location’ window; make sure the correct database is selected in the ‘Current Data Source’ list. Select the newly created database connection in the ‘Replace with’ list. Click the Update button.
Now the database connection is updated. Next, we need to replace each database table listed below the data source connection.
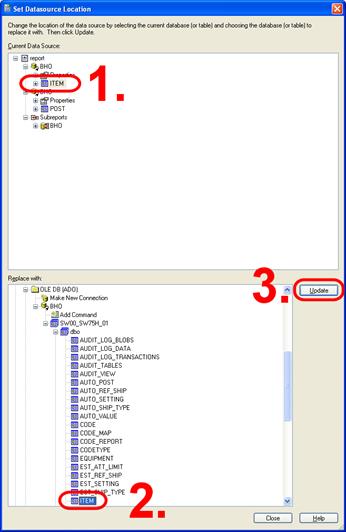
In the ‘Current Data Source’ area, click the table to be updated, in this case the item table. In the ‘Replace with’ area, expand the database branch and then the dbo branch. Now a list of the available database tables will appear. Click the table to replace with and click the Update button.
Repeat this procedure for all database connections and database tables in the ‘Current Data Source’ list. This must also be done for database connections and database tables used by Sub-reports.
Please note that you only have to replace project databases and project log databases. These have names starting with SWXX_, where XX can be any number between 00 and 10.
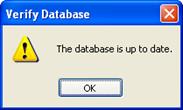
When you are done, close the Set Datasource Location window. On the Database menu of the Crystal Reports designer, select Verify Database. A message saying ‘The database is up to date’ should appear.
In the Field Explorer, you can see that the ProjectID field is available.