ShipWeight Basics > The Item Window: Entering Weight Information
The Items window is mainly used to add, edit and delete weight items. New weight items can be added and edited both using the Single record view and the Table view.
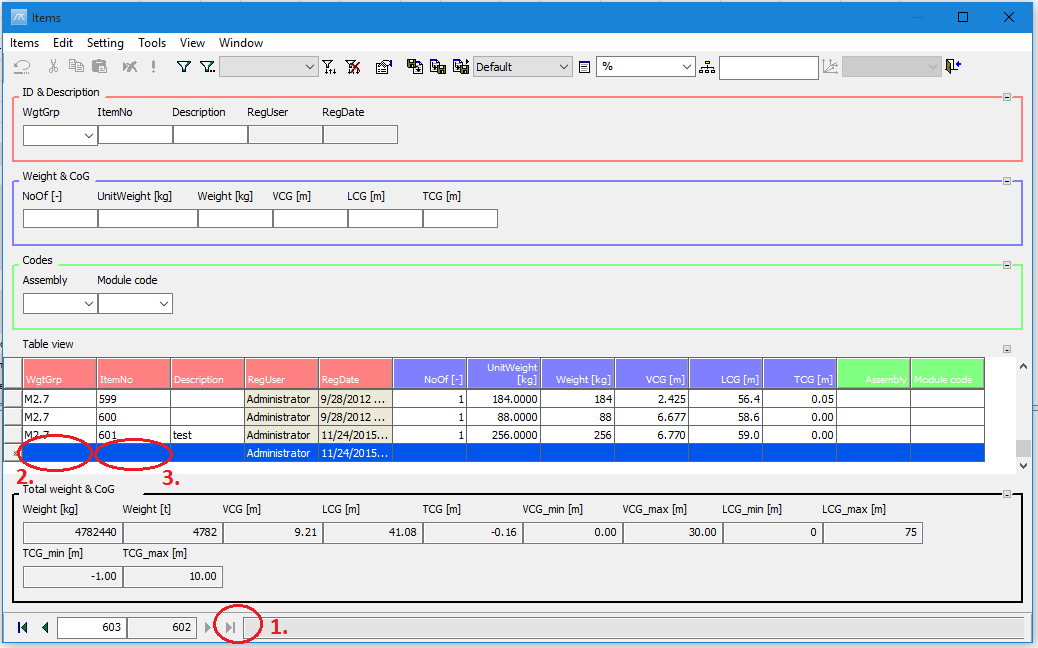
To add a new item, follow these steps:
Click the Last item button (1.). This will clear the fields of the single record view. This step is only necessary if there already are weight items defined in the weight group.
Click on the WgtGrp field (2.), and select the weight group from the dropdown list.
Jump to the next field by pressing the TAB key.
Enter a unique number in the ItemNo field, e.g. 11001, 1100ABCd.
Press the TAB key to jump to the Description field. Enter a description, e.g. ‘Shell Plates’.
Continue jumping to the next fields pressing the TAB key and add data to the weight item.
When you have completed entering data, click one of the Navigation buttons (First, Previous, Next or Last) to finalize the registration of the item.
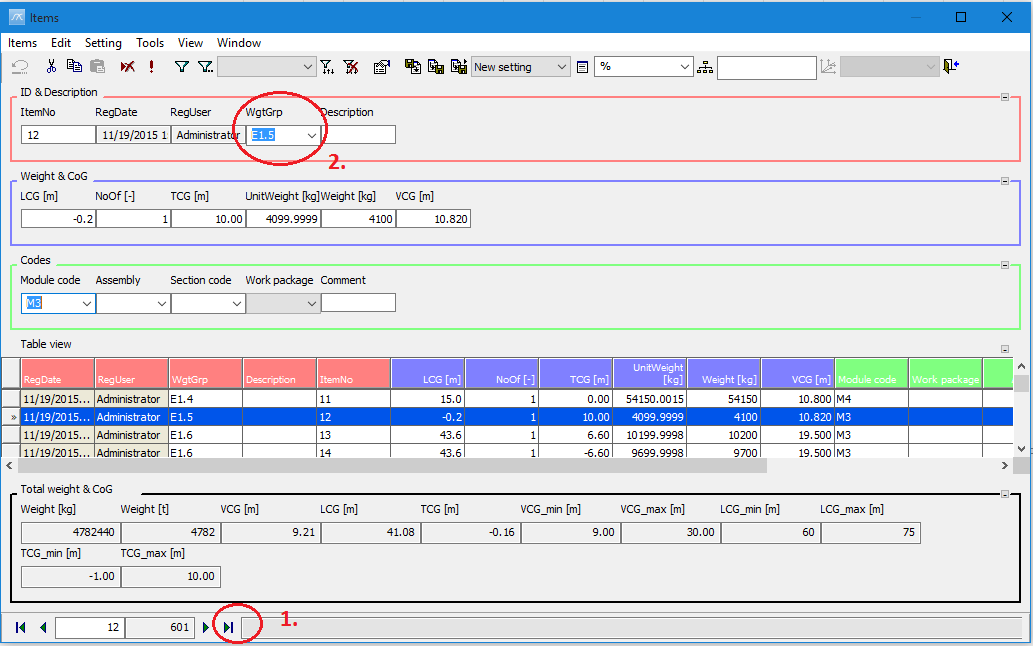
Adding an item using the Table view
Alternatively, new items can be added using the table view.
Select the last record in the table using the mouse, or click the Last item button on the toolbar.
Activate the WgtGrp cell in the table by clicking on it with the mouse or by pressing the ENTER key. Select weight group from the dropdown list.
Press the TAB key to jump to the ItemNo cell, and enter a unique item number, e.g. 11002
Press the TAB key to jump to the Description cell and enter a description.
Continue entering data for the item by jumping to new fields pressing the TAB key.
After you have finished entering data for the new weight-item, select a different item (click another row in the table). This will ensure that the weight-item is properly registered.