Additional Features > Importing and Exporting Data in ShipWeight > ShipWeight Data File Import (Excel, Text & Access)
If you want to do more advanced settings importing an Excel file or want to import a file in another format, from the Project menu, select Import and then Data File… to open the ShipWeight Data File Import window.
The ShipWeight Data File Import window can import all kinds of text files (flat files, tab-, comma- and semicolon- delimited files) as well as Excel files and Access files. In addition, it can export weight items to Excel format (.XLS) or as a Comma Separated Textfile (.CSV).

Importing
First of all, make sure you have selected the Import source tab at the upper part of the window. Choose file type to import:
•No delimiter (flat file)
•Tab delimiter
•Excel file
•Access file
•Custom delimiter
If you have selected Access file, please enter the name of the table to use.
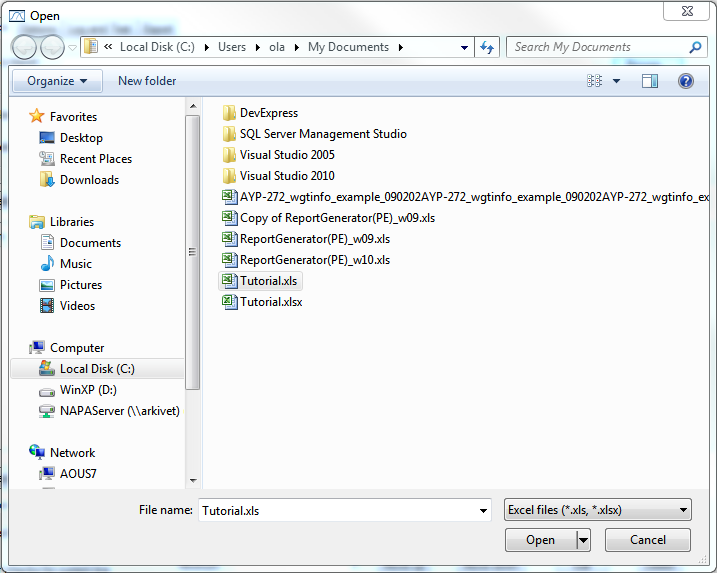
Click the Browse button next to Data file to import. Now the Open window will pop up. Select the file to import and click OK.
Next, select the Options tab.
At the left side of the Options tab, there are three checkboxes. The Log imported items option is used to choose whether the import will be logged or not. Logging of weight items is necessary to be able to produce reports based on the Log database.
There is an option Update items to allow overwriting of existing items. WARNING: ALL INFORMATION ON EXSITING ITEMS WILL BE DELETED WHEN ITEMS ARE REPLACED.
If the Trim spaces option is checked, spaces in front of or behind of a value will be removed during the import.
Next, you can define the number of header rows in the import file. For Excel files one header row is assumed.
Make sure to set the proper units in the file, SI (metric) or US. Default units are SI.
The Options tab also includes buttons for deleting and updating weight items.
To delete old weight items, you can use the Clean Log and Clean DB buttons. The first will delete all weight items in the Log-database and the second will delete the weight items in the project database.
WARNING: ALL INFORMATION ON EXISTING ITEMS WILL BE DELETED FROM THE DATABASE. THIS ACTION CAN NOT BE UNDONE.
In the Update functions frame, there is a button for updating calculated codes quickly after import. The Calculate all weights / Calculate all codes menu selection in the Items window is currently using old (slow) methods for update – The Calculate all codes button in the new Flat File Import window uses new and quick methods.
The Pad ItemNo button will change the format of the item number of existing items. First set the number of characters the item number should include. Clicking the Pad ItemNo button will add the digit 0 in front of the item number so that the item number includes the proper number of characters. Example:
123 à 0000123

To start a Flat File Import, you first need to define a ShipWeight Import (SWI) format – or load an already existing one.
A defined SWI format contains a set of import rules, and each import rule tell what data from the flat file goes into a specific field in the database.
To start a new import definition, click the New definition button. This will clear the window of any previous definitions.
The definition of an import rule is done in the lower area of the window.
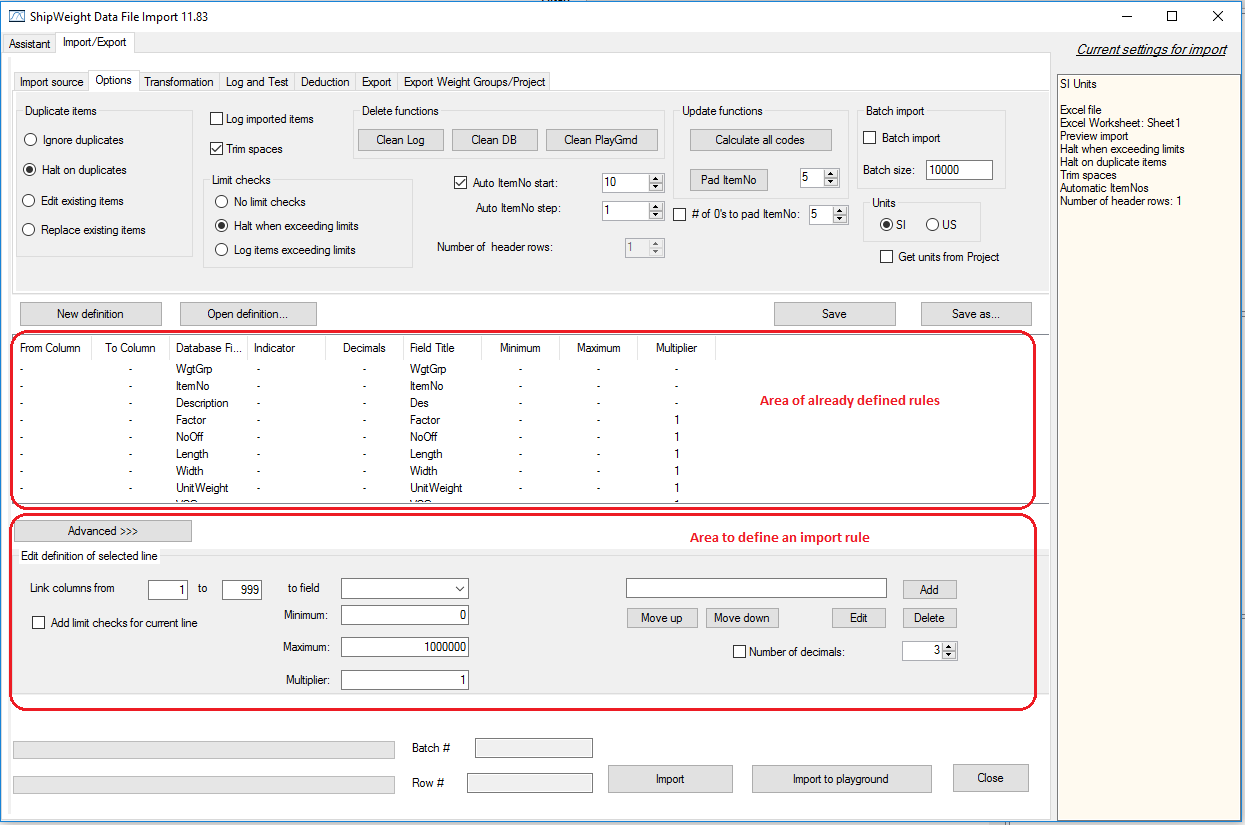
In the Edit definition of selected line frame, the first two edit boxes are used to tell which character positions to be retrieved from the import file. Next, to specify which field in the database the information in this character field is going into, select from the dropdown list of the ComboBox. The ComboBox only spells the ID of the field since this title may change from project to project. In the field right to the ComboBox, however, you can read the title for this field as defined in the project the data will be imported to.
Directly below this, there is a checkbox to tell if the value has decimals not separated by a dot. If so, there is also a spin box to indicate the number of decimals.
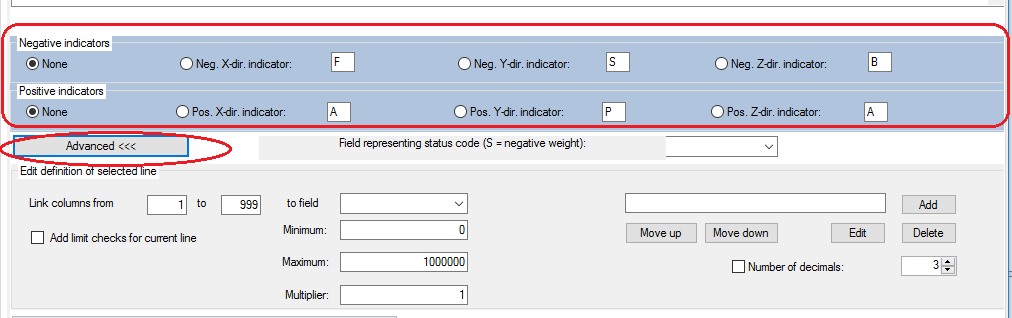
To show or hide advanced settings for the data file, click the Advanced>>> button. The advanced settings are used to define is the indicator field. An indicator field means that we have a number followed by a character, i.e. 23.4A, where the character indicates if the value should be read in as negative or positive value. If there is no indicator field, you simply select ‘None’. Otherwise, you should select the direction and the character of the indicator field. The default indicators are:
X-direction: F (fore) = Negative
A (aft) = Positive
Y-direction: S (starboard) = Negative
P (portside) = Positive
Z-direction: B (below) = Negative
A (above) = Positive
At the bottom of the Advanced settings area, you can specify a code e.g. [C01] to hold the value ‘S’ to indicate negative weights.
When all the correct settings have been selected, click Add button to register the import rule.
Any selected row in the definition can be delete by selecting the Delete button or edited by the Edit button.
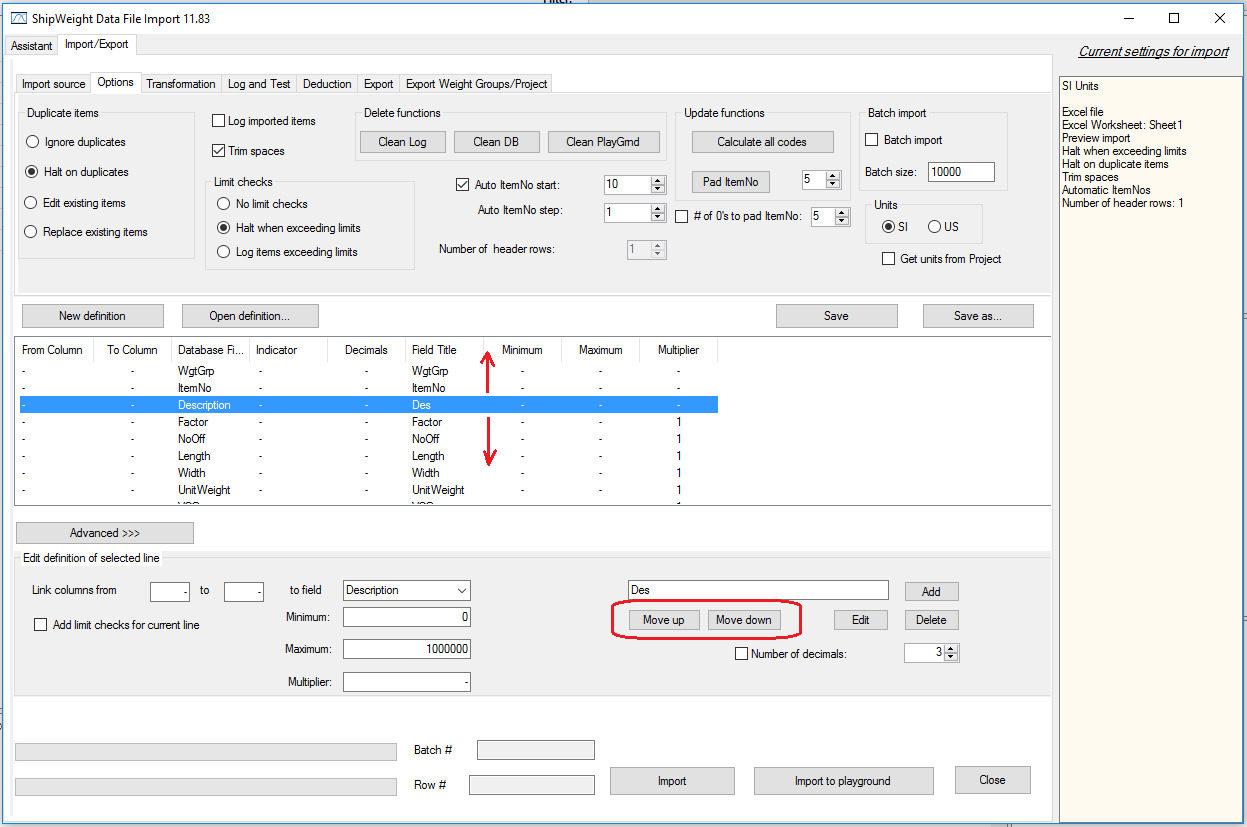
To change the order of the rows, select a row and click the Move up or Move down buttons.
When all necessary import rules have been defined, the definition can be saved by clicking the Save or Save as… buttons.
An already saved definition can be retrieved by clicking Open definition…
The import is executed by clicking the Start Import button.
Exporting
The ShipWeight Data File Import window also supports exporting weight items. Weight items can be exported to an Excel file (XLS, max. 1 048 576 rows), Excel file (XLS, max. 65 536 rows), a Comma separated text file (CSV) or a Flat text file.
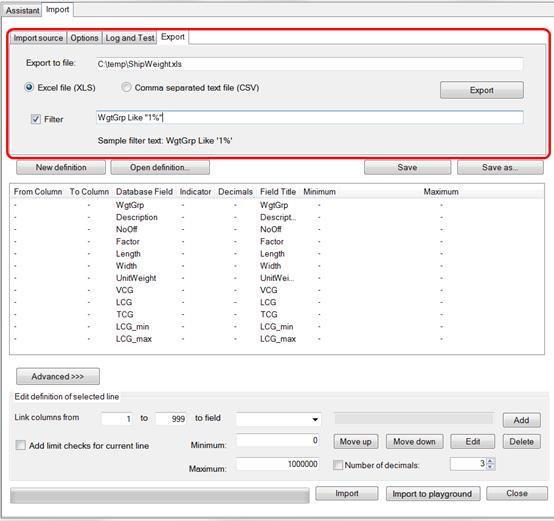
Select the Export tab. Enter the path and filename of the file to be created. Choose format for the export file, XLS, CSV or Flat text file.
To filter the data to be exported, check the Filter box. Next to the Filter box, you can add a filter string. The filter string follows the same syntax as the Filter window in the Items window.
In example, to export weight information from all 100 weight groups, the filter syntax to enter is: WgtGrp Like ‘1%’
Next, you must define a set of export rules; i.e. which columns to be exported. This is done in the same way as defining import rules when importing.
The export is executed by clicking the Export button.