Follow these 4 steps to export a project to the historical database:
Step 1: Open Project in ShipWeight
The project you want to export needs to be opened in ShipWeight.
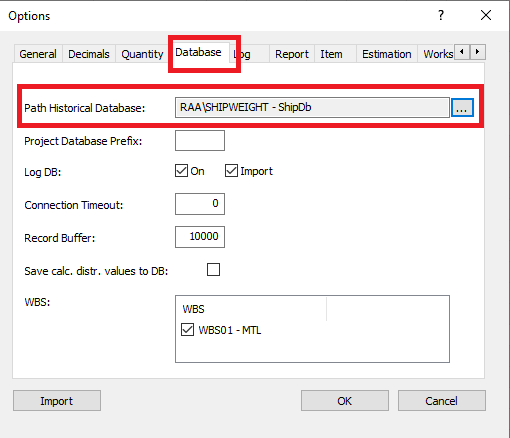
Step 2: Select Historcal Database
Make sure that your settings in the Options window is pointing to your default historical database (and not the demo/training database). You check this by going to the menu View->Options…, then select the tabsheet “Database” and check the path to historical database. This should be set to ShipDb. If needed, change to this path by clicking the browse button […] next to the path field to select the right one. Then close this window.
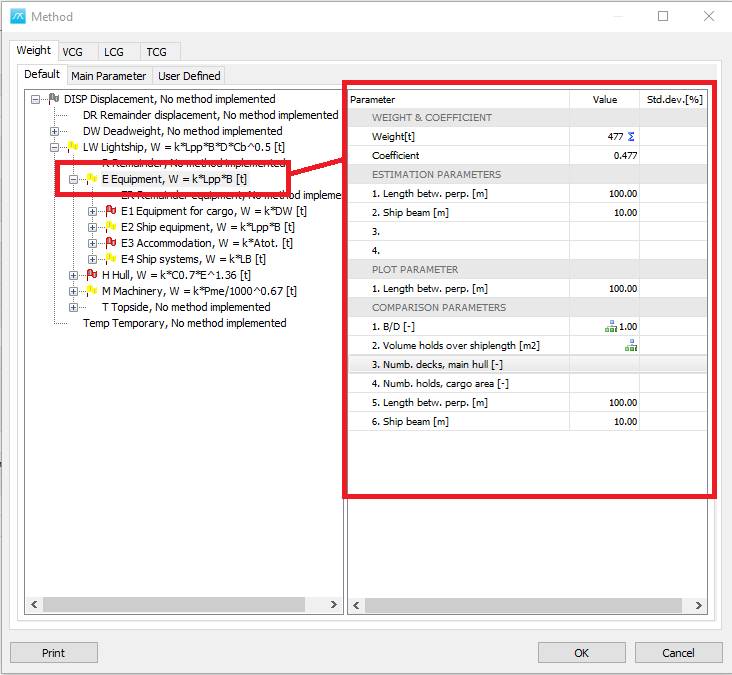
Step 3: Define Missing Parameter Values
To be able to create a historical reference point in a weight group from the project you need to fill in parameters for the estimation method(s) in addition to the weight (and CG). To do this most efficiently, open the Method Values window from menu View->Method Values… This window gives an overview of the status of each weight group. A flag icon next to the weight group node indicates the following:
•A red flag signals not enough parameter values to create historical coefficient for the group (missing estimation and/or plot parameters).
•A yellow flag signals that there are enough parameters for the group to create a coefficient, but one or more comparison parameters are missing values.
•A green flag signals that all parameters for the group has values.
You should try to get as many groups as possible to a green flag. If it is not possible to get all parameters, try to get it to a yellow status. If even a yellow status is not possible, the project can still be exported to the historical database, but the project will not be able to produce coefficients for the weight groups with red flags.
Step 4: Export to Historical Database
The final step is to export the project to the historical database. Go to menu Project->Export->Historical database… and fill in the Project ID that you want the project to be identified as in the historical database, make sure all information is selected and click the Export button. Close the export window. The export process is now finished.
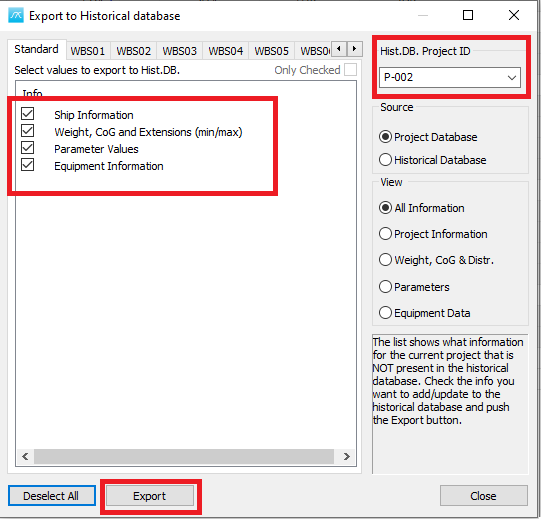
You may now verify that the project has been exported by opening and checking the Reference project window from the menu Estimate->Reference Projects… You should be able to find your newly exported project in the list of vessels in this window.