This section will look into:
•Defining loading conditions
•Calculating hydrostatics
•Using global filters
Step 1: Open the Loading Condition Window
To start the Loading conditions window, go to View menu and select Load Conditions…
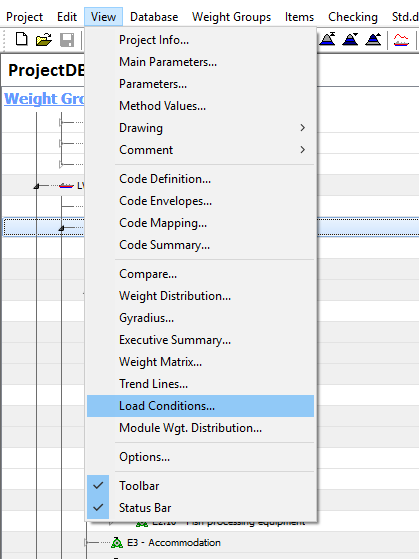
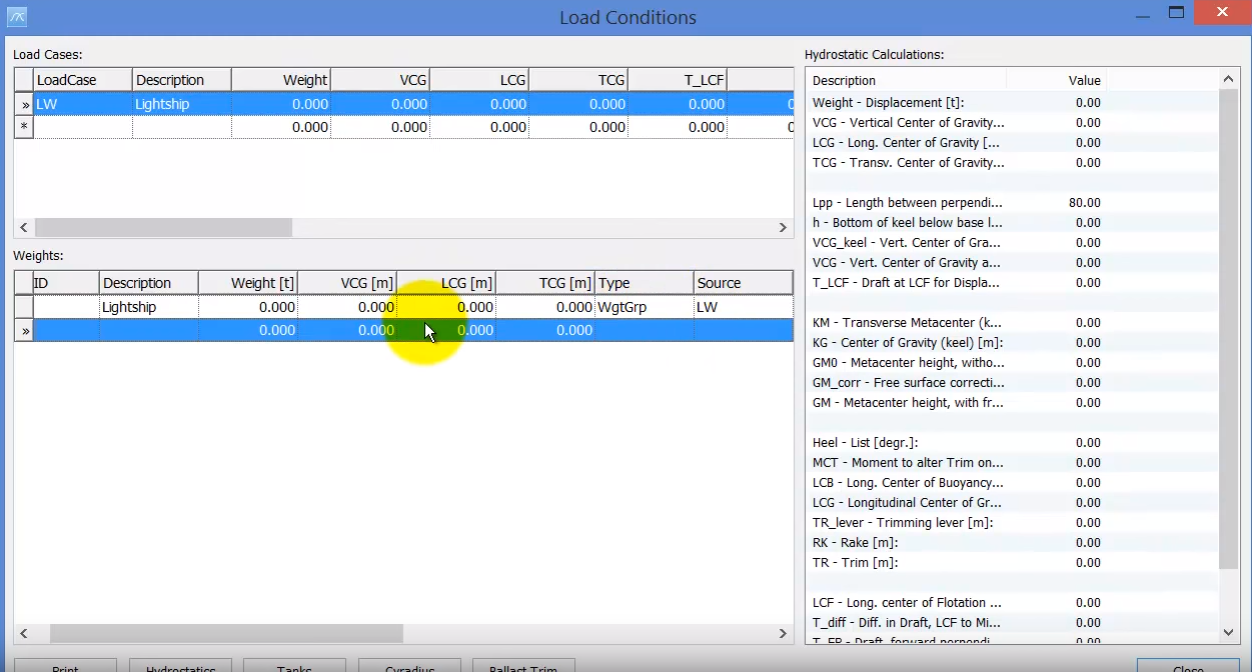
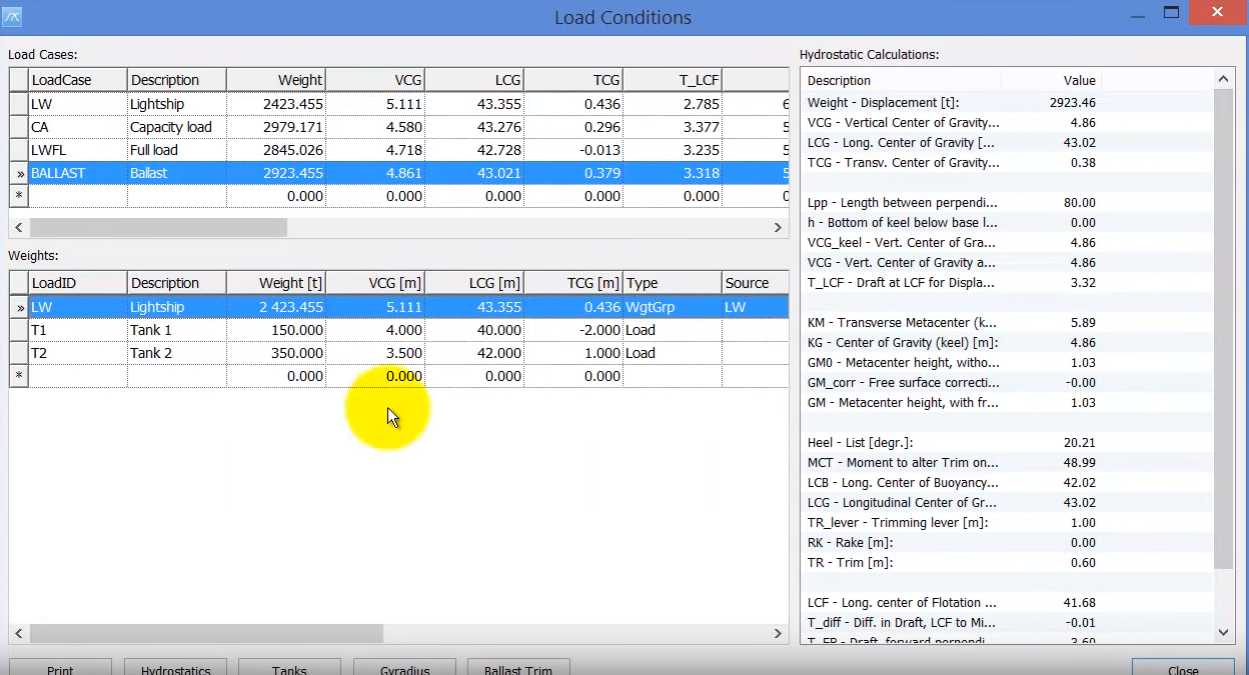
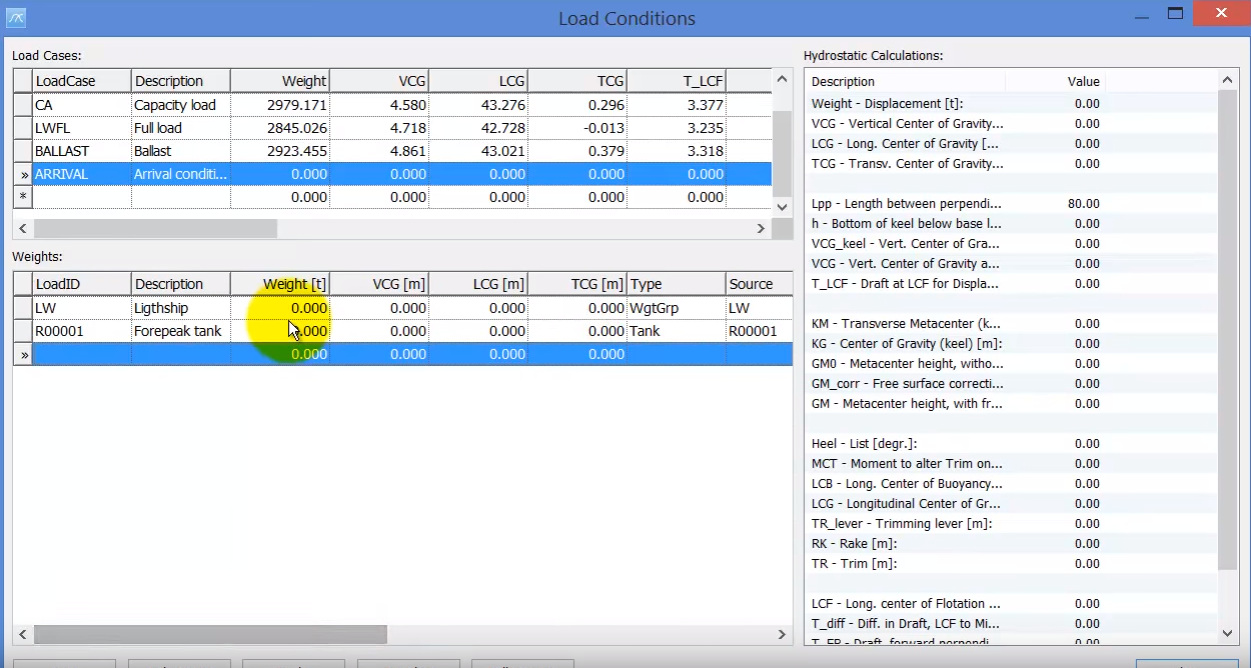
The Load Conditions window will appear:
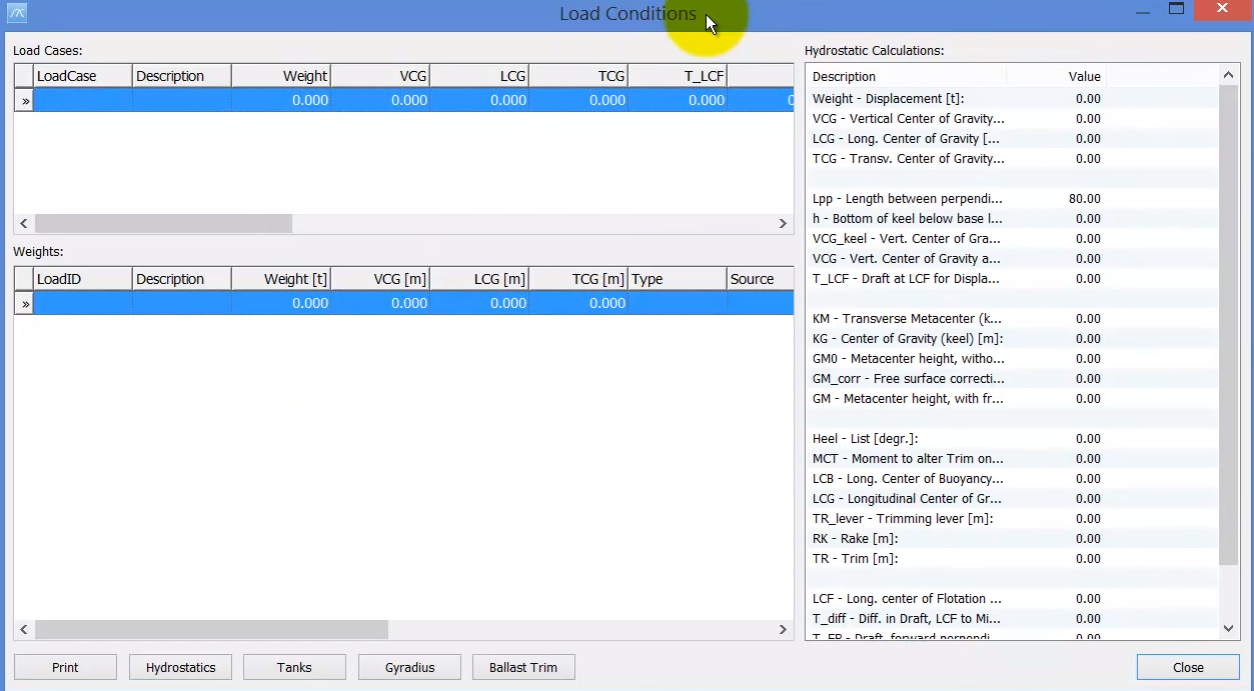
Step 2: Get the Hydrostatics Table into ShipWeight:
To get the hydrostatics table into ShipWeight, press the Hydrostatics button and this brings up the Hydrostatics window:

We can input all the needed values or Copy them from Excel (taken from the stability software):
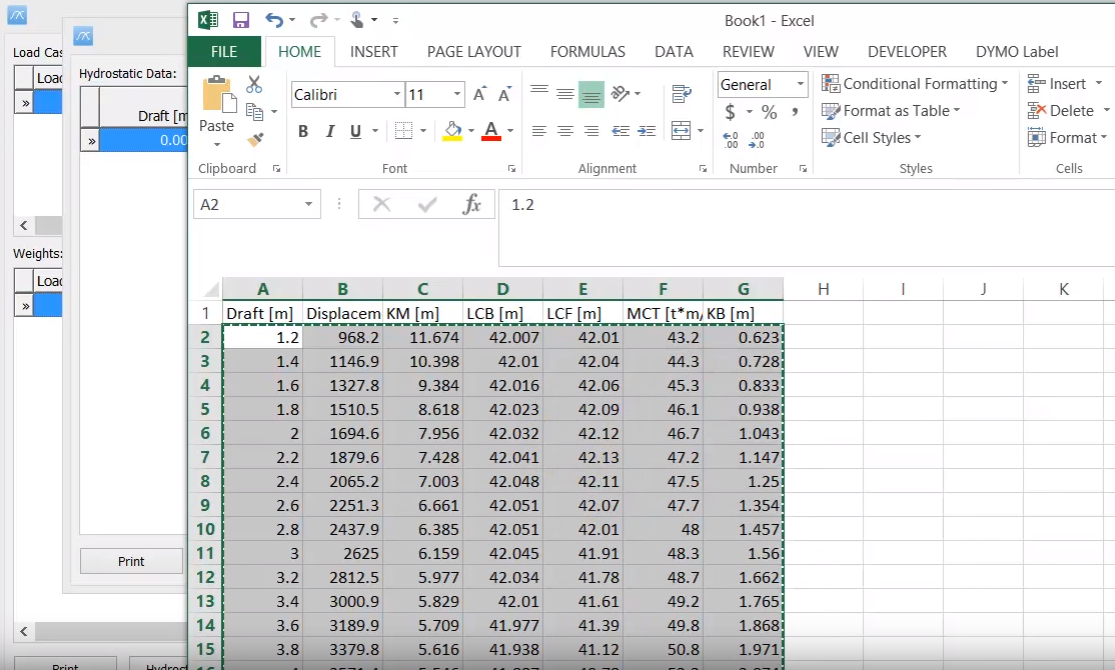
And then Paste them in the Hydrostatics window:
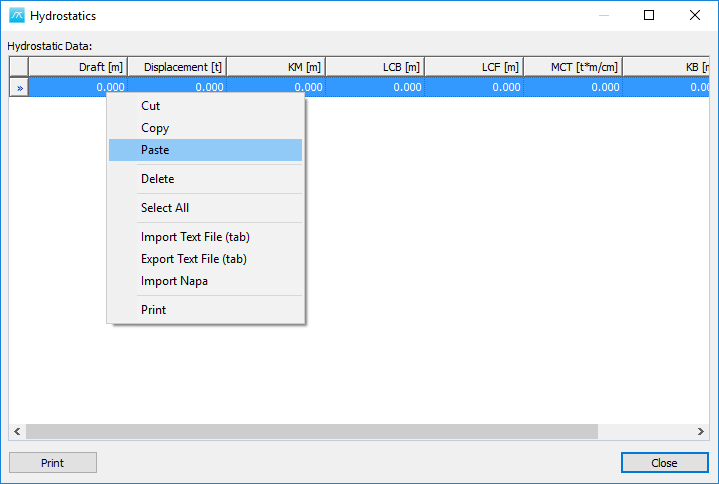
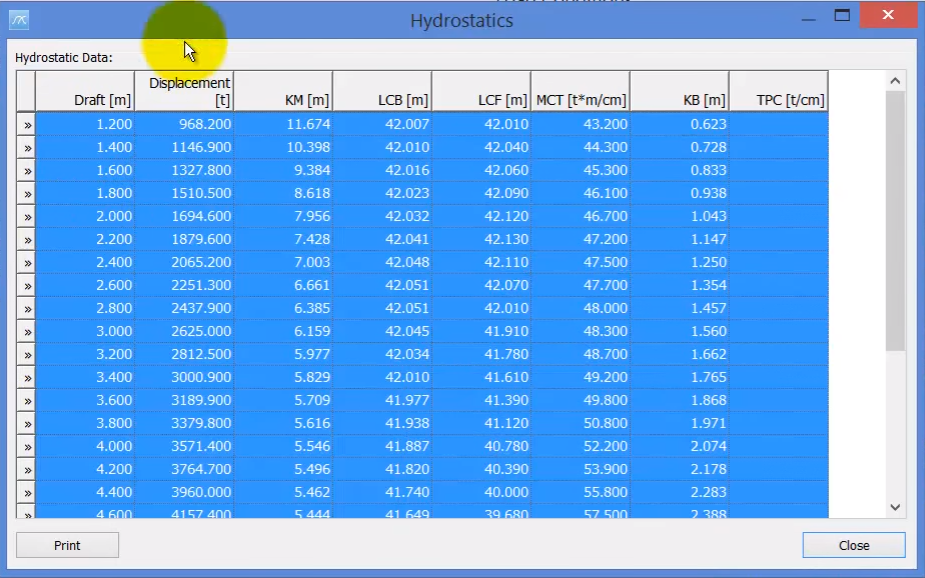
And press Close.
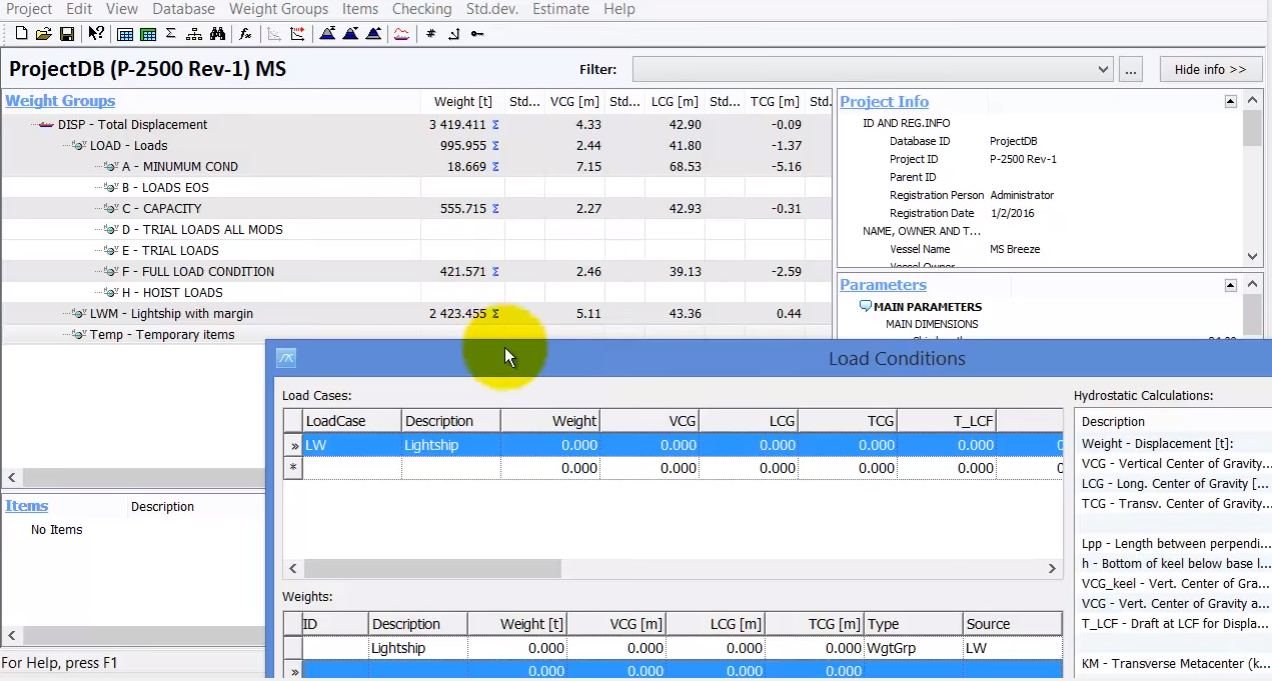
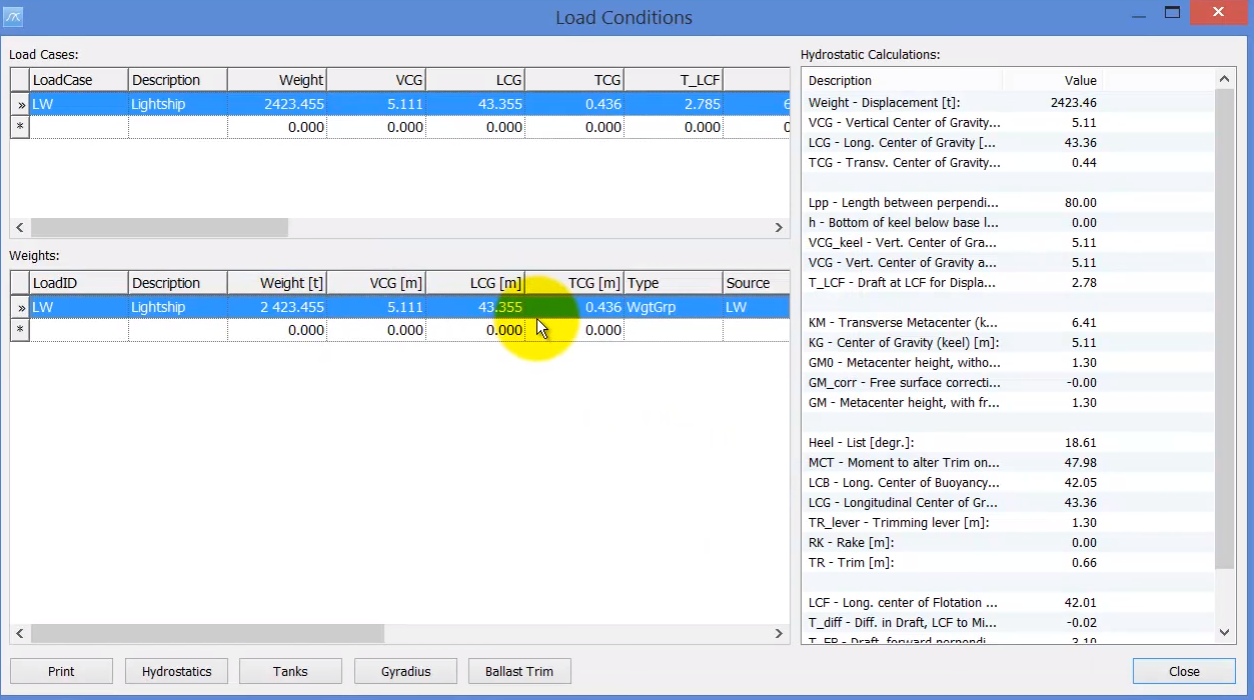
Step 3: Create the Lightship Loading Condition
The Loading Conditions are created in the Load Cases area, where each row will define one loading case. Let’s start by creating the Lightship condition. Type LW for LoadCase, then Lightship for Description. As always in ShipWeight when you create a new row, go to the row below to make sure this data has been properly registered in the database, then go back to the first row:
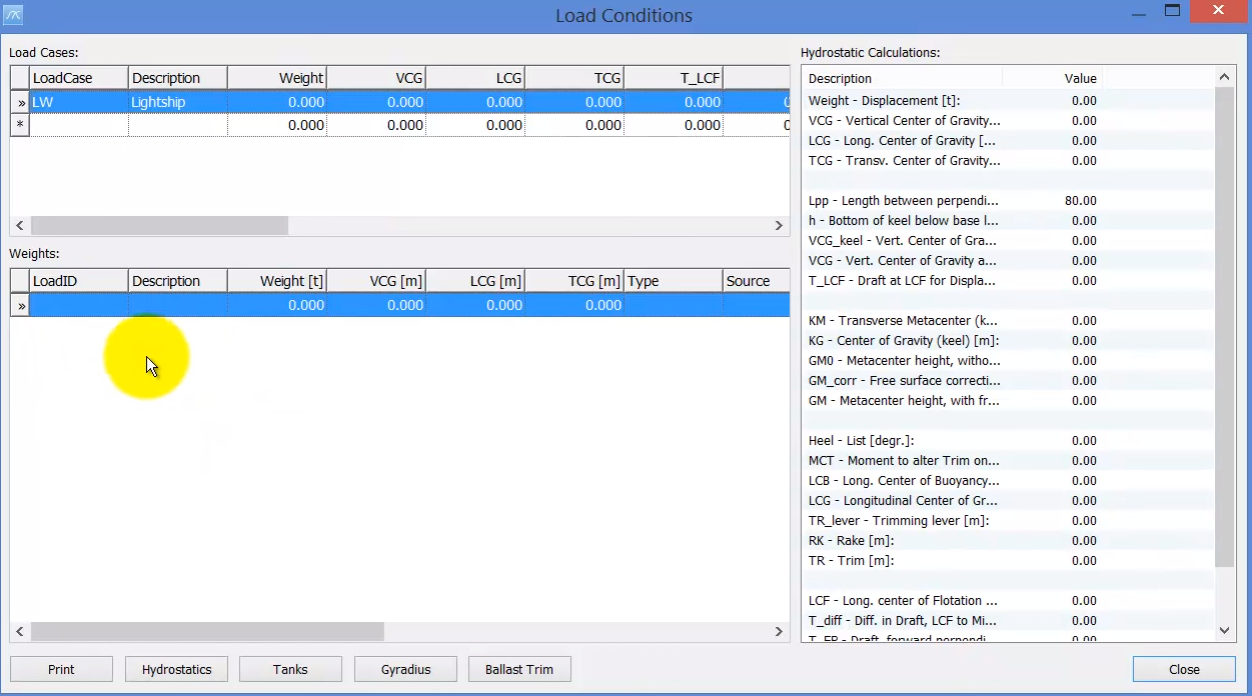
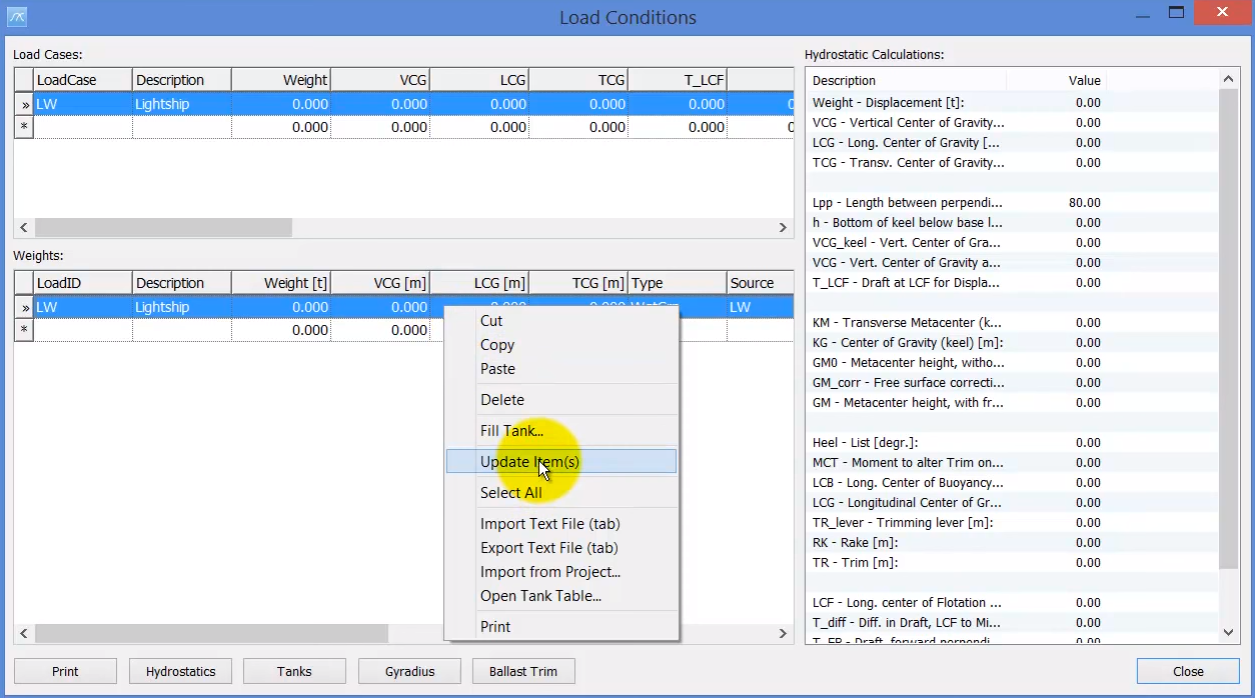
The definition of the lightship condition is done in the Weights area, and since is the lightship only, is just one weight to be defined:
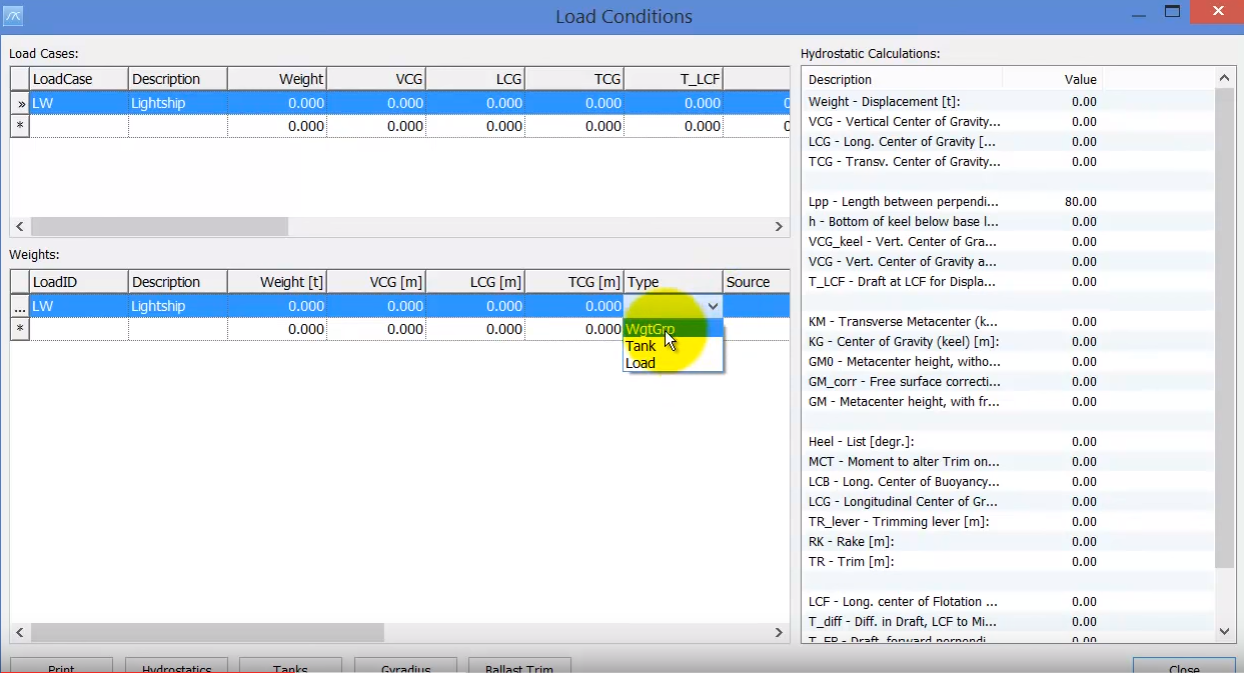
And select LW for Source column:
So, we are refering to the weight group Lightship in ShipWeight main window:
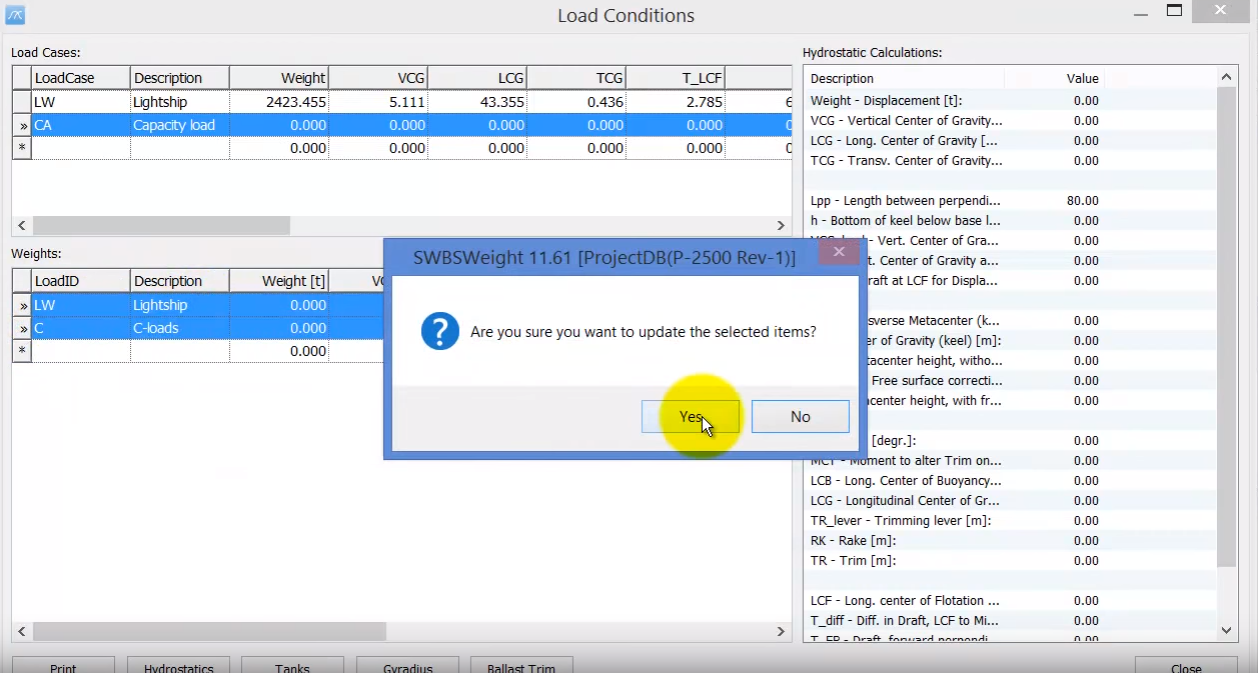
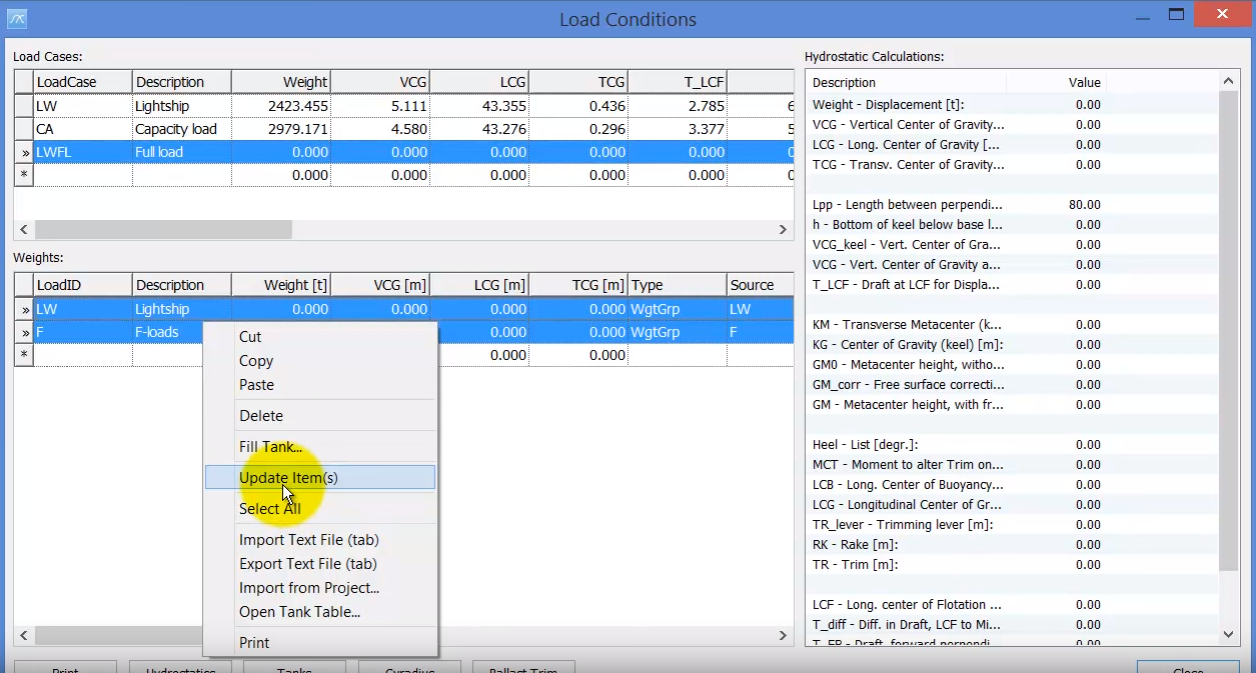
Then right click and select Update Item(s) option:
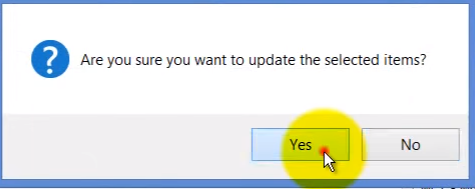
And now it brings in the numbers of the weight and cg of the lightship, and also calculates the values for the Hydrostatics on the right side of the window:
Step 4: Create a Capacity Loading Condition
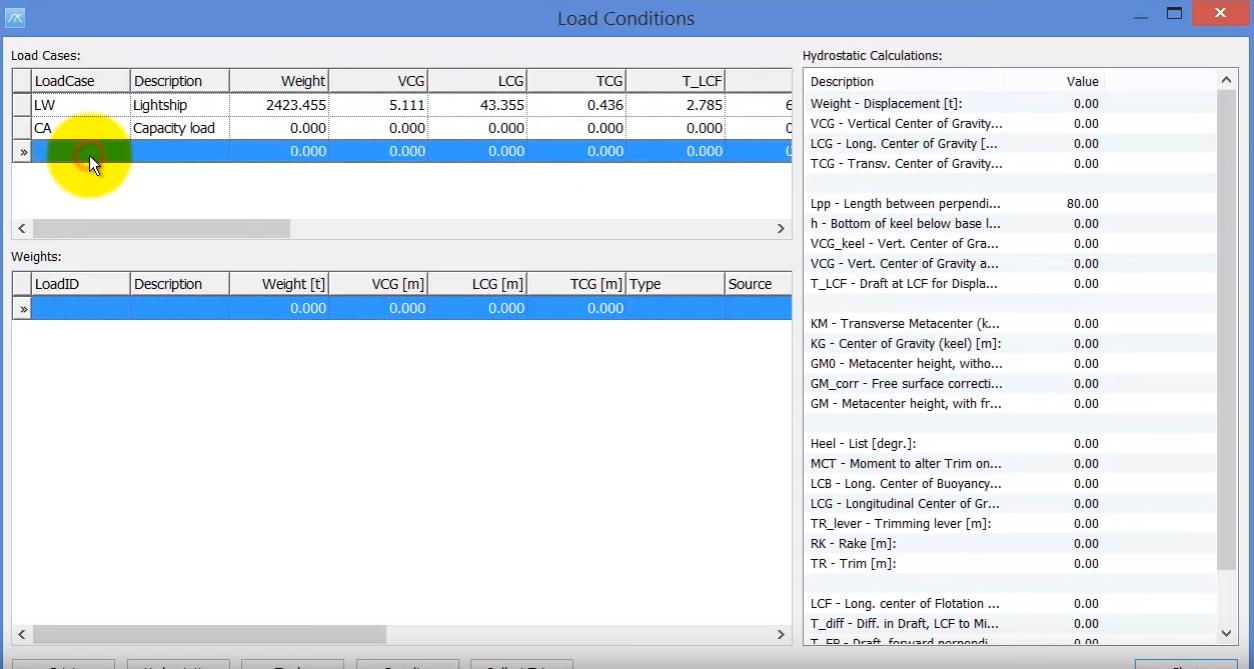
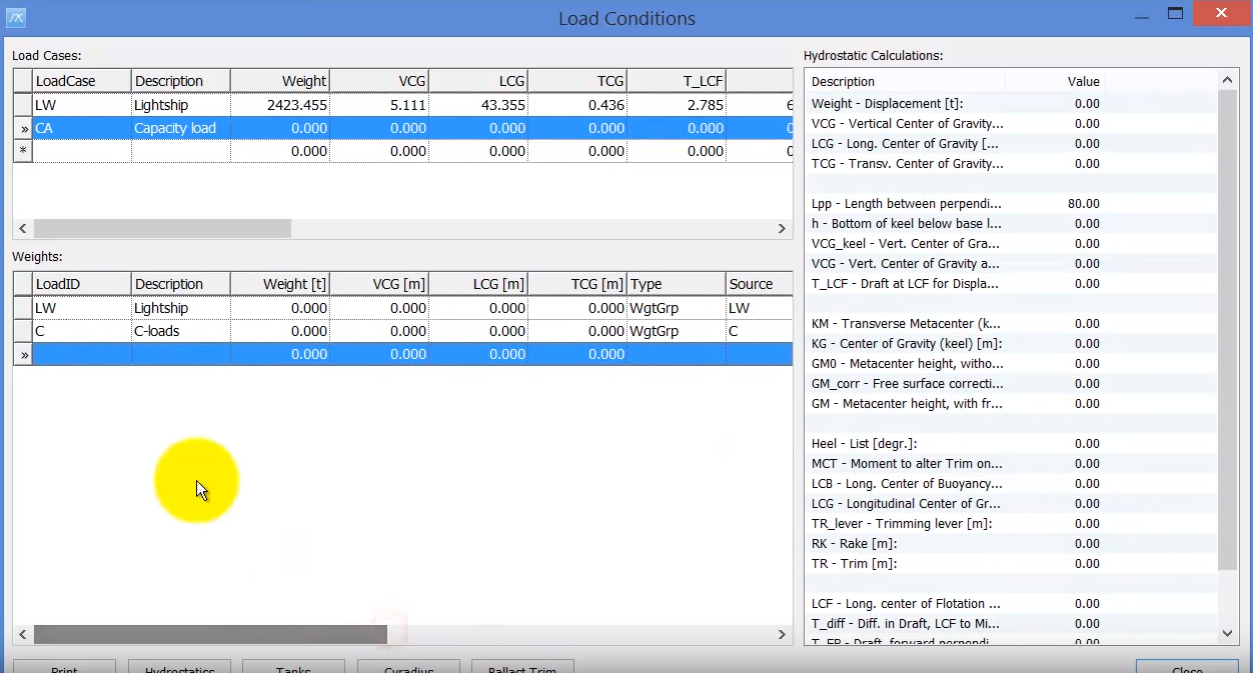
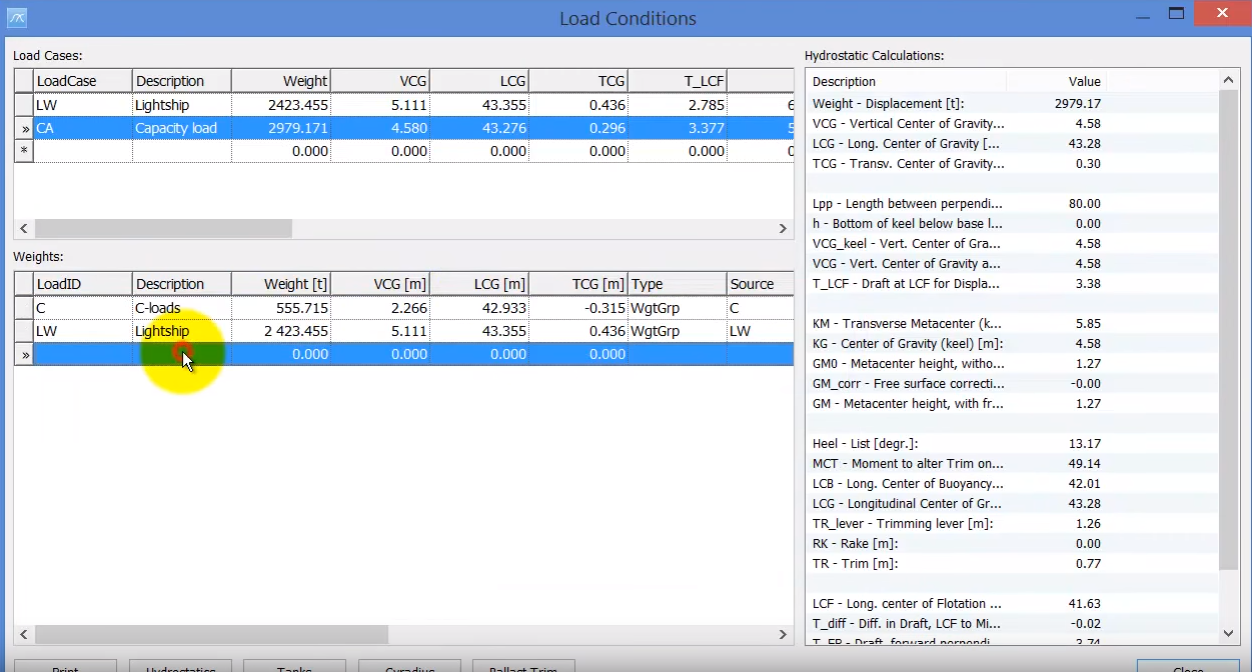
And the Lightship and C-loads weights:
Again, select both lines from Weights area, right click and Update Item(s):
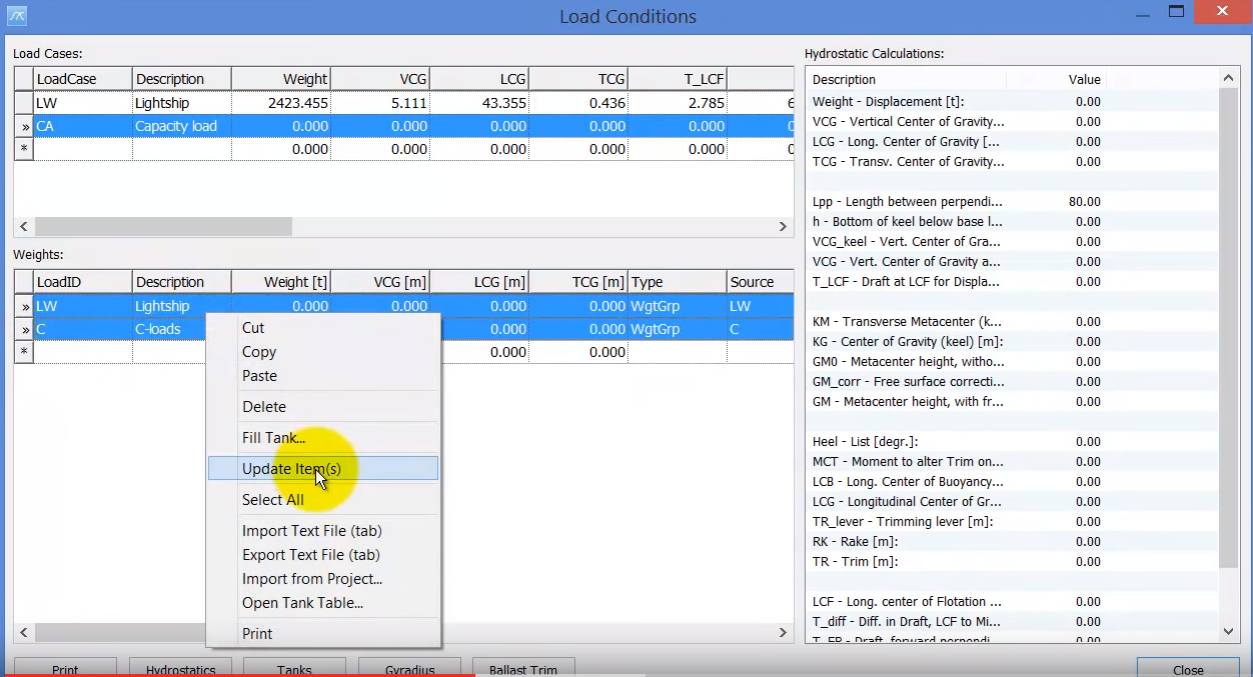
This brings in the numbers of the weight and cg of the lightship, and also calculates the values for the Hydrostatics on the right side of the window:
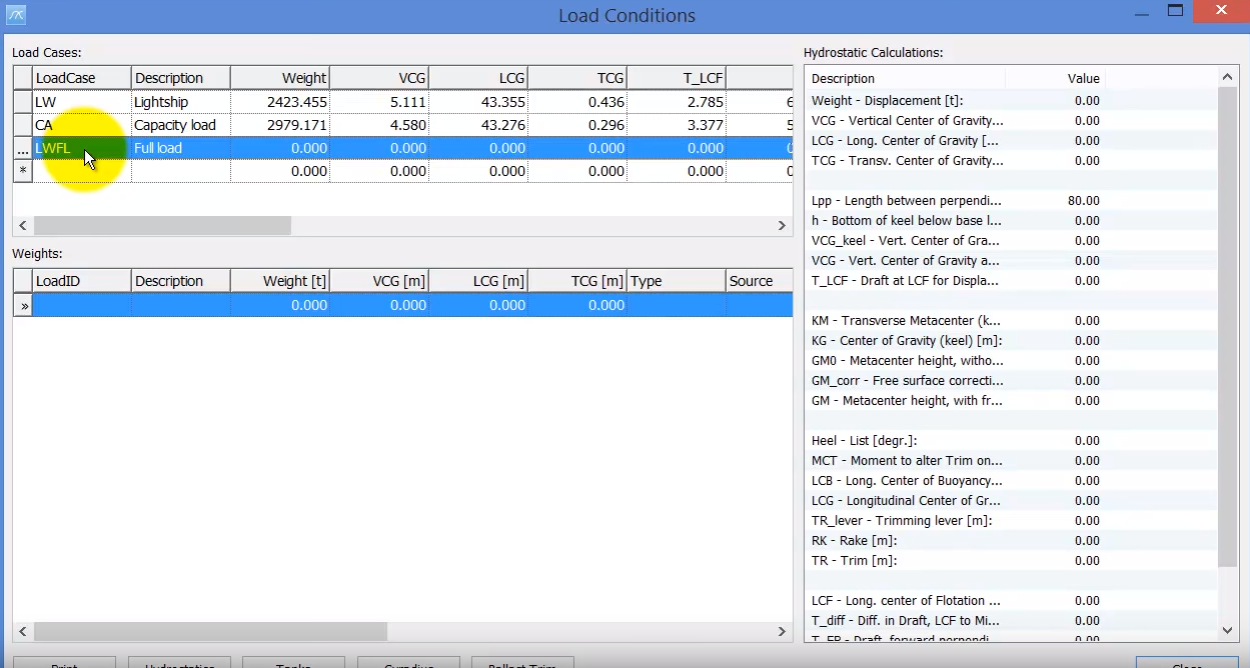
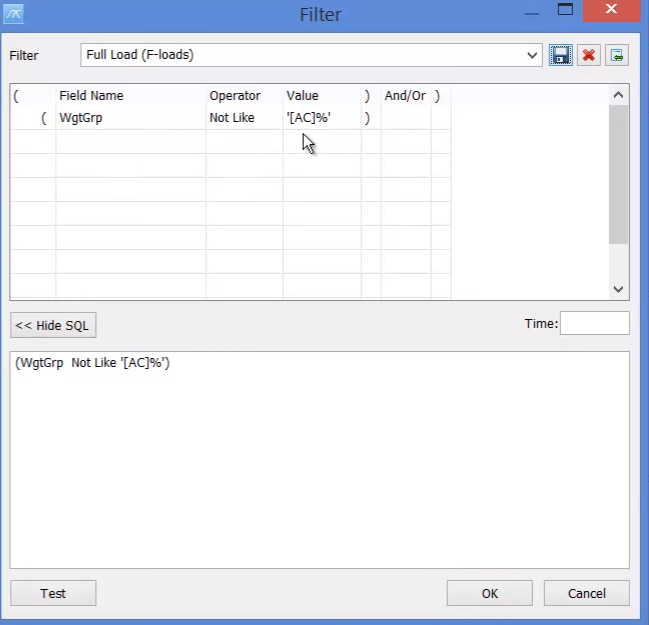
Step 5: Create a Full Load Condition
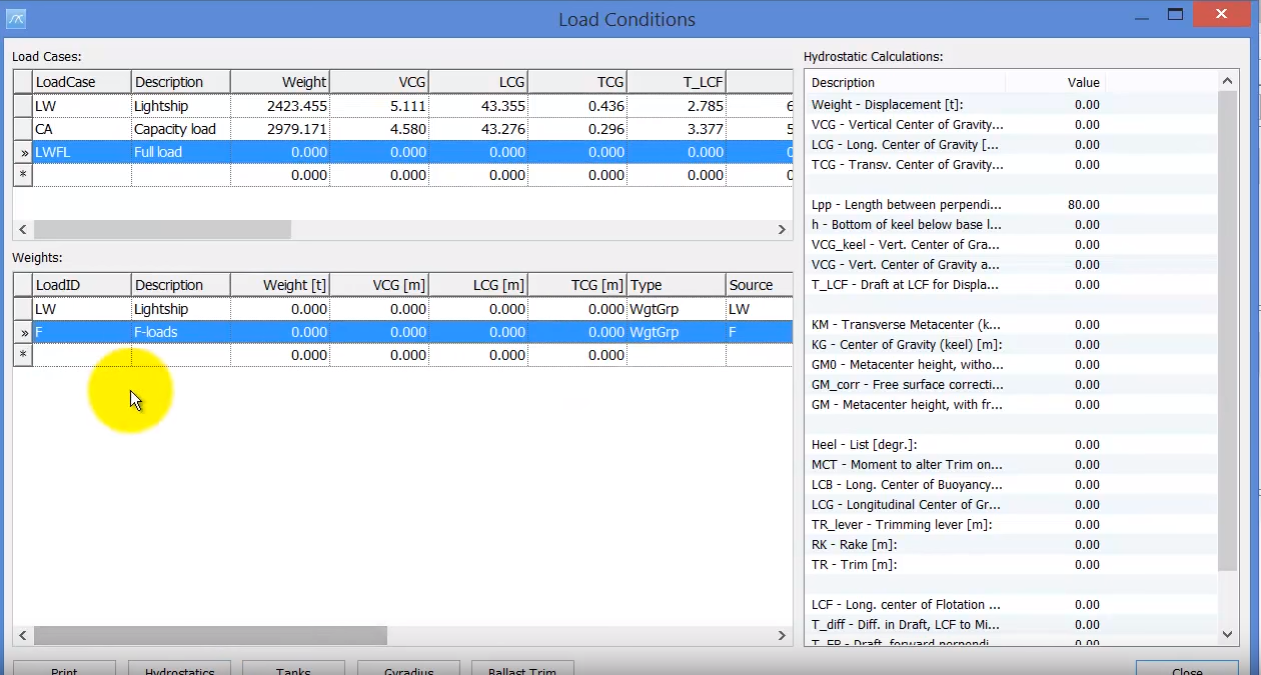
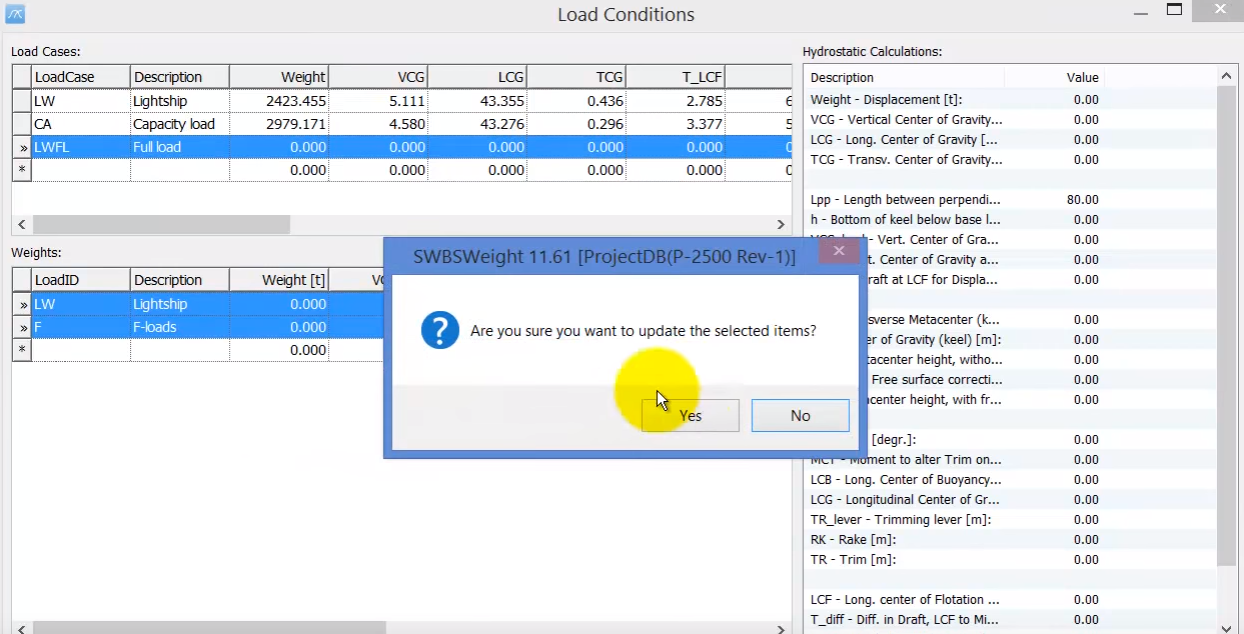
The links that we create to ShipWeight, they are not live, so we need to select these items and right click and Update Item(s) manually every time:
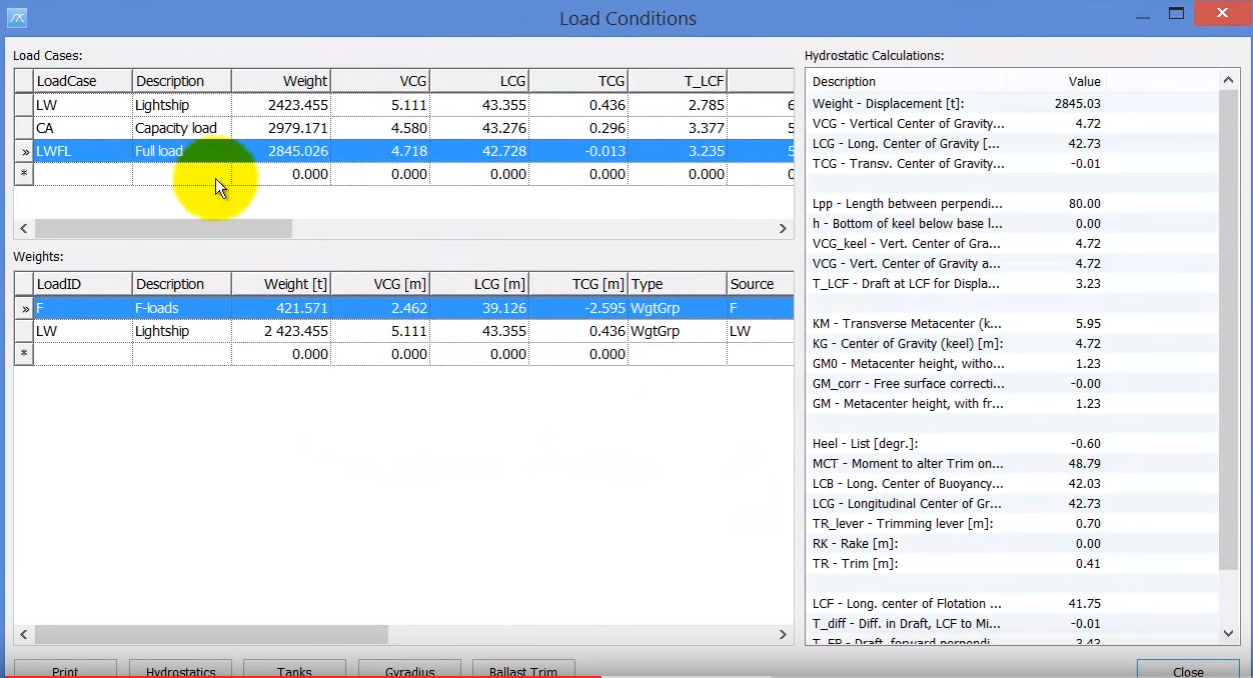
Now we have created 3 loading cases, and have the hydrostatics values calculated for all 3 of them. All of the loading cases have one line each, but of course more weights can be added for each loading condition.
Another way to create loading conditions is just refering to weight groups in the main hierarchy.
Step 6: Define a Ballast Condition
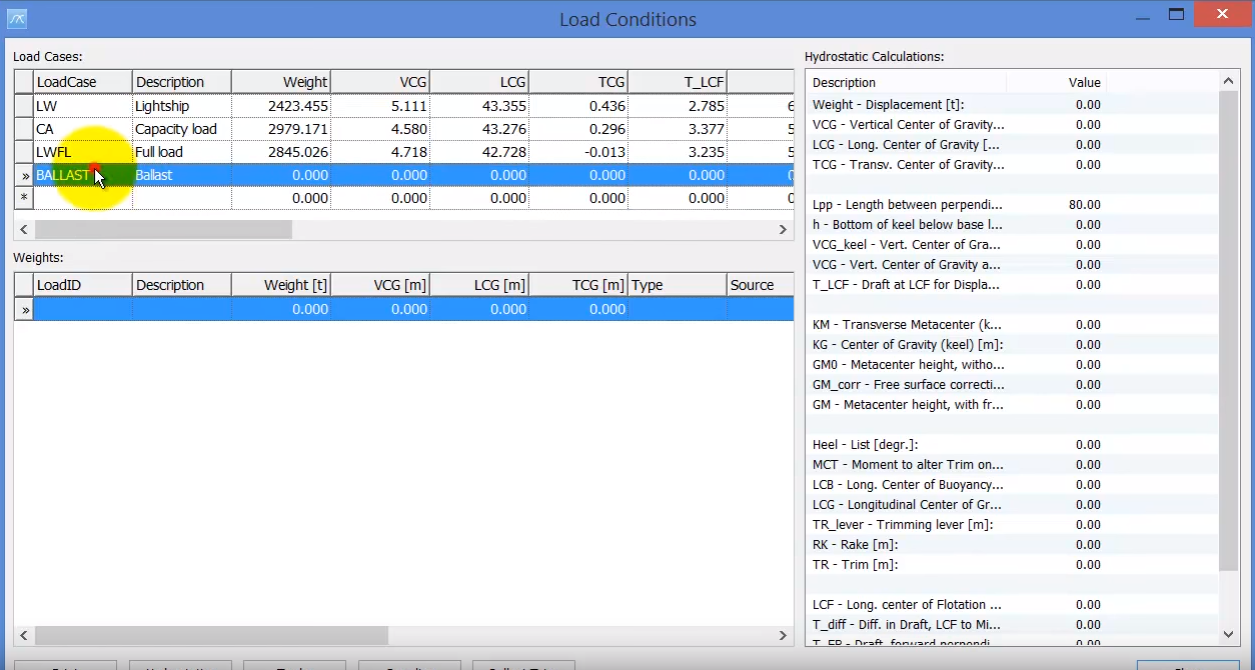
We will not refer to any weight groups, we will only define the lightship weight in ShipWeight:

But, now instead creating another reference to the ShipWeight weight groups, we will create a reference to the tank load:
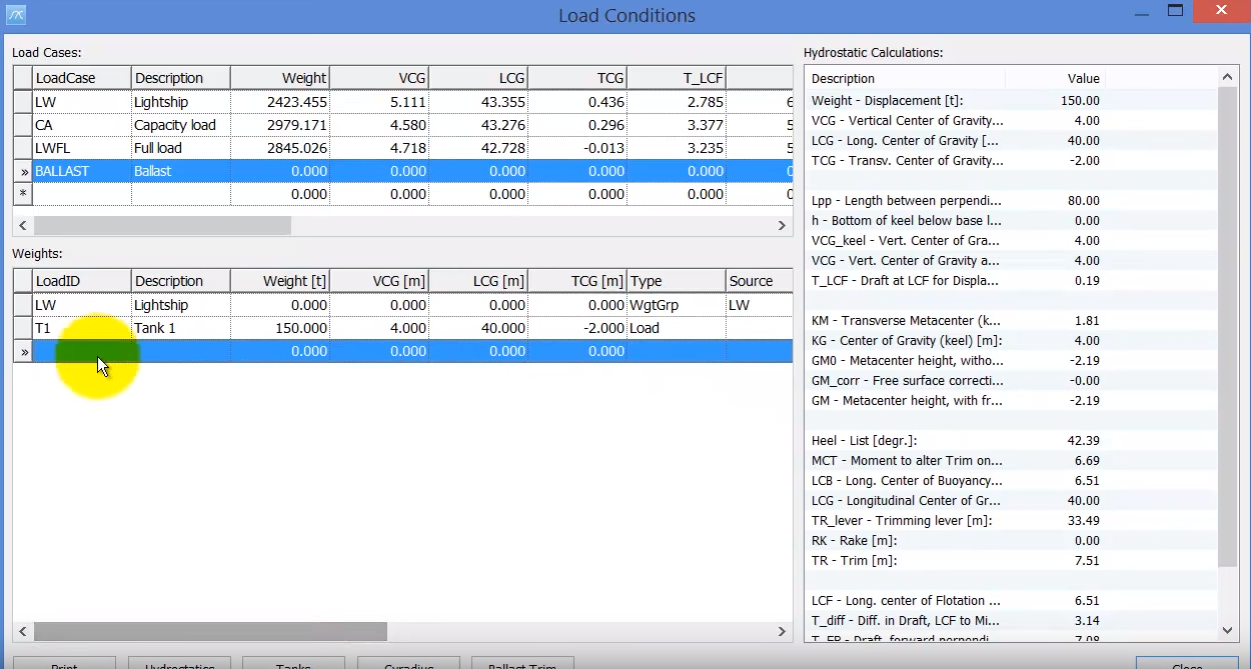
So, T1 doesn’t have a Source because is just a load point.
And one more point load T2 needs to be defined:
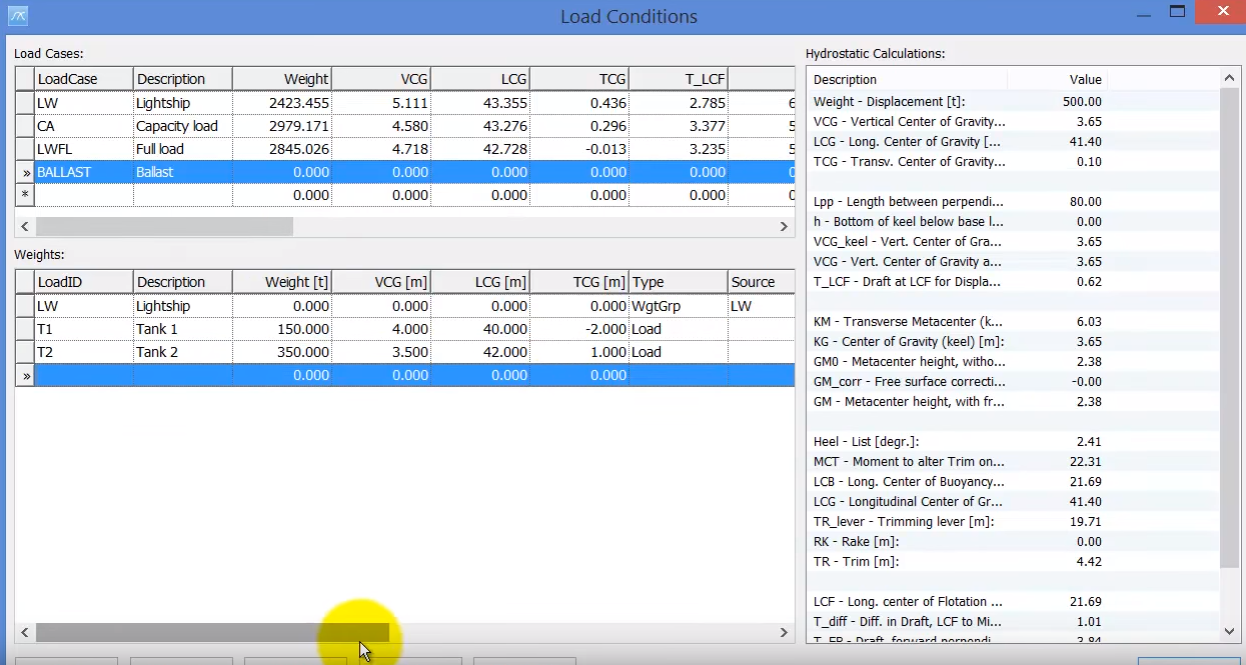
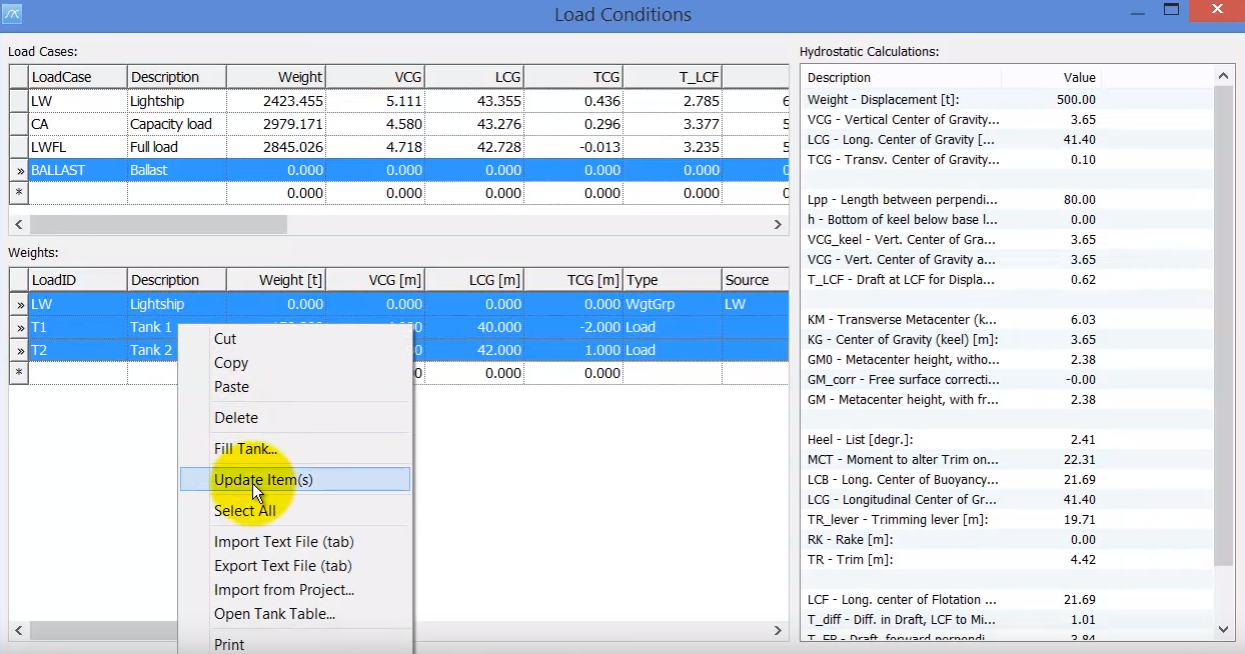
Select all weight groups, right click and Update Item(s):
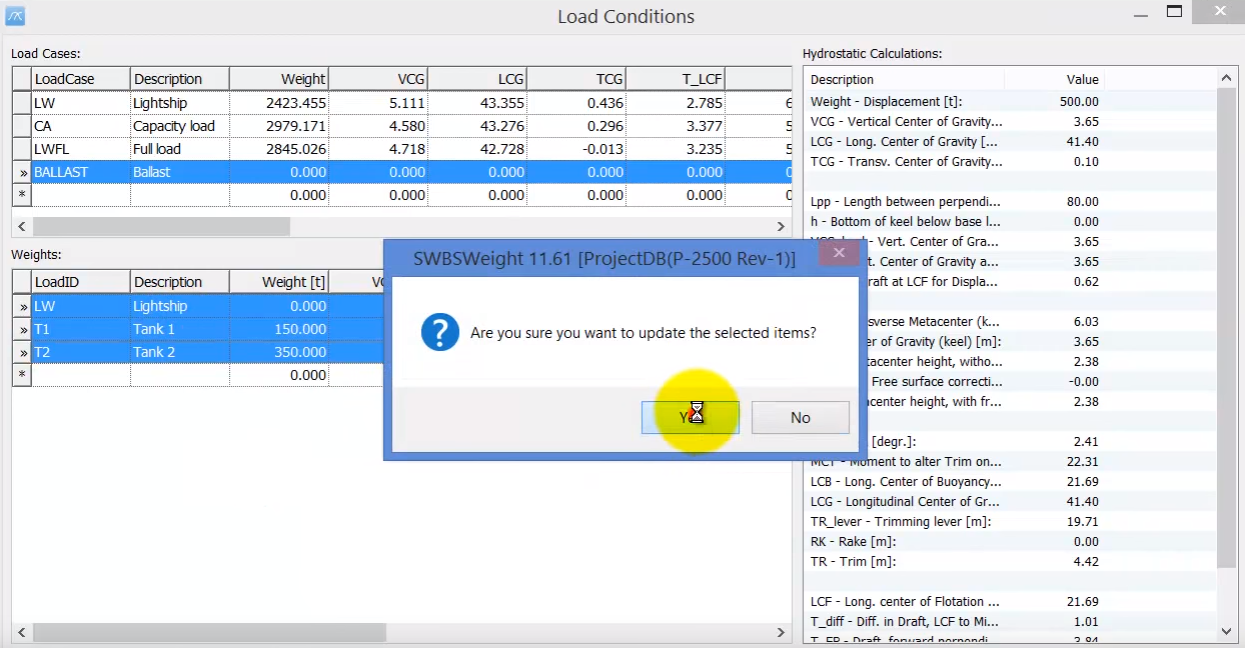
The hydrostatics values are calculated:
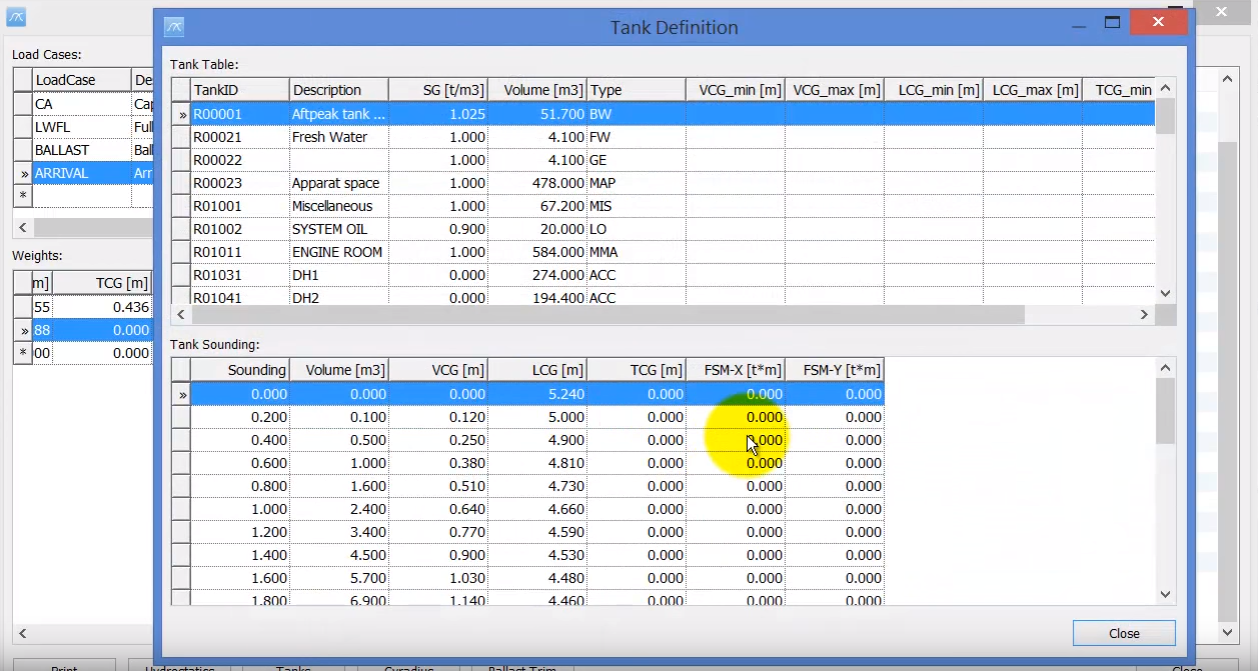
The last loading condition to be shown allows you to refer tanks that have specific contents and sounding and then it will fill up those tanks by using sounding tables.
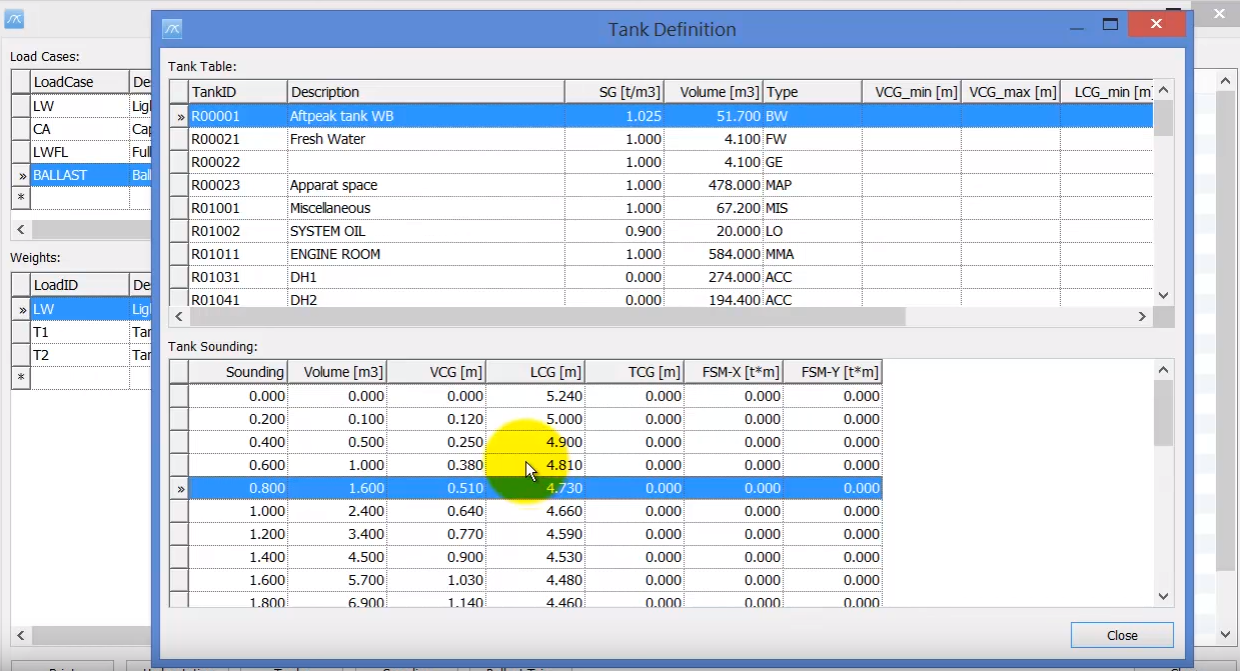
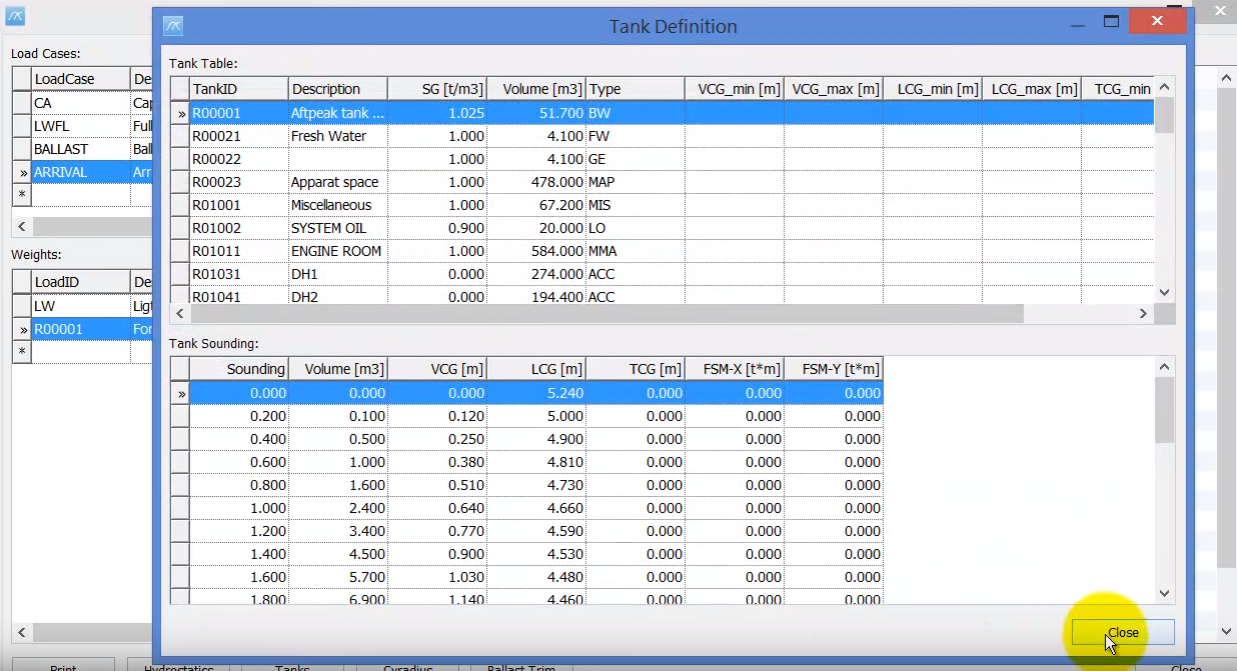
To be able to do that, in adition to add the Hydrostatics table, you also need to add tanks. So, if we click on the Tanks button, the Tank Definition window will open:
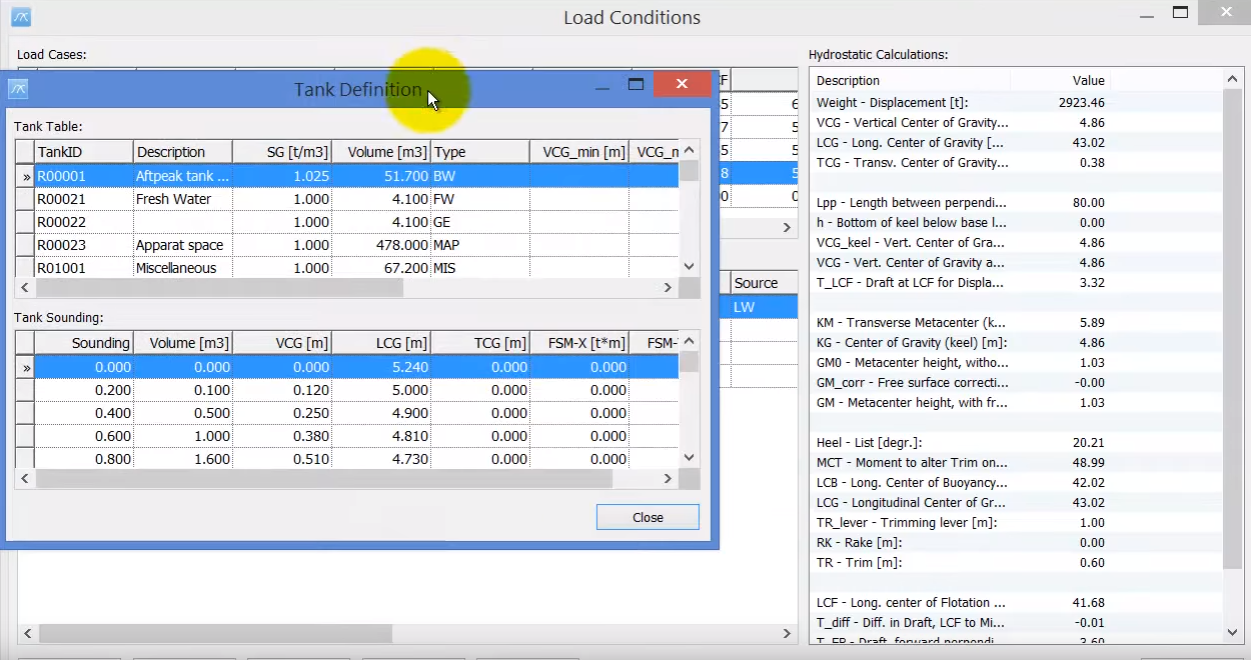
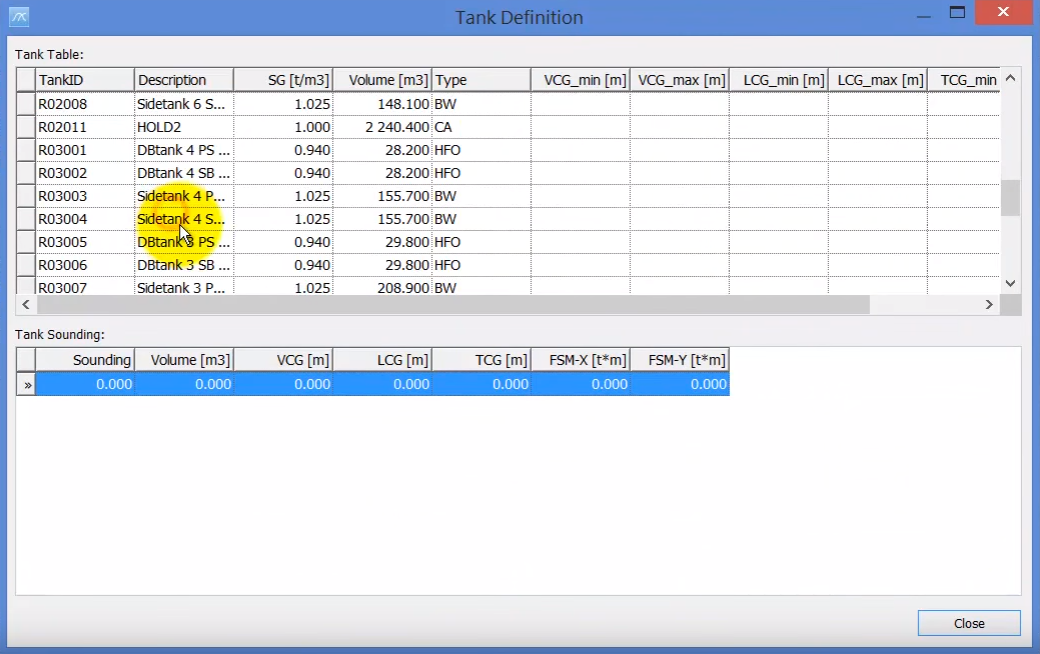
We can see the prefilled list of tanks:
If we select one TankID, we will see for this specific tank, the sounding table, which allows to fill the tank for a certain percentage:
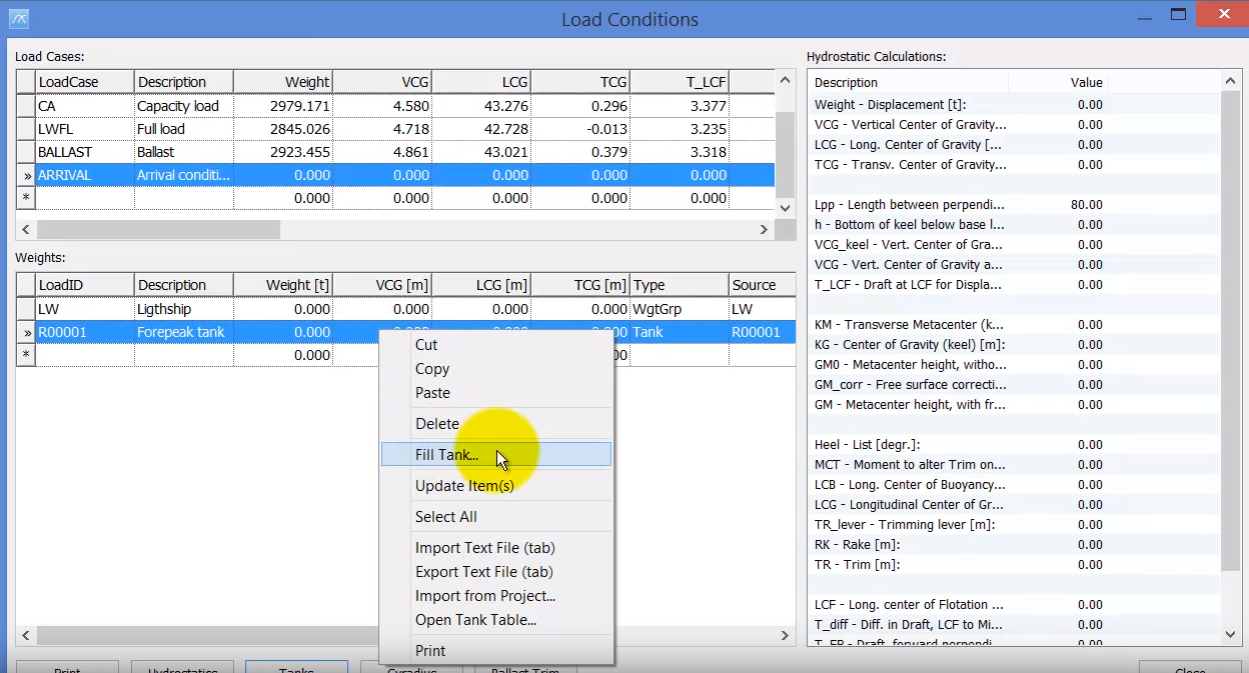
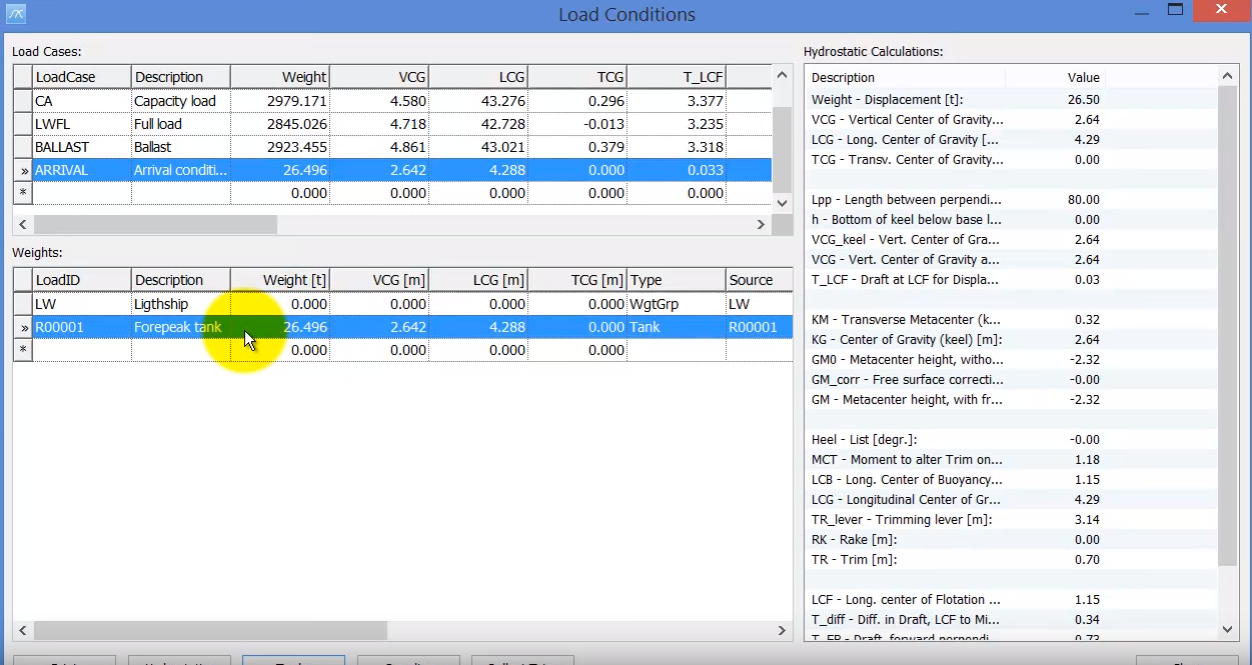
Close the Tank definition window and define a new loading condition ARRIVAL and the corresponding weights:
R00001 line is connected to the Tanks list (window), which again is connected to sounding table:
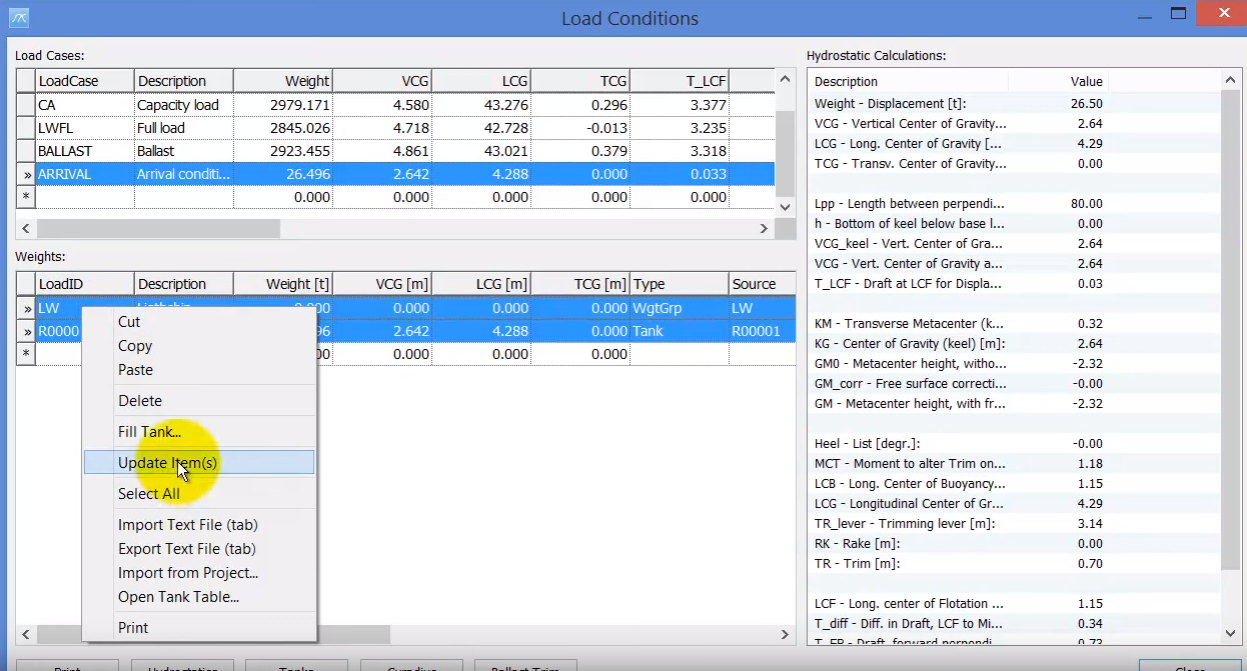
Right click on R00001 and select Fill Tank…
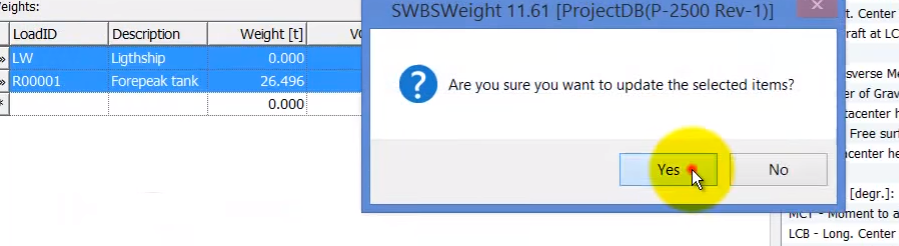
And for example, use 50% fill:
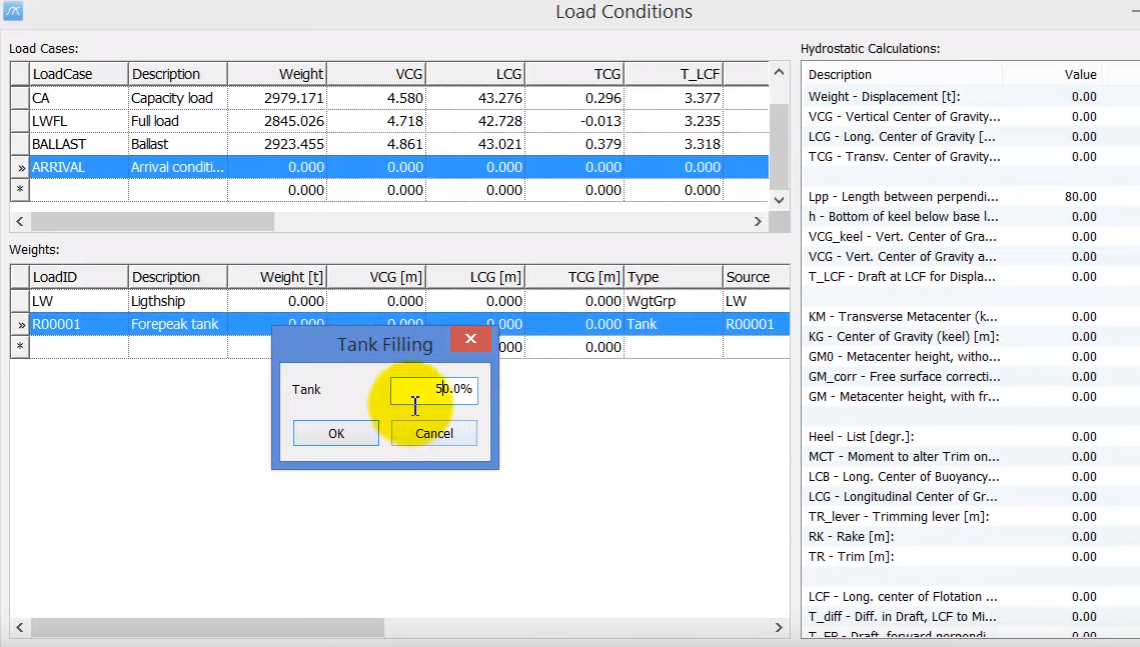
Press OK. And then, ShipWeight looks up for the sounding table of this tank R00001, and gives the correct CoG and Weight:
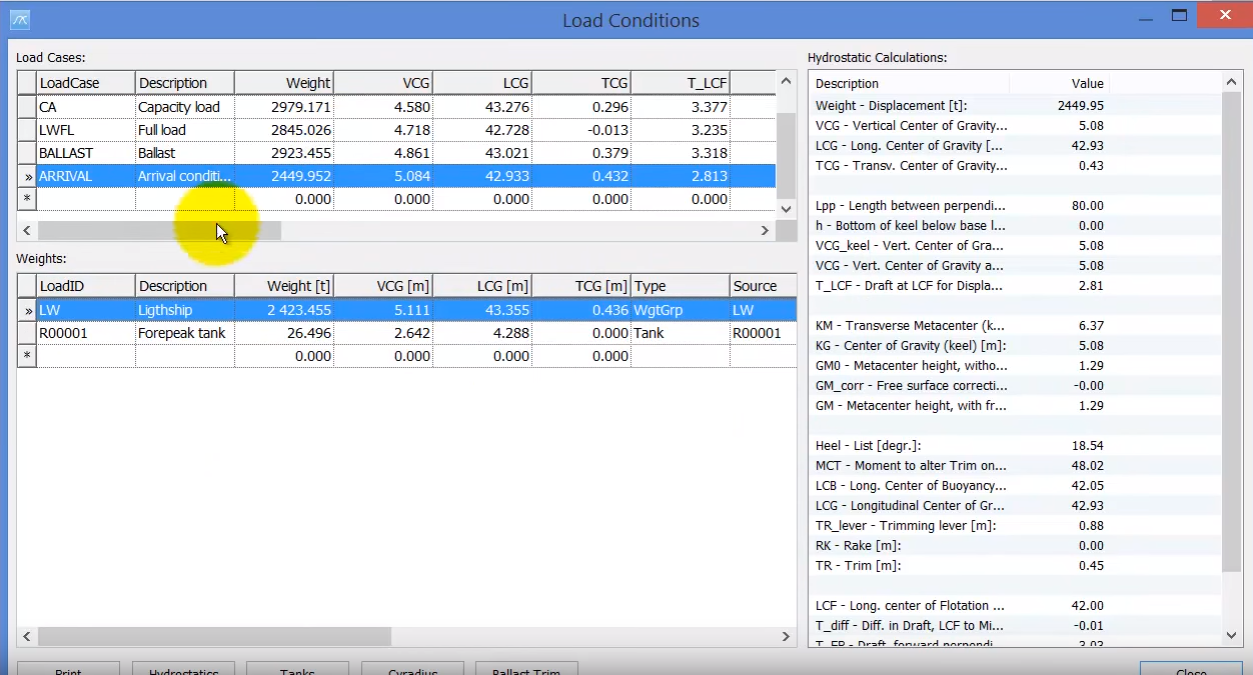
Finally, select these rows again and Update Item(s):
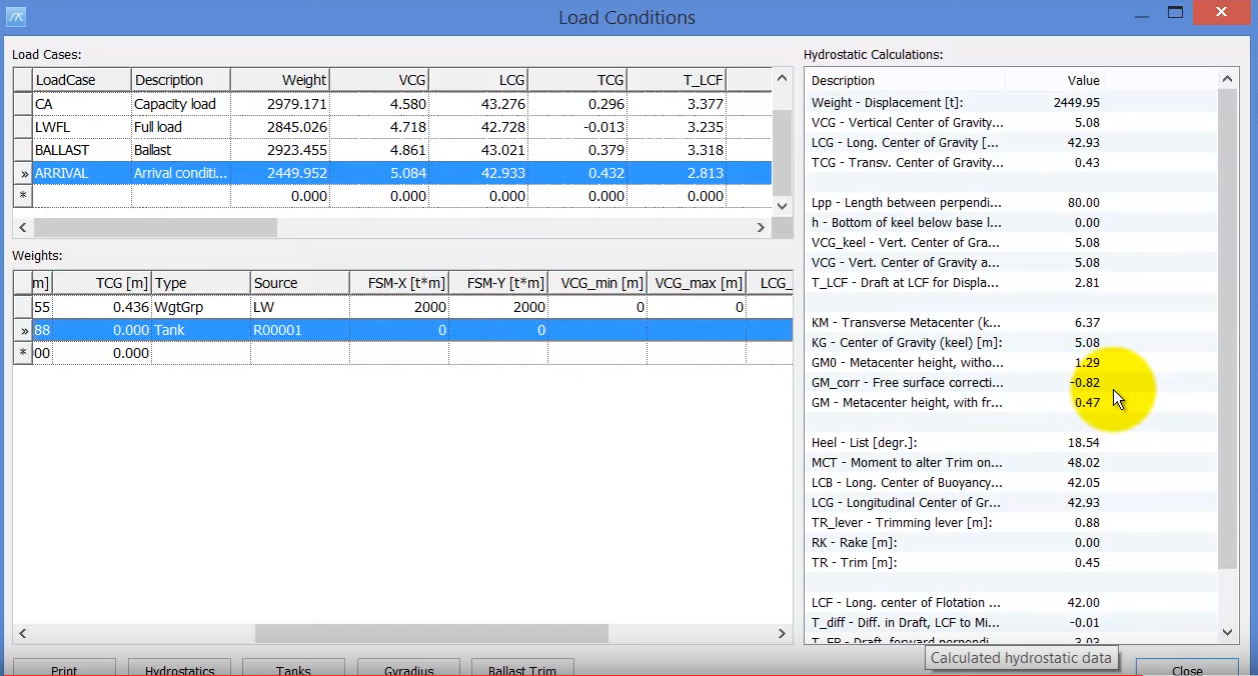
The arrival condition is updated and the hydrostatic values as well:
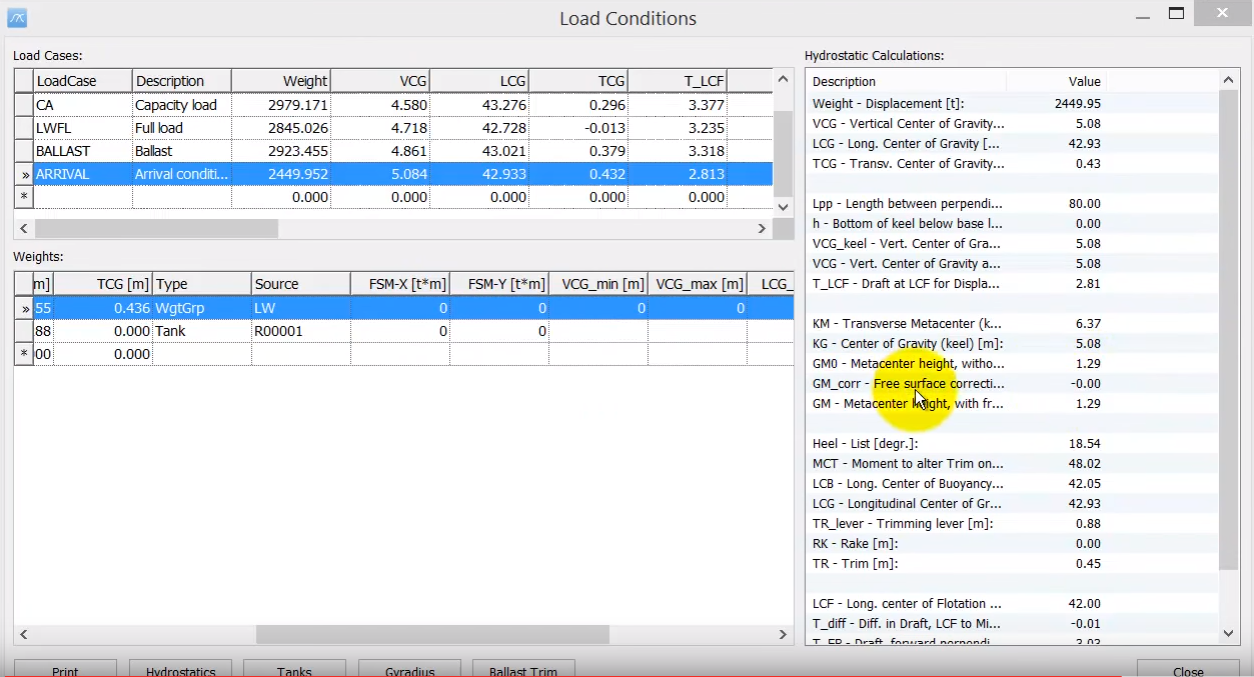
Values for the free surface moments can be given in directly either in the grid here:
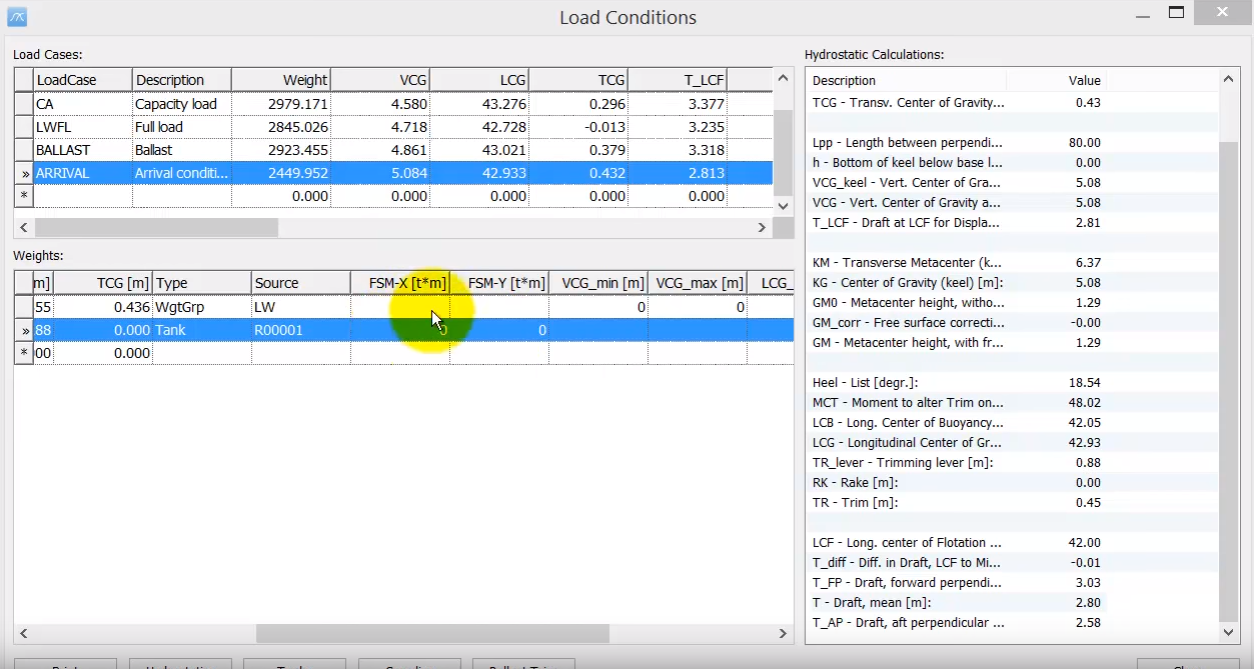
Or may be defined in the sounding table in the Tank Definition table:
As you can see now GM_corr –Free surface correction is 0:
But if you type in for FSM-X, FSM-Y some numbers:
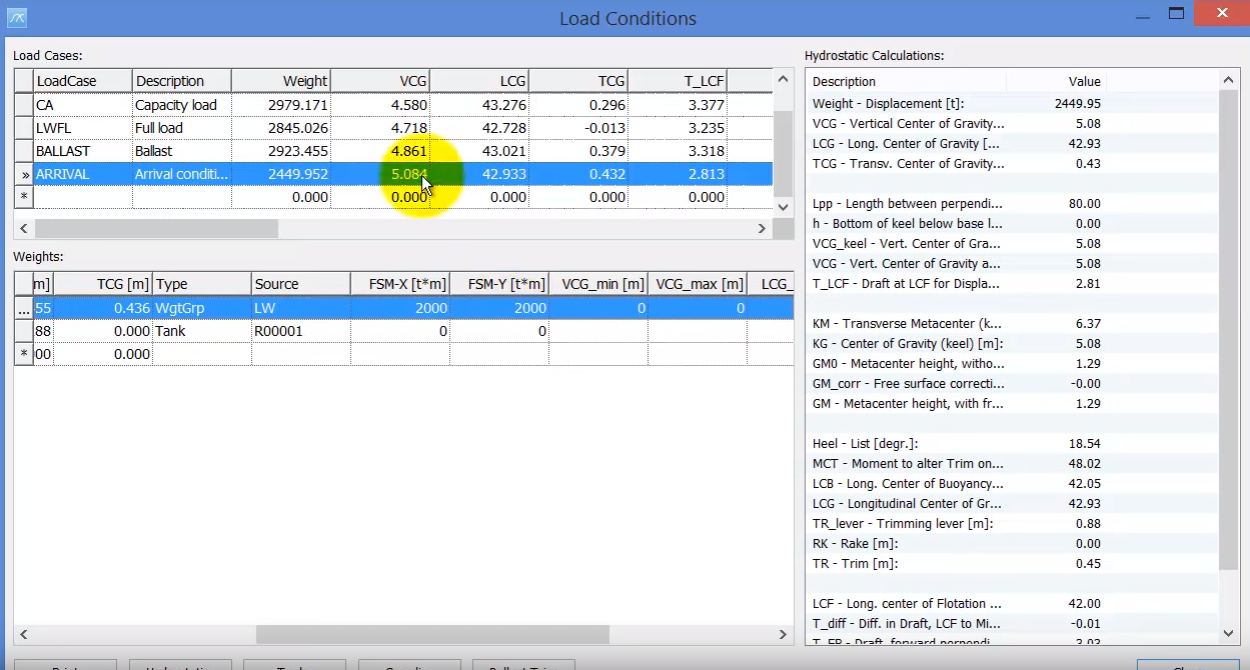
You will notice the free surface correction value has changed:
Finally, one very important note, is that all the information from loading conditions window is taking basis in the fact that the origin is AP, baseline and centerline for the calculations.
If you are using a project with the origin in FP and positive axis going from FP toward AP, to get correct hydrostatic values calculated.
IMPORTANT:
If your project is defined with origin in FP (FP=0) and positive direction from FP towards AP, make project settings as shown here:
LCG set to Lpp value
LCG dir. Set to -1
So, in the Project Info window:
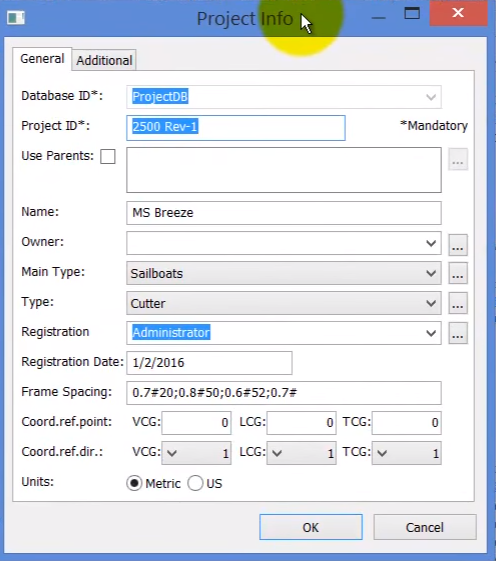
Change the LPP value, in this case LCG from 0 to 80, and then shift coordinate direction from 1 to -1:
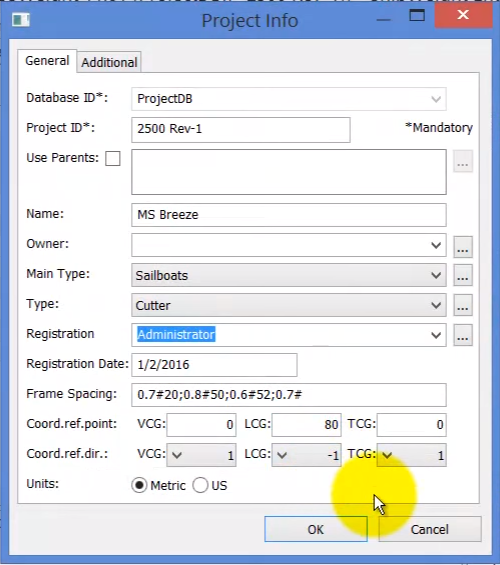
If you do an FP =0 and positive from FP to AP, make sure you make this changes to have the hydrostatics calculated correctly, otherwise drafts at fore and aft and trim values will be wrong.
Step 7: Alternative Method: Using Global Filter for Handling Loading Conditions
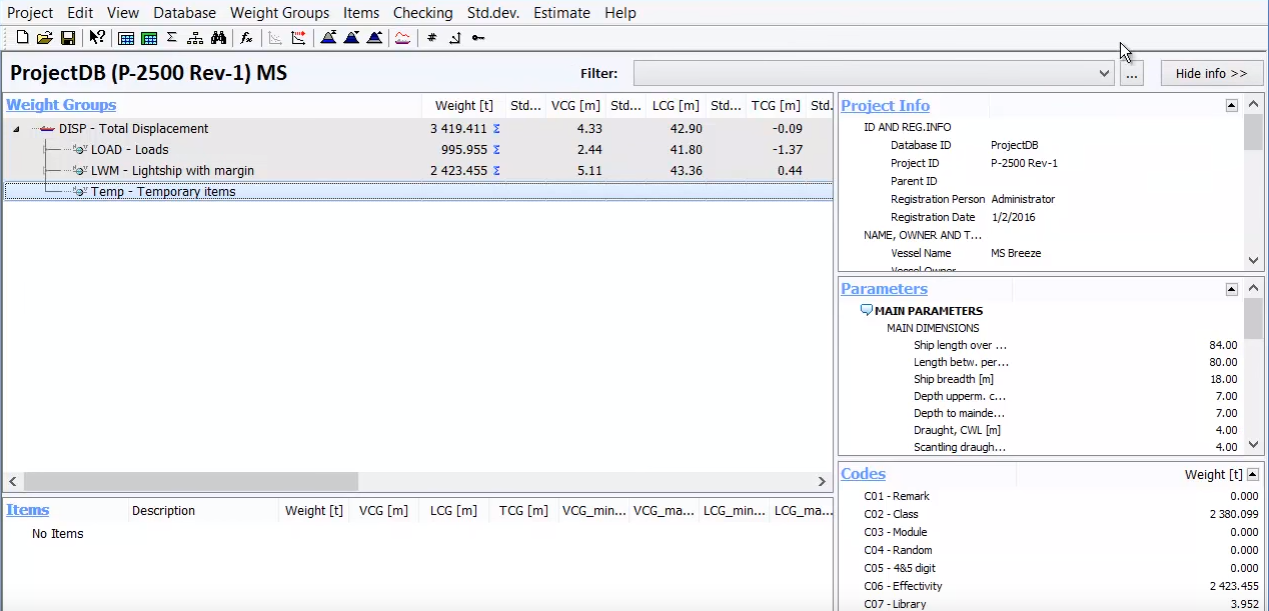
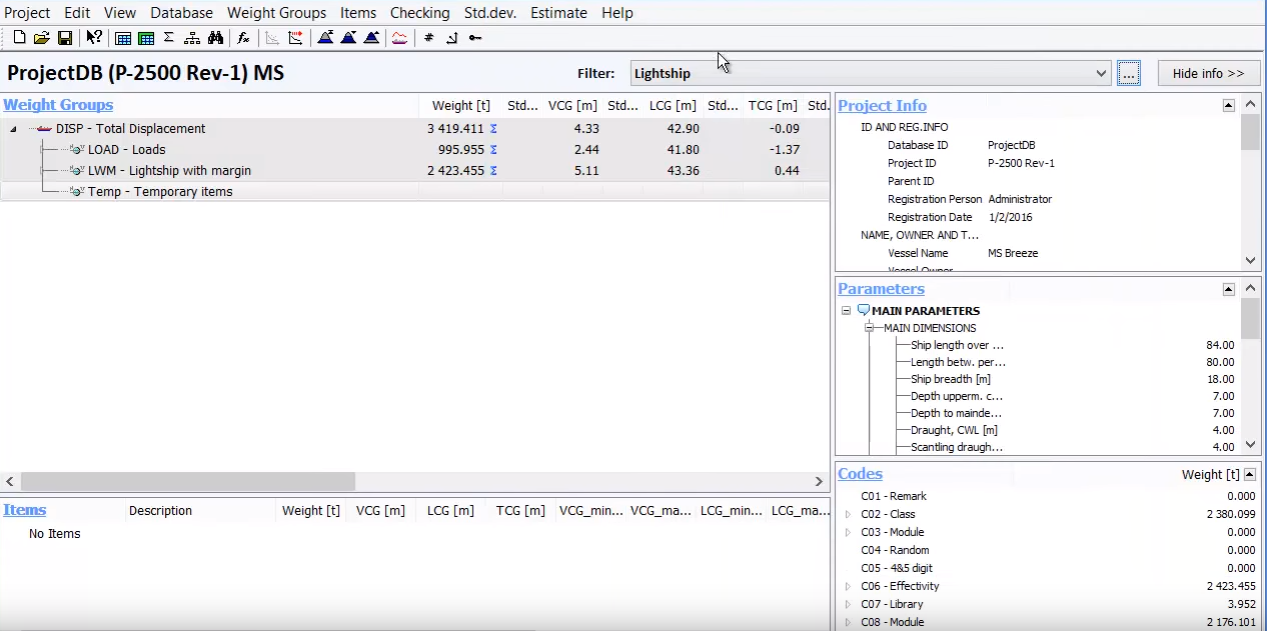
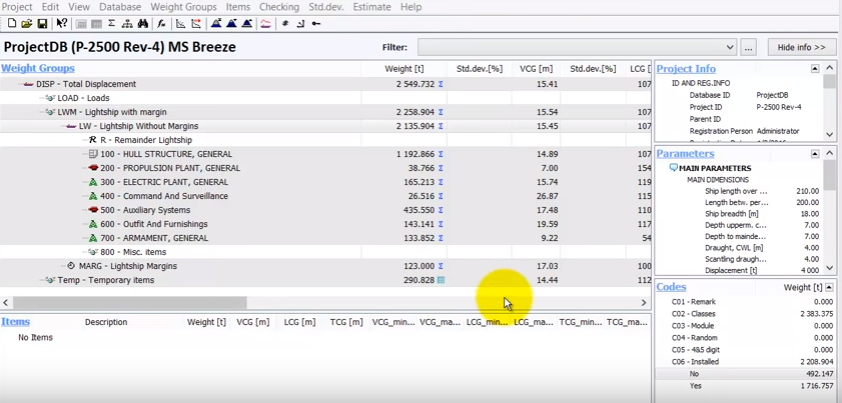
This chapter will explain how to hadle different loading conditions in the main window in ShipWeight. In the following project we have defined Lightship with margin items and Loads items, which together make up the total Displacement for the project:
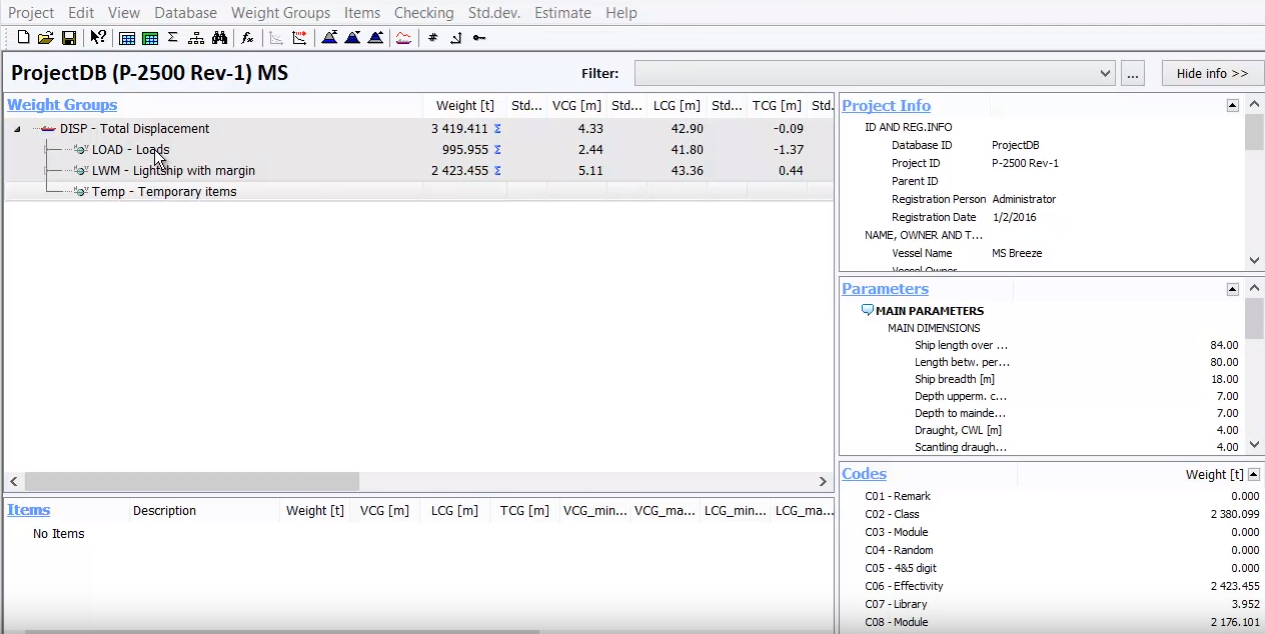
Now, if we expand the Lightship, we can notice this is made up by the typical summary of the 1 through 700 digit SWBS numbers:
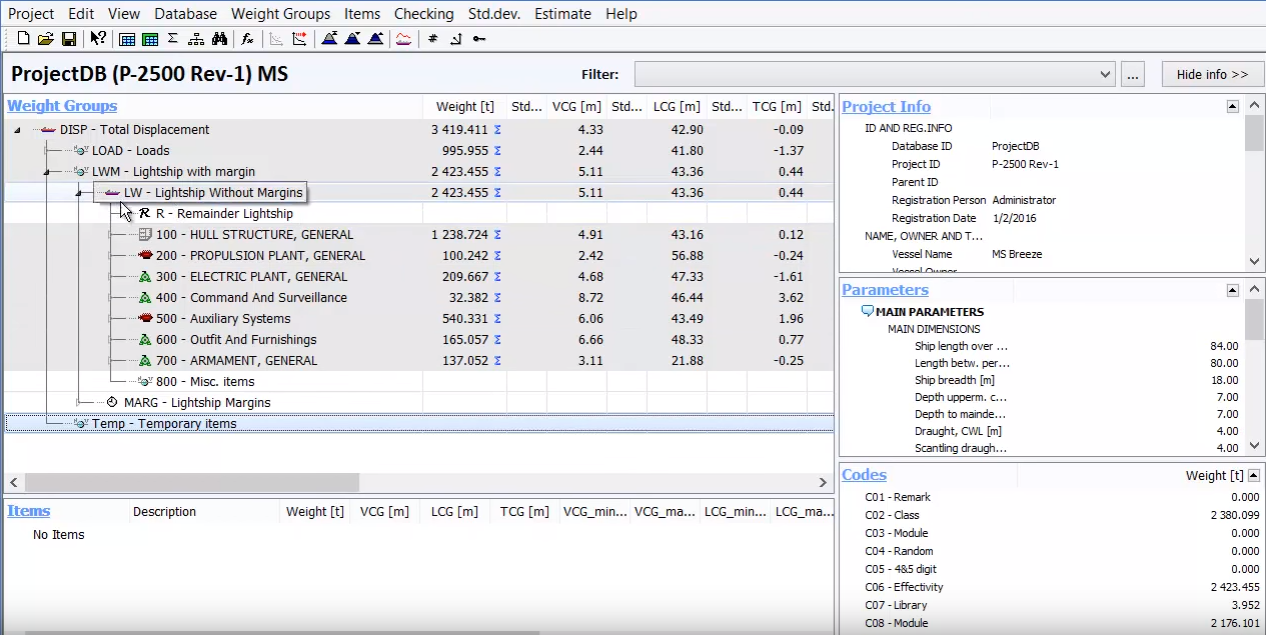
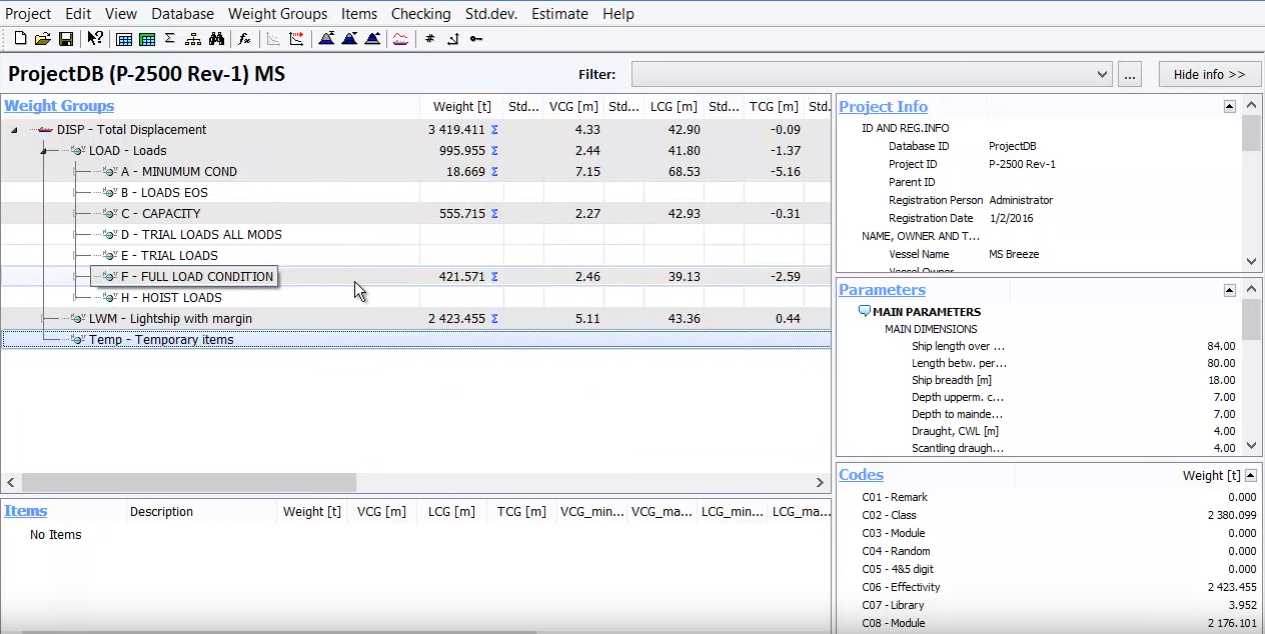
If we expand the load group, we will see that the load is made up by summarising A loads, C loads and F loads:
This is just a summary of all loading conditions, and thus the total displacement in this case which is the summary of the Loads and the Lightship doesn’t make sense, it does not represents one particular loading condition.
So, now we will apply global filters to set up various loading conditions, that would be meaningful, in the main window and also in running other functions in ShipWeight like weight distribution curve, gyradius function, and so forth.
We will create loading conditions using the global filter. The global filter setting can be seen in the upper right side:
Click the browse button (to the right of the Filter droplist). The Filter window will open:

Now we will create gloval filters for our various loading conditions. First we will create a lightship condition for the lightship weight. Start by giving a filter name, and create the actual filter as following:
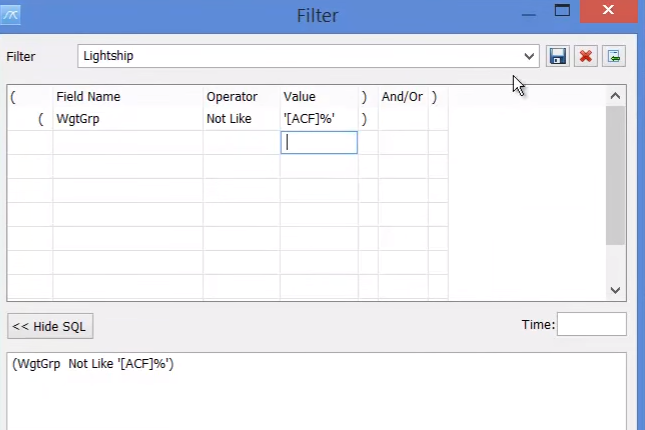
Global filter setup:
(WgtGrp Not Like ‘[ACF]%’)
meaning: SWBS groups should not start with A, C, or F
Then press the Save button.
In the window below we can see the global filter was created:

This filter means that we should not include weight groups that starts either with ACF and weight groups that starts with this having other letters or numbers after these letters (this is what the percentage % represents).
Now, we will create a filter for the full load condition:
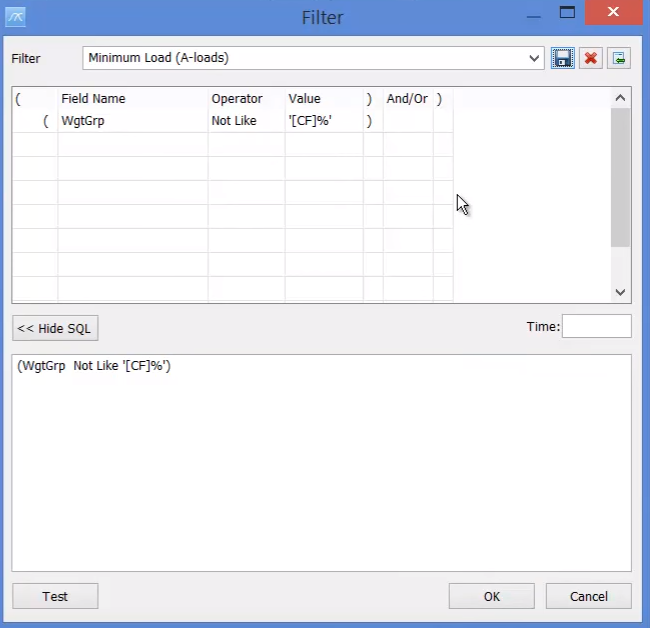
And also define minimum load filter:
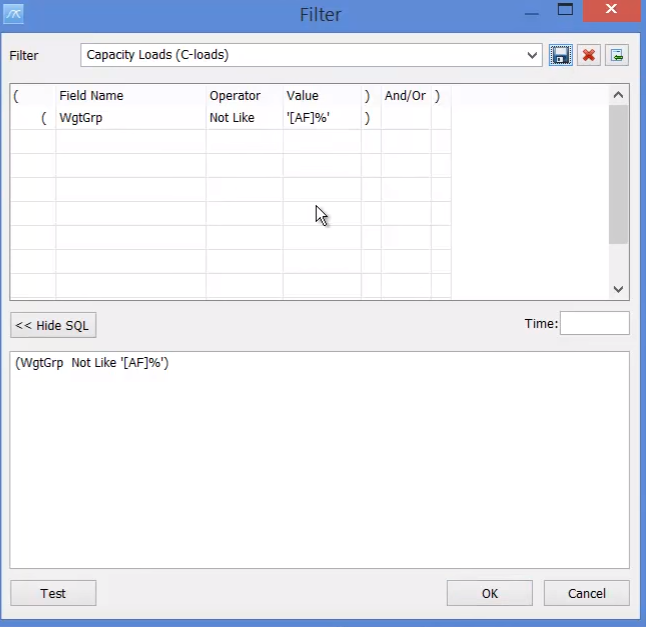
And finally the Capacity loads filter:
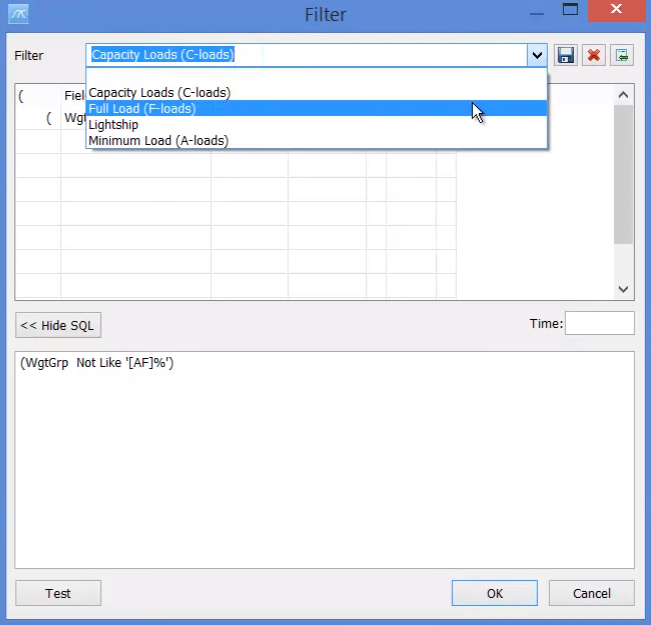
So now, all the needed filters are created and available in the dropdown list:
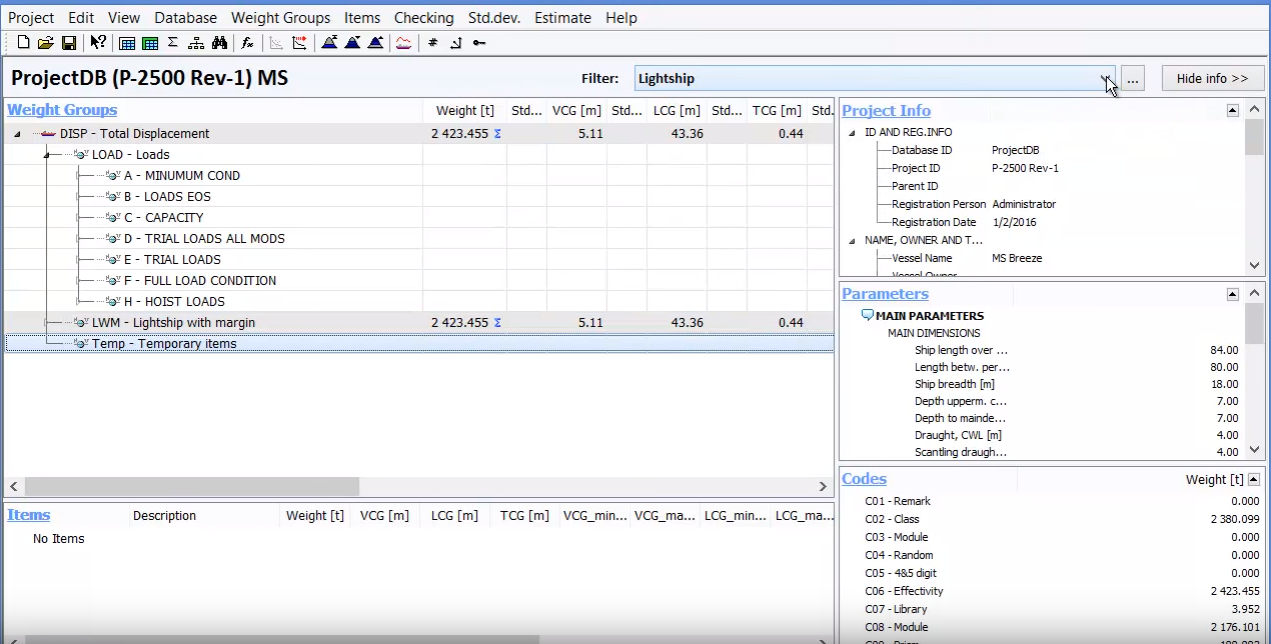
Select from the list, the Lightship filter and then press OK. It will be visible in the Filter area:
Starting with the lightship filter, it will remove all the other loads, and we are left only with the lightship:
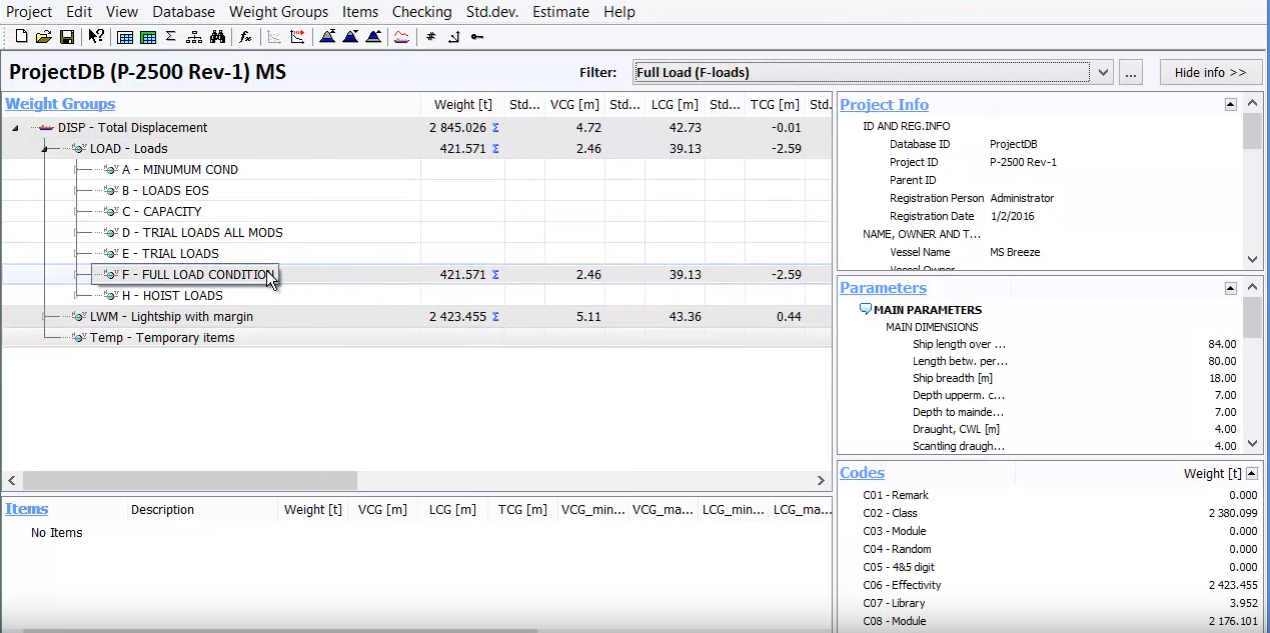
Now if we pick from the filter’s list the Full load, it will show in the tree the lightship and also the full loads values:
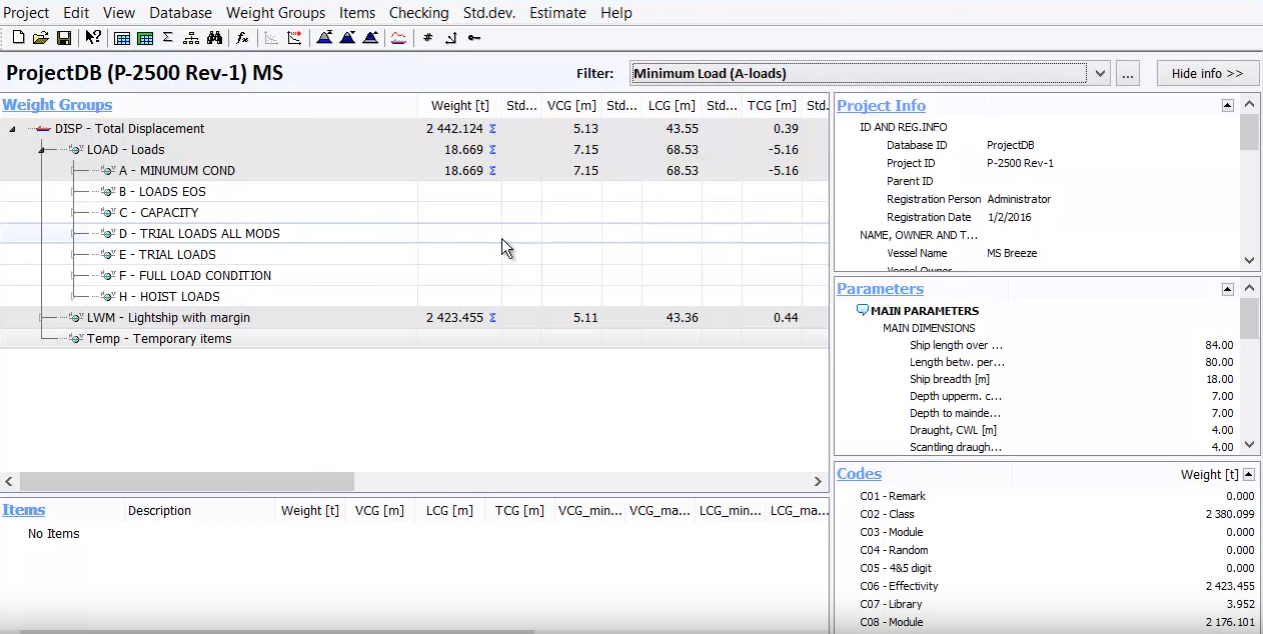
We can also check Minimum Load filter:
All the filters are global, meaing that they will be valid, not only for the main screen, but also for the item window, without the details, now we only see A Loads and Lightship items, and also when running weight distribution curve, gyradius, etc. then these functions in the ShipWeight application can now be run for these global filter settings.
Step 8: Running a Displacement Test Report
In this chapter we will look at how to calculate a new lightship and center of gravity weight after a displacement and inclining test have been done. We will do this by setting up a project to hold temporary items and to distinguish between installed and uninstalled items and then we will use Crystal reports to calculate the lightship and center of gravity.
Right now we are looking at a project and in this project we have already created some custom codes:
And we called the needed custom code C06 installed:
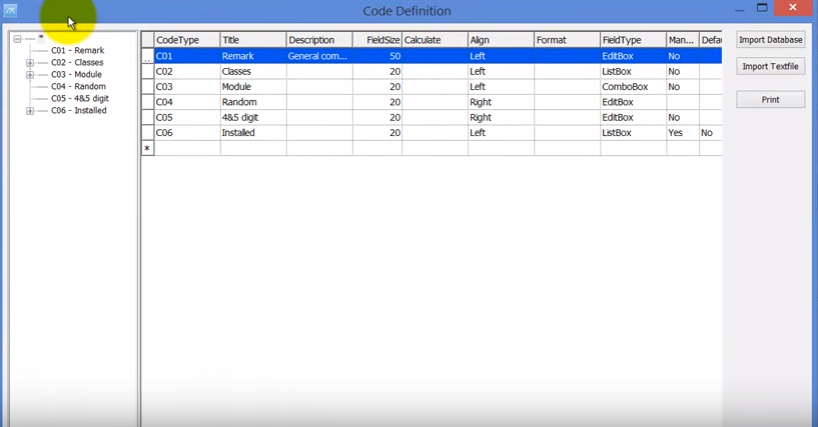
The C06 code it is a listbox with two subcodes No and Yes:
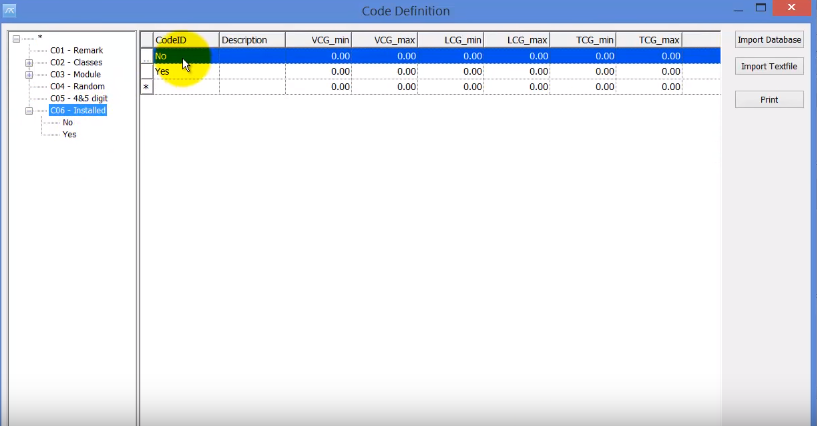
The naming of the custom code and the CodeID can be anything you choose. We need to have this custom code to distinguish wether an item is installed or not installed on the vessel.
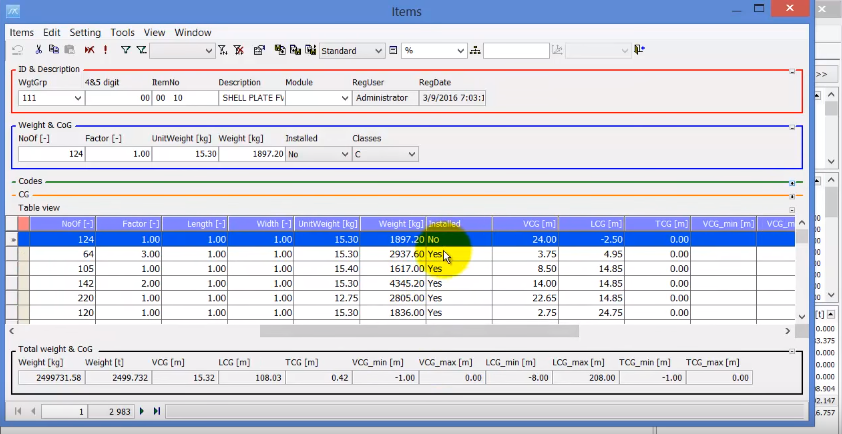
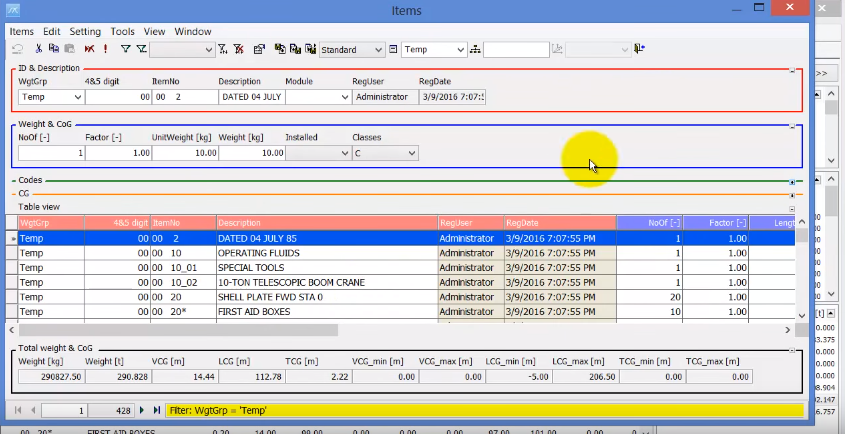
In the Items window these items are tagged in this way, so in this word there is nothing special about the code:
Another thing we need to do is to put all items that are on the vessel, but they are not part of the lightship weight, in other words they are temporary items that are onboard vessel during the displacement and inclining test, but should not be there during the delivery of the vessel and should not be included in the lightship weight. And these items, we have addded them to the temporary group:
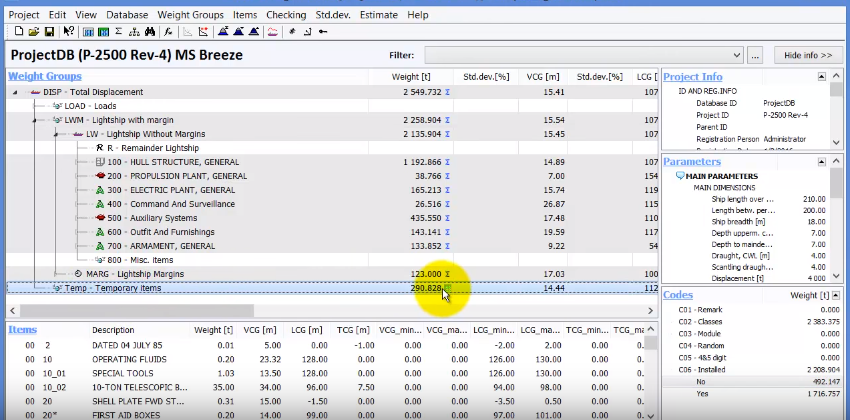
So the temporary group have now a list of items that will be taken off before the dlivery of the vessel:
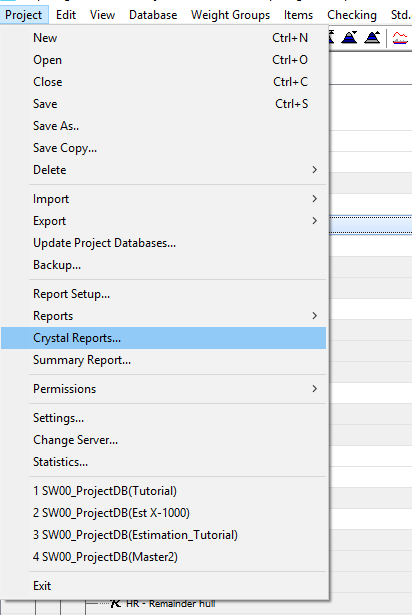
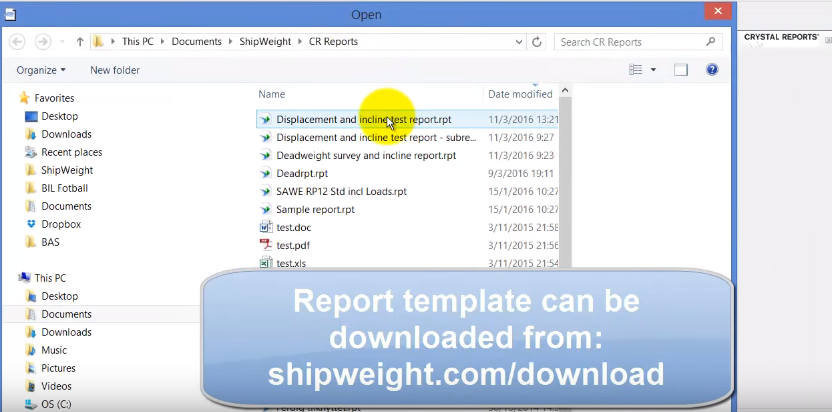
Now go to Project menu and find Crystal Reports:
To open up the crystal reports viewer:
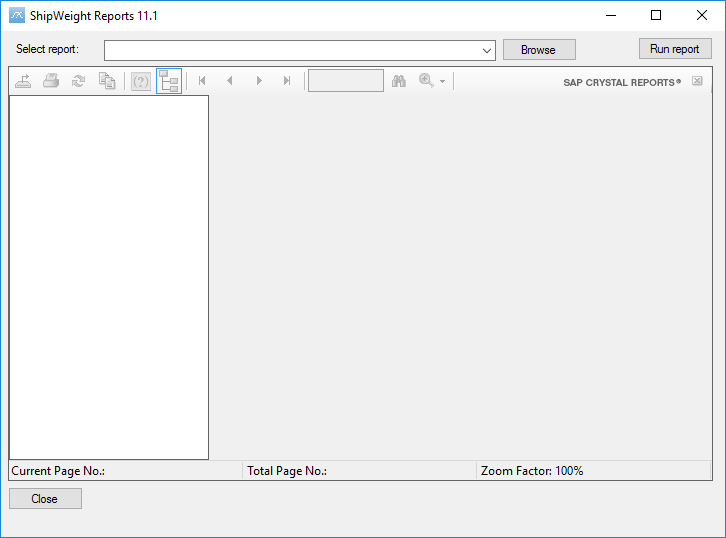
And here you press Browse button and find the Displacement and Incline test report.rpt
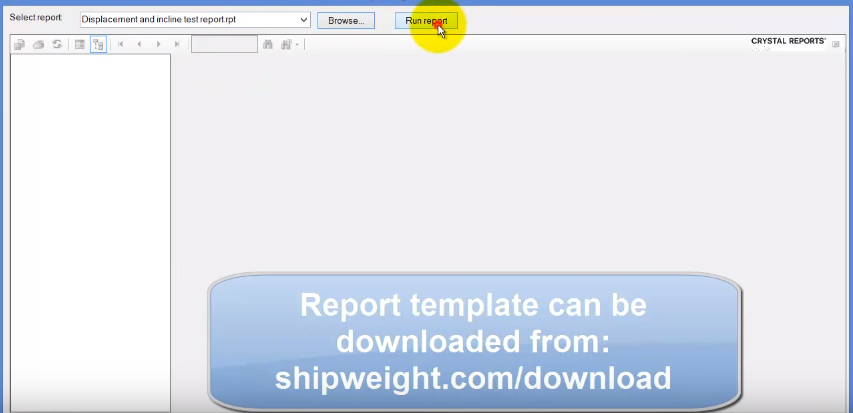
Then, you can simply press the Run report button:
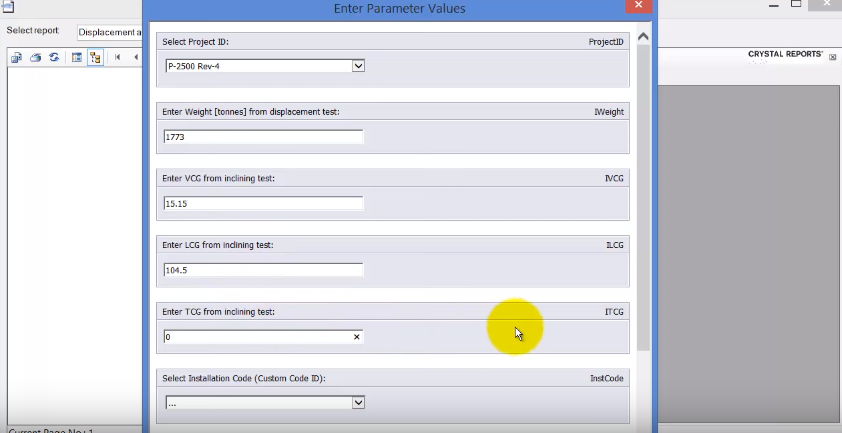
And then the Filter window opens up, to allow you to input some parameters:

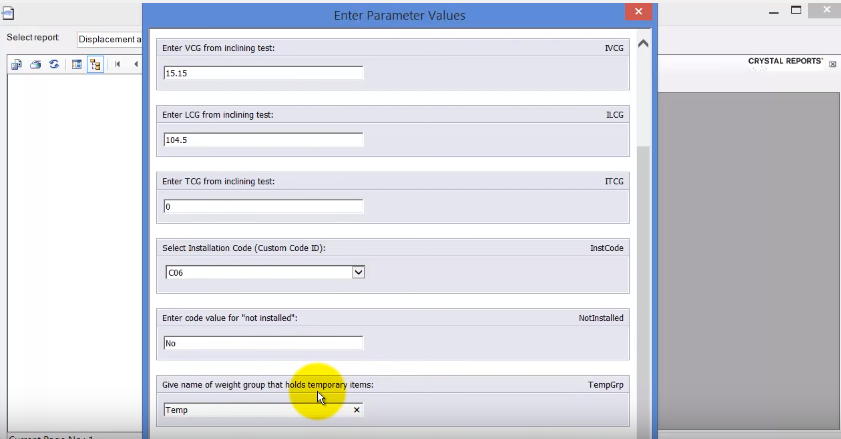
Fill in the parameters:
And more down below:
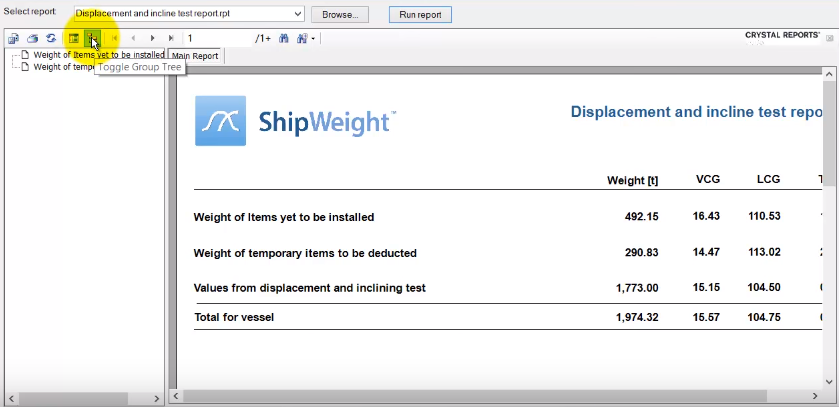
Now click OK button and the report is running:
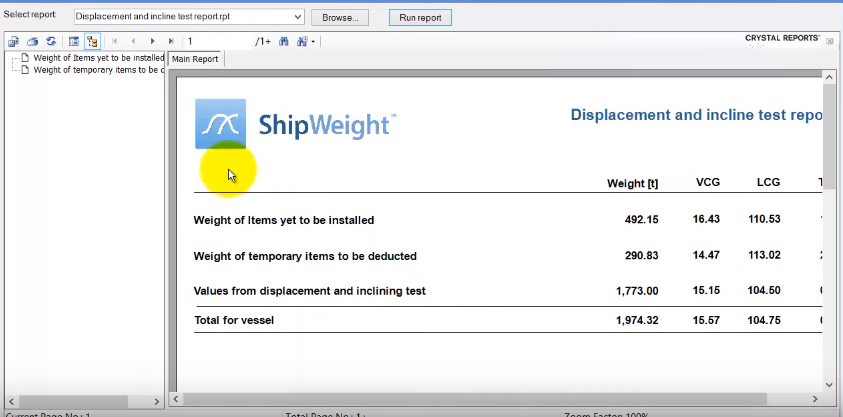
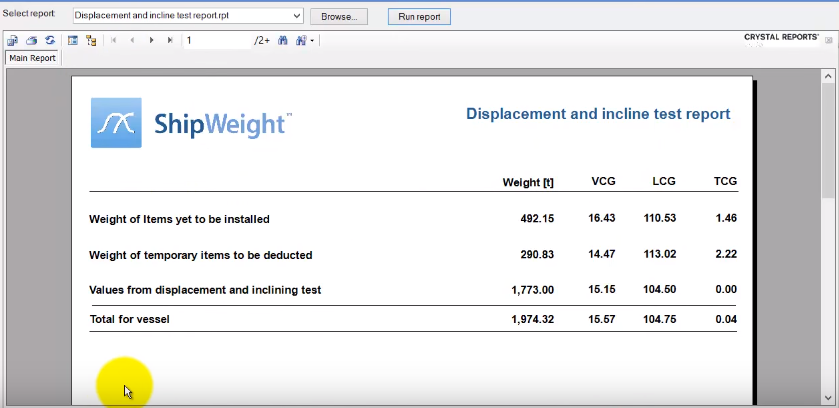
And the report has at least two pages:
One summary page showing the weight and center of gravity:

The next page starts to list the details of the weight of the items yet to be installed:
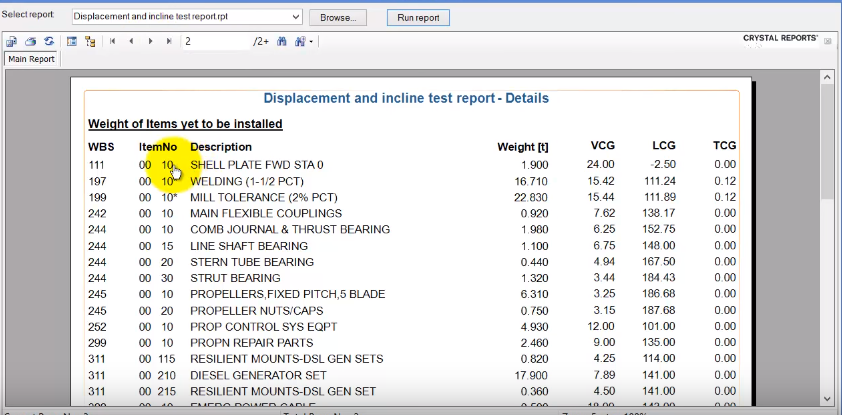
And later on also the details of the items in the temporary groups.
And then is the summary on the main page: