This section will give an introduction to the parametric estimation in ShipWeight
Step 1: Start ShipWeight and Log on
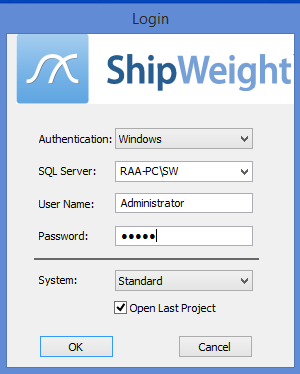
Start ShipWeight and log in to ShipWeight using the user name “Administrator” and password “admin”.
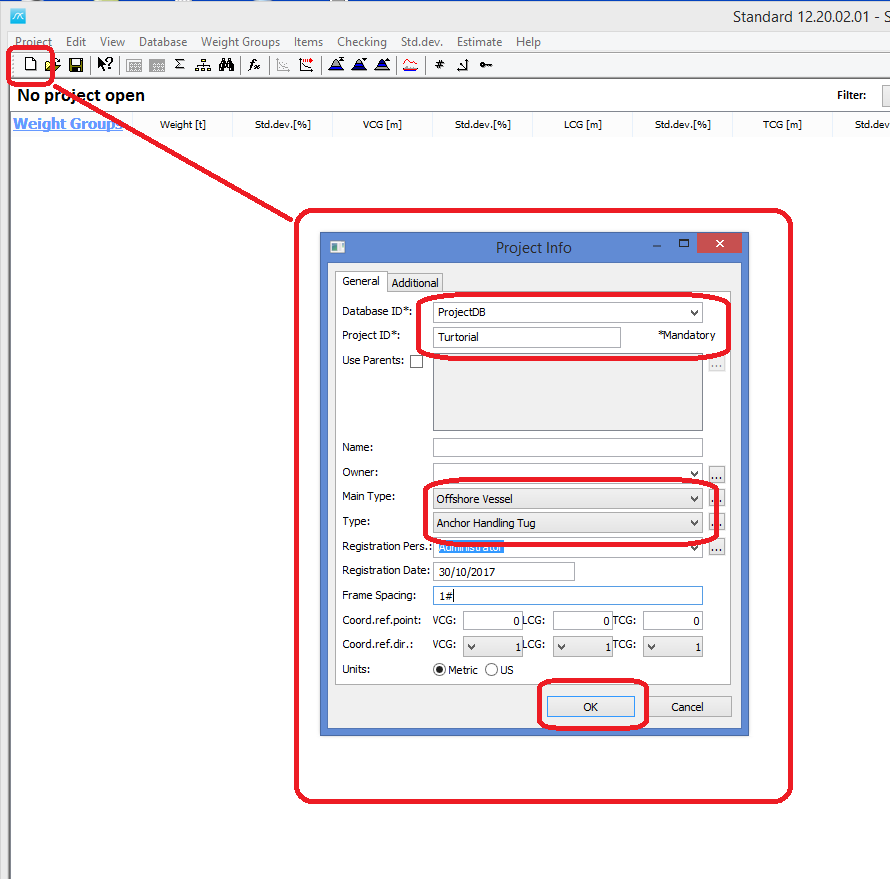
When ShipWeight opens, click the “New” button on the toolbar and select “ProjectDB” as Database ID, set “Tutorial” as Project ID, and select Main Type “Offshore Vessel” and sub type “Anchor Handling Tug”. You may also give in a vessel name if you’d like, but this is not necessary. Hit the “OK” button.
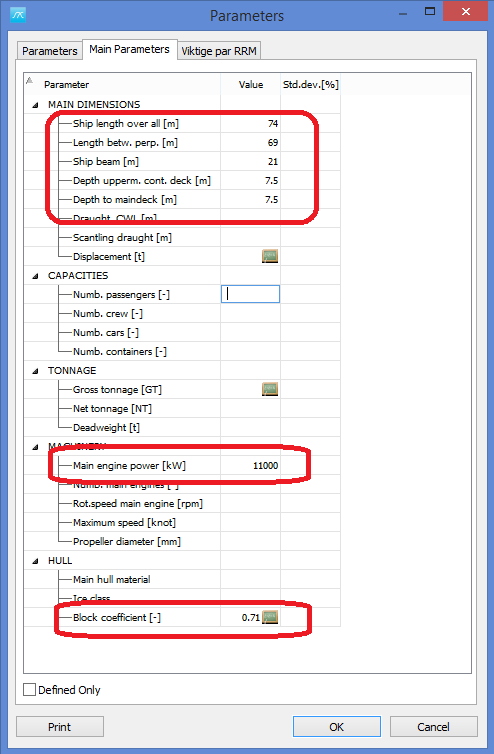
In the “Main Parameter” window that shows up, give in at least the parameters as shown above. You may give in other parameters as well if you like.
Step 4: Select the Demo Ship Historical Database
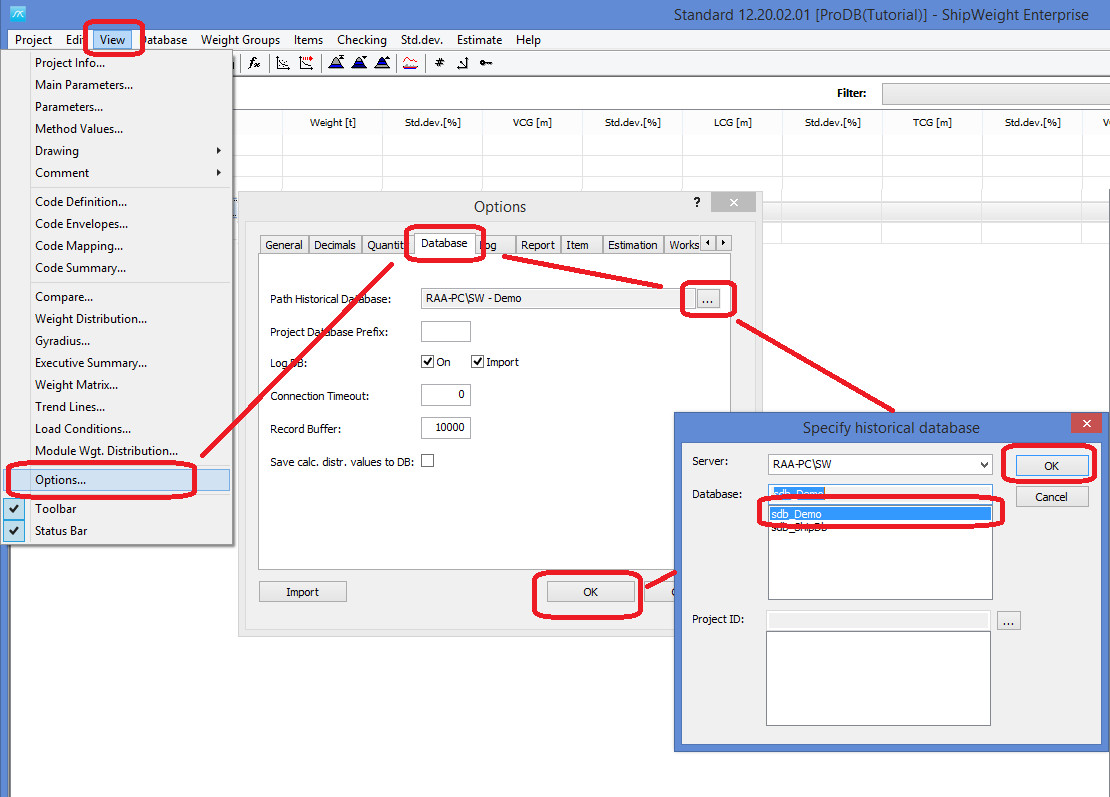
Next, go to the View menu and select the “Options…” window. Click the “Database” tabsheet in the Options window, and select the “Browse” […] button next to the “Path Historical Database”. In the pop-up window from the browse, select the “sdb_Demo” database in the list and hit the “OK” button. Next, hit the “OK” button on the Options window.
Step 5: Activate the Demo Ships in Reference Project Window

Next, head to the “Estimate” menu and select “Reference Projects…” window. In this window, selec the “Include all” button and hit “OK” button. This activates all the reference projects that in the demo database that was selected in previous step. We now have a basis ready for the parametric estimation.
Step 6: Select the Lightship Weight Group and Open the Estimation Window
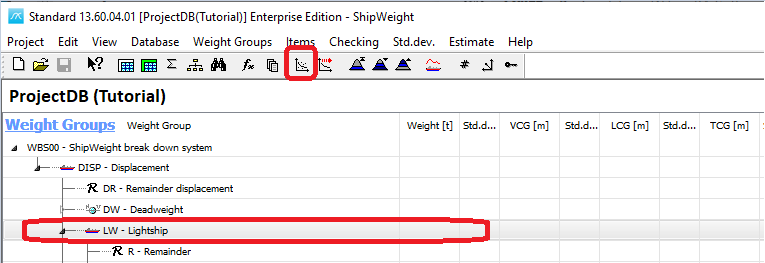
Select the “LW – Ligthship” group in the main window WBS and clikc the estimation graph button in the toolbar to open the estimation window. We are now ready to estimate the Ligthship.
Step 7: Estimate Lightship Weight
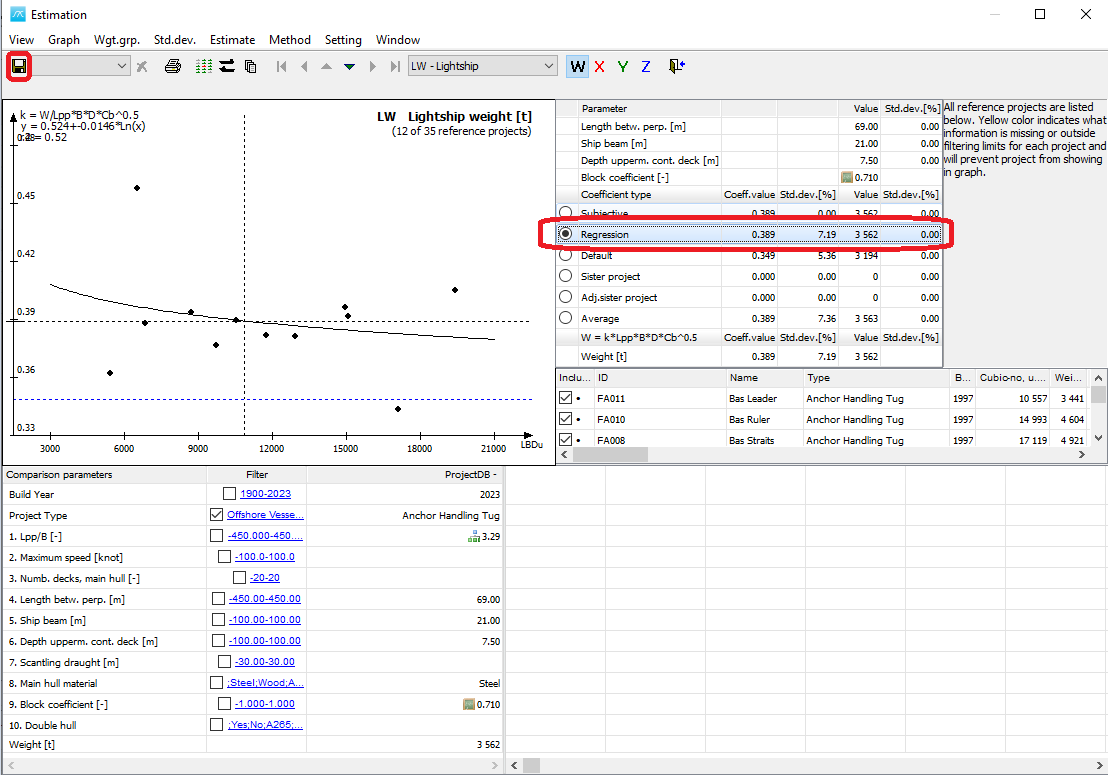
In the graph window, select the “Regression” radiobutton to execute an estimation based upon selecting a coefficient for the method from the regression line. Next, click the “Save” button to save your initial Lightship estimate.
Step 8: Estimate Lightship VCG
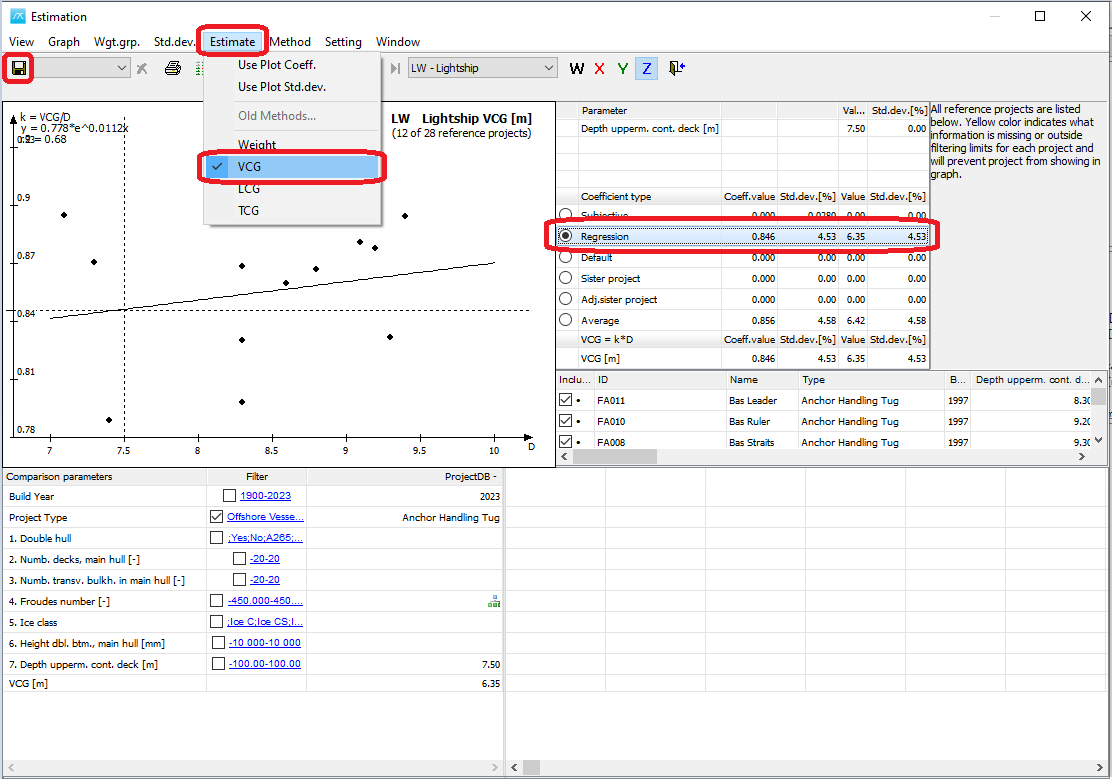
Go to the “Estimate” menu in the Estimation window and select “VCG” to start estimating the initial LightShip VCG value. Selct the “Regression” radiobutton to estimate the VCG value for the lightship and hit the “Save” button on the toolbar to save.
Step 9: Estimate Lightship LCG
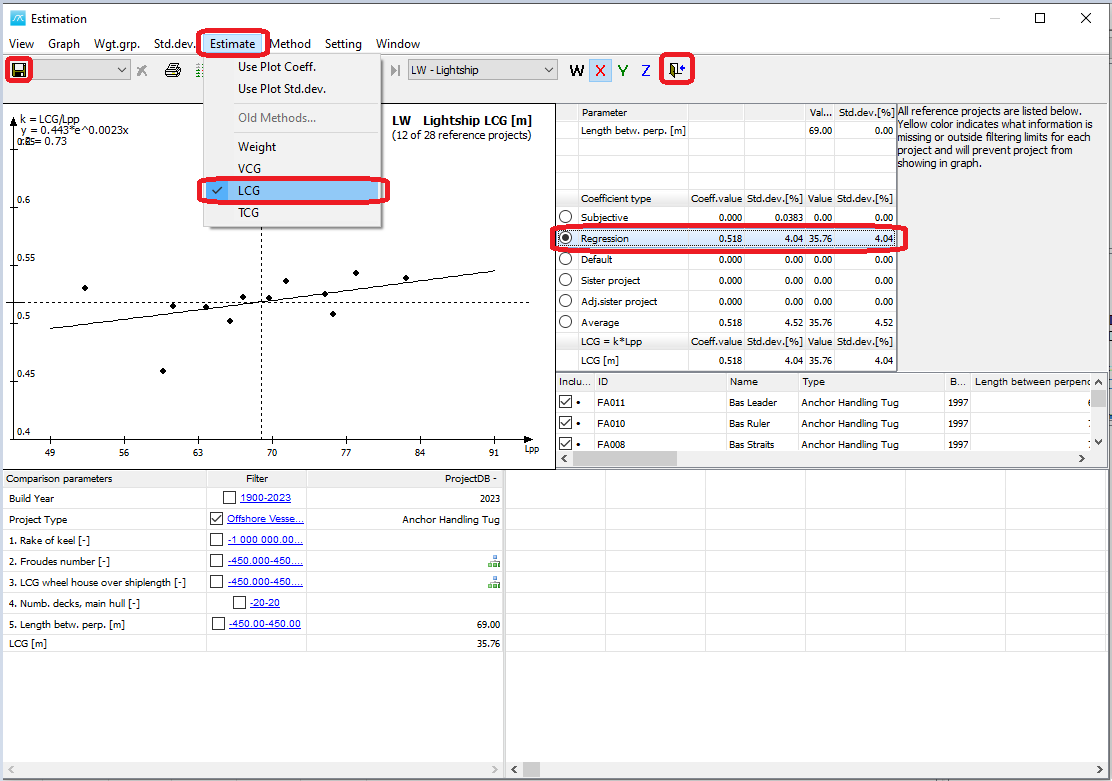
Repeat the same steps as above, but now for selecting the LCG instead of VCG, and after this, close the window by clicking the Close (Door) button on the toolbar.
Step 10: Lock Lightship Estimate and Select Subgroup
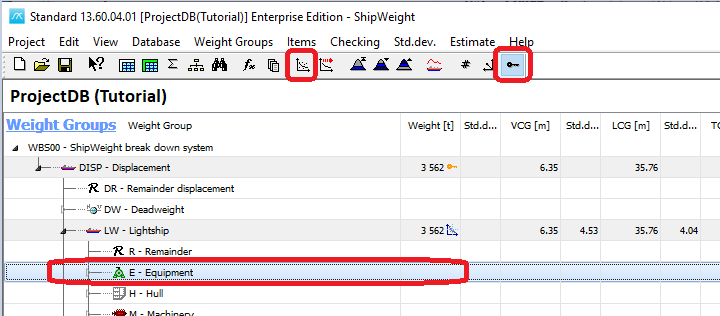
You should now see the results of the Lightship estimation in the main window. Click the Lock (key) button on the right end of the toolbar to lock the estimated numbers before we go refine the estimate. Next, select the “Equipment” weight groups in the main window and once again click the graph icon on the toolbar to open the Estimation window.
Step 11: Estimate Weight of Equipment Group
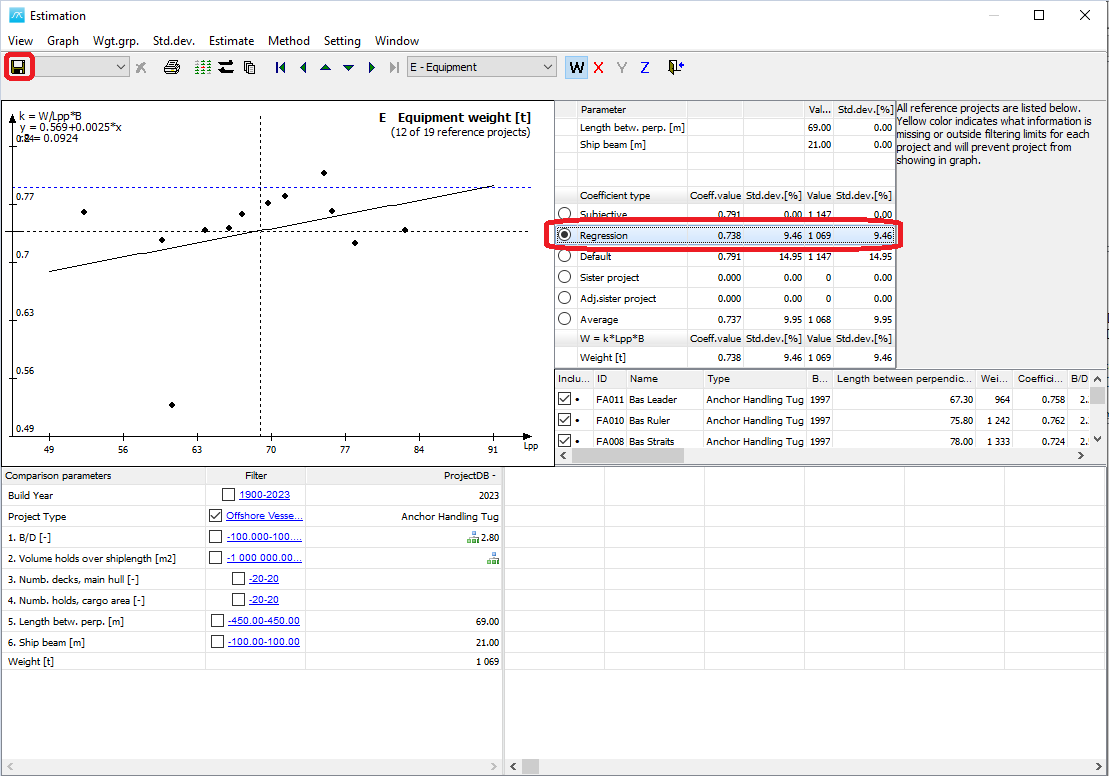
Repeat the steps from the Lightship estimation: Select the “Regression” radiobutton to execute an estimation based upon selecting a coefficient for the method from the regression line. Next, click the “Save” button.
Step 12: Estimate VCG of Equipment Group
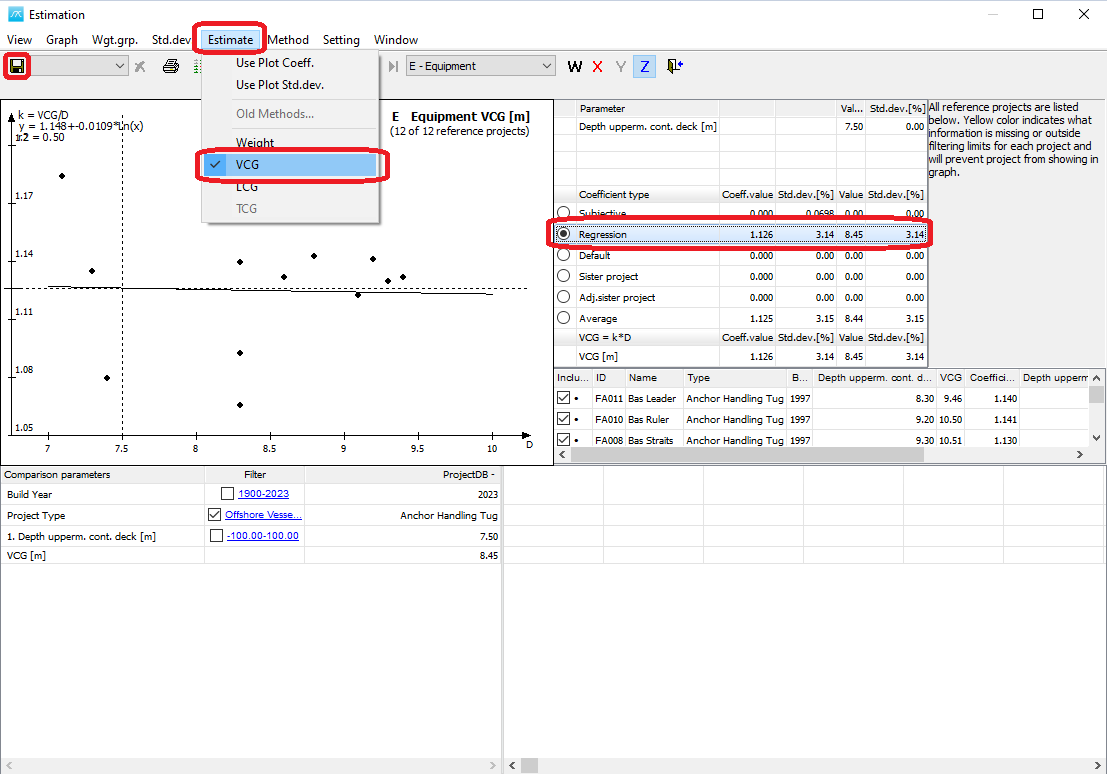
Repeat the steps from the Ligthship VCG estimation: Go to the “Estimate” menu in the Estimation window and select “VCG” to start estimating the initial Equipment VCG value. Select the “Regression” radiobutton to estimate the VCG value for the equipment and hit the “Save” button on the toolbar to save.
Step 13: Estimate LCG of Equipment Group
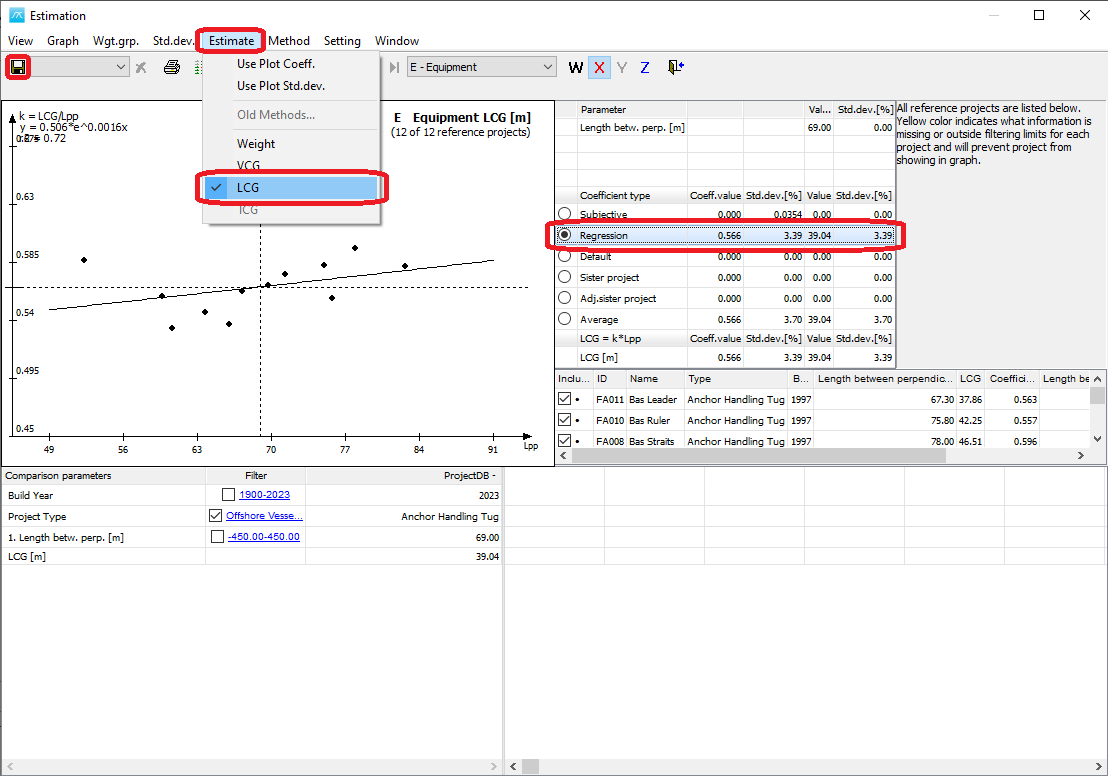
Repeat the steps from the Ligthship LCG estimation: Go to the “Estimate” menu in the Estimation window and select “LCG” to start estimating the initial Equipment LCG value. Select the “Regression” radiobutton to estimate the LCG value for the equipment and hit the “Save” button on the toolbar to save.

Click the toolbar button with the right arrow as marked above to move to the next weight group on the same level (Hull) without closing the estimation Window.
Step 15: Change Weight Estimation Formula for Hull
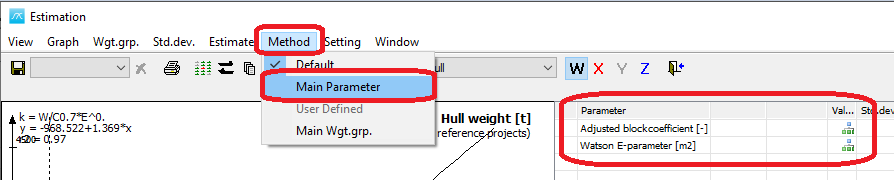
In the Hull weight group the standard formula is using the Watson E-parameter. We do not have the details at hand to fill this in, so instead we will change formula. Go to the “Method” menu and select Main Parameter as the method to use instead of the Default method. The method will now change to a formula only containing the main parameters and we do not have to enter more information to carry out the estimation.
Step 16: Estimate the Hull Weight
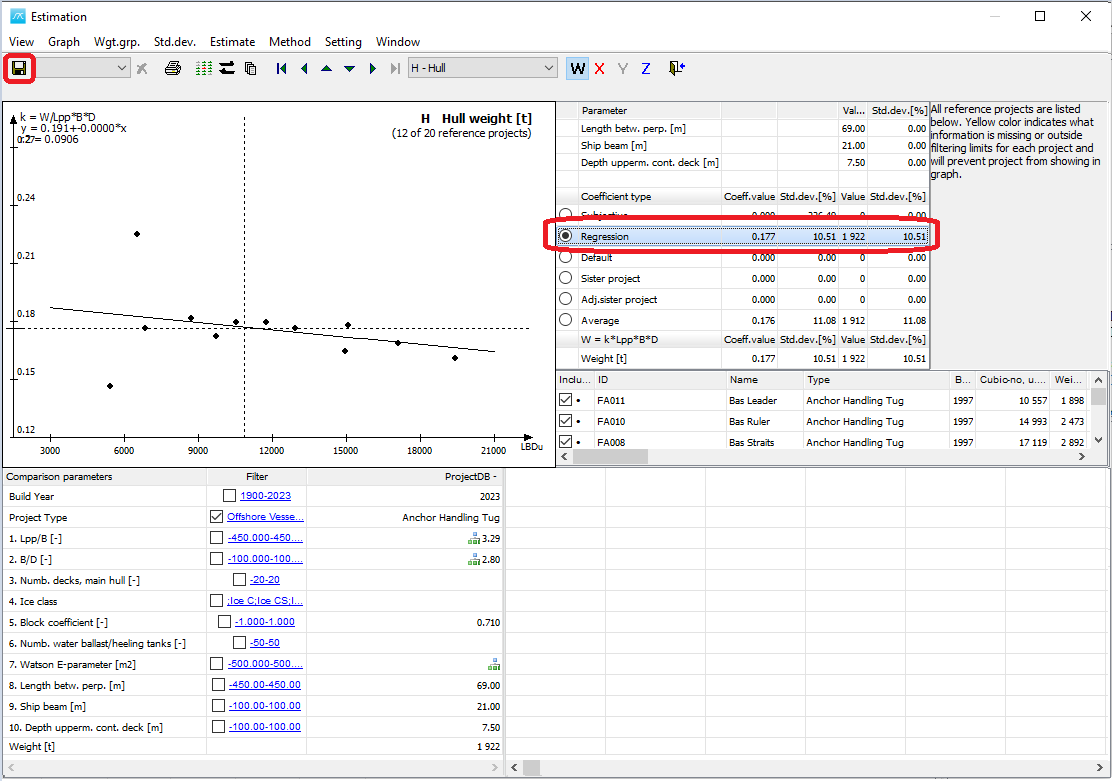
Now estimate the Hull weight by selecting the “Regression” radiobutton and save the result.
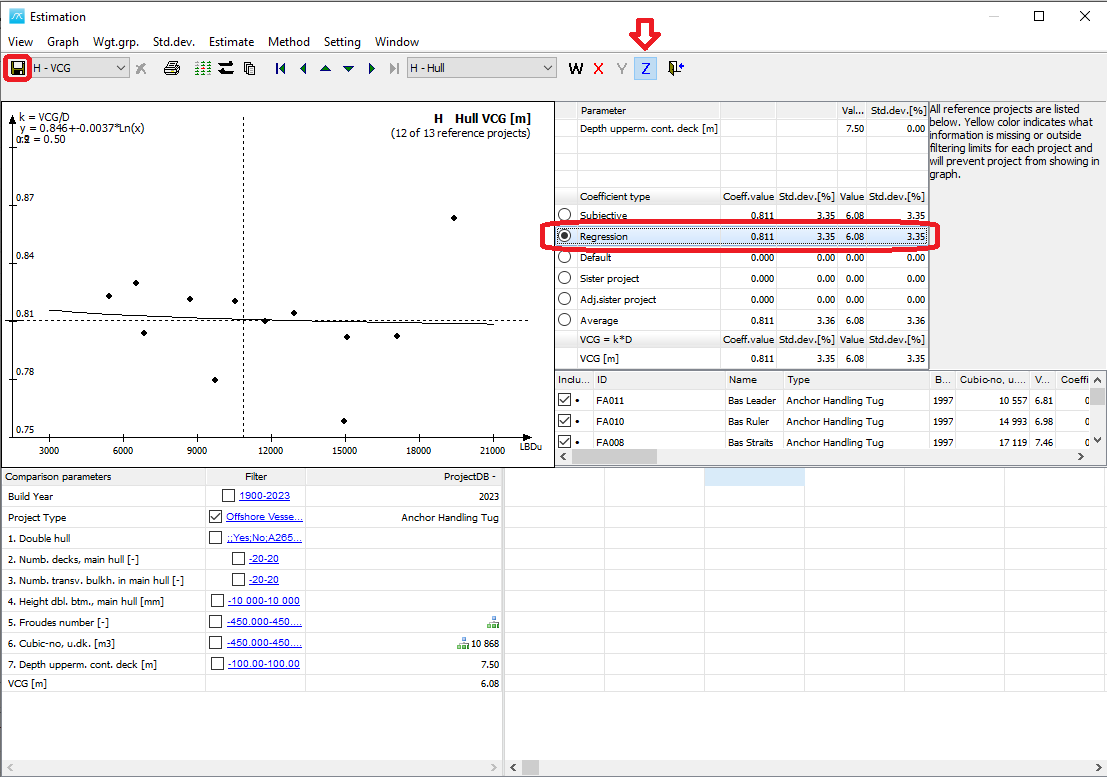
Step 17: Estimate the Hull VCG
Next, switch to VCG estimation by clicking the Z button to the left for the door button.

Then carry out this estimation by again selecting the ”Regression” coefficient and finally again save the result.
Notice that Z button is highlighted to indicate the estimate that is selected.
Step 18: Estimate the Hull LCG

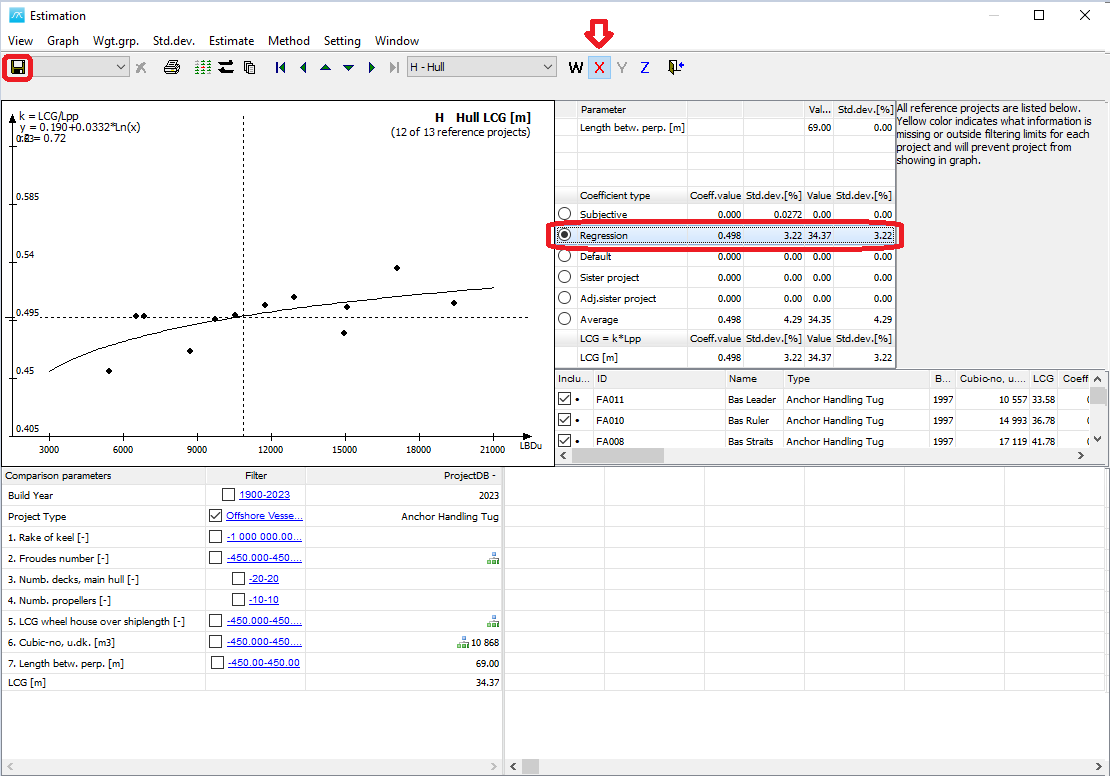
Repeat the steps you just did for the VCG estimation, only this time for the LCG. The X in the menu indicate the LCG.
Step 19: Move to Machinery Group
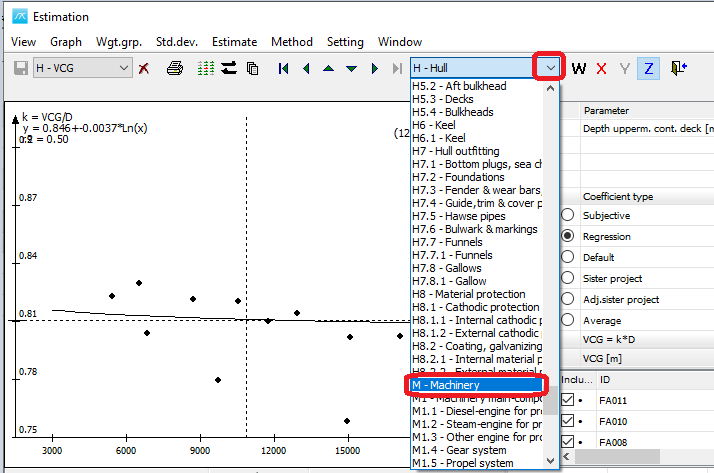
Click the drop down button to the right for the right arrow as marked above to move to the final weight group on the same level (Machinery) without closing the estimation Window.
Step 20: Set Power Range Limit to Filter Projects
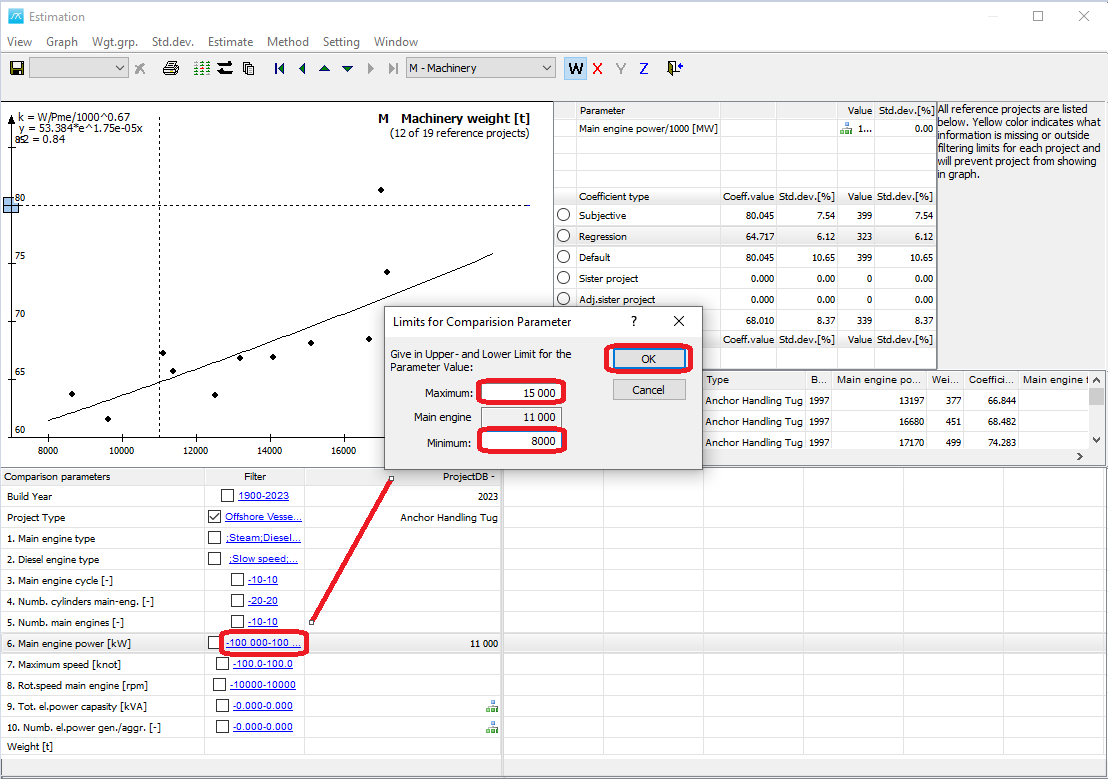
In the Machinery group, click the hyperlink next to the “Main engine power” parameter and in the pop-up window, set 15000 as maximum power and 8000 as minimum power as range for the propulsion data to be plotted in the graph. Hit OK button to close window.
Step 21: Estimate Machinery Weight
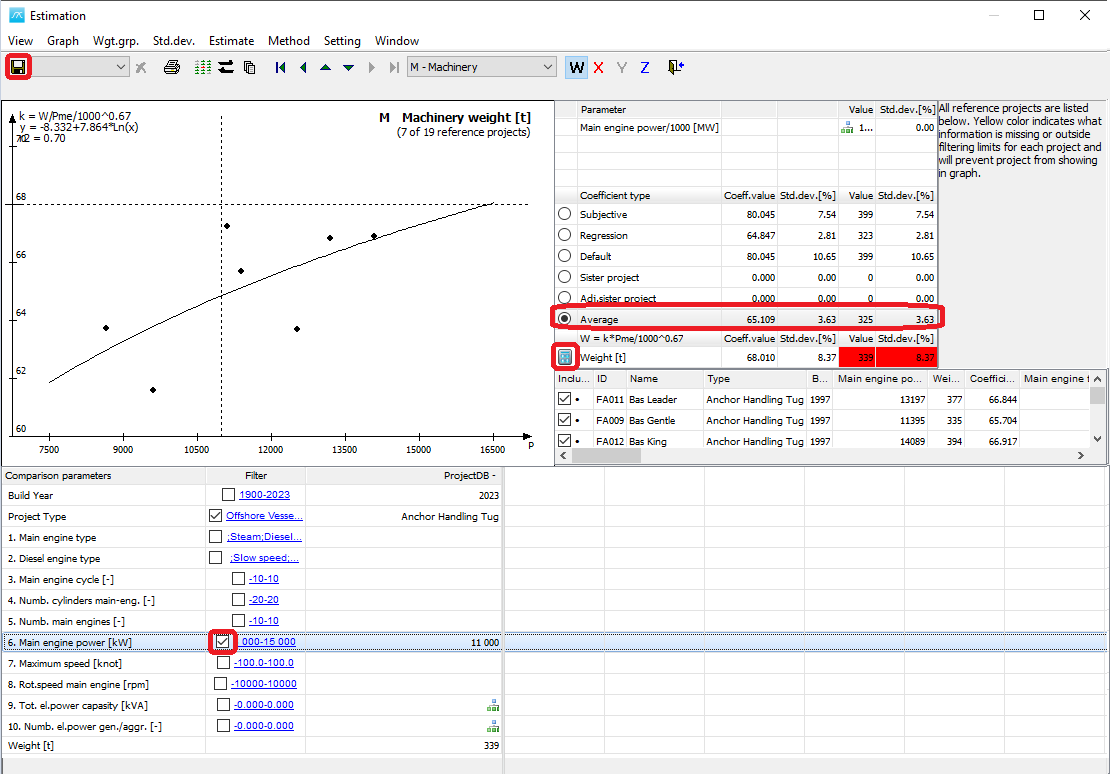
Check the checkbox to the left of the hyperlink where you just set the range for Main engine power to activate this as a filter for the projects plotted in the graph. Click the “Average” radiobutton to select the coefficient to be used in the estimation and to calculate the Machinery weight. Click the blue calculator that appear next to the Weight result to update the estimate and then save the result.
Step 22: Estimate Machinery VCG
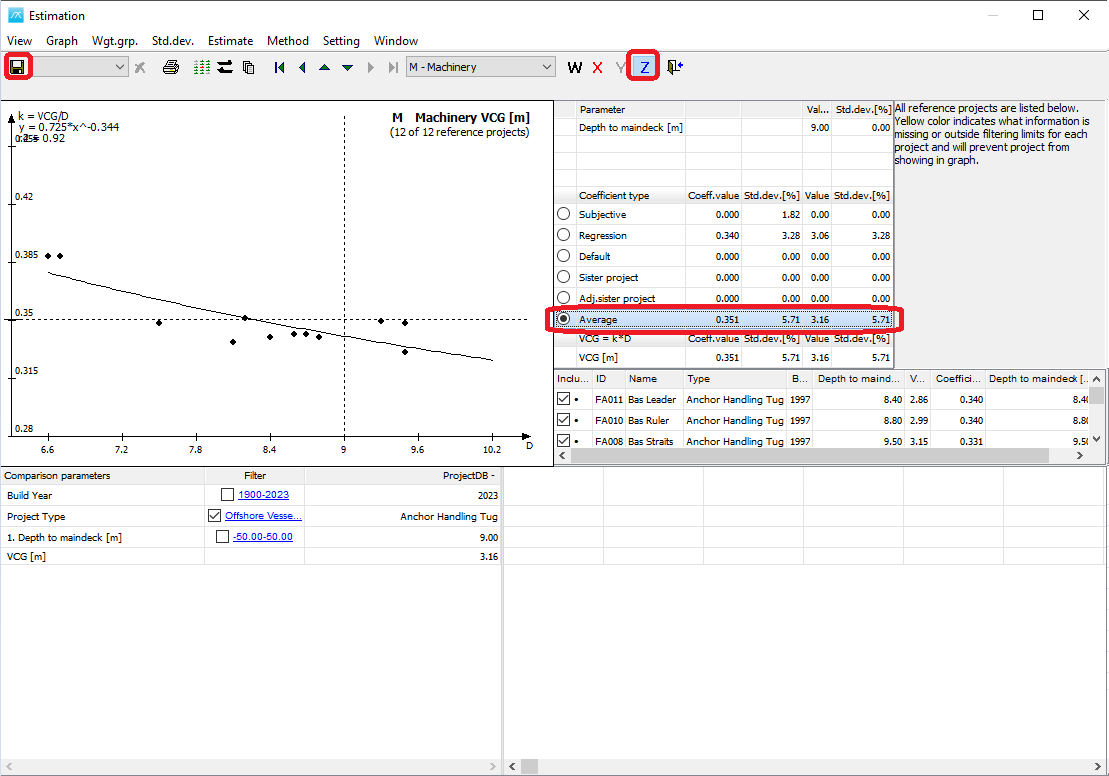
Change to the VCG estimate by clicking the X again. Carry out the estimation for the VCG by selecting the “Average” coefficient. Save the result.
Step 23: Estimate Machinery LCG
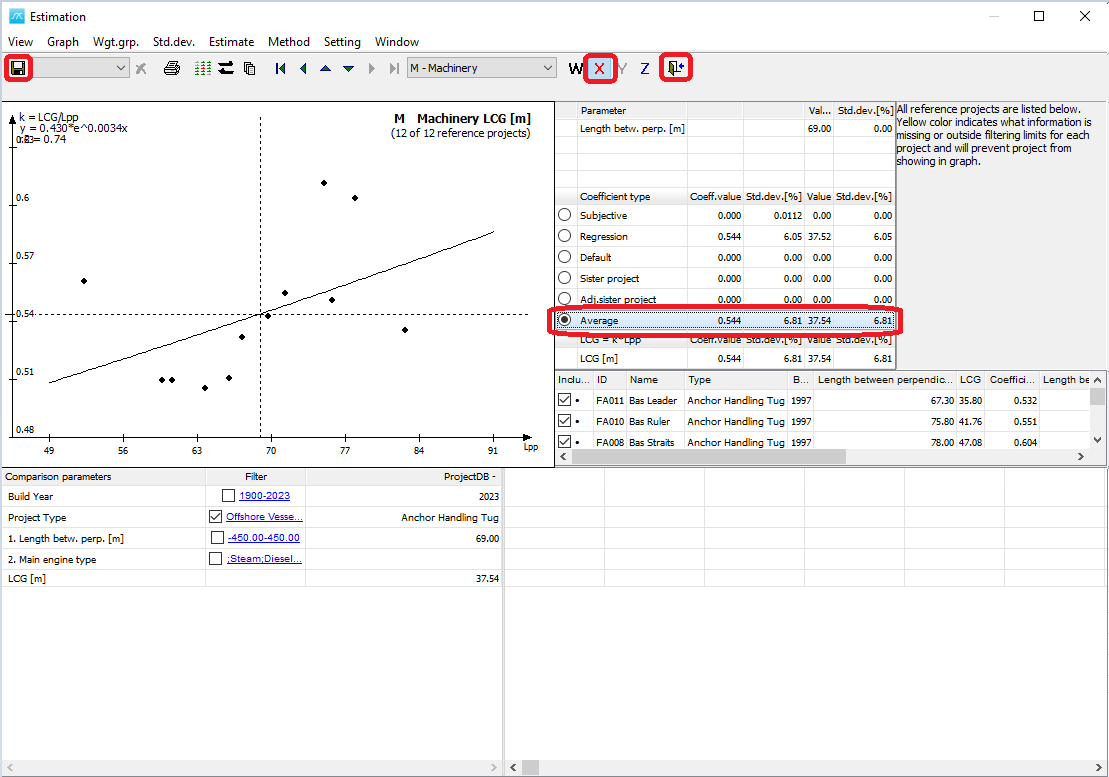
Carry out LCG estimation in similar fashion as for VCG, but in addition, after saving, close the Estimation window by clicking the Close button (door) in the toolbar.
Step 24: Check Results from Subgroups
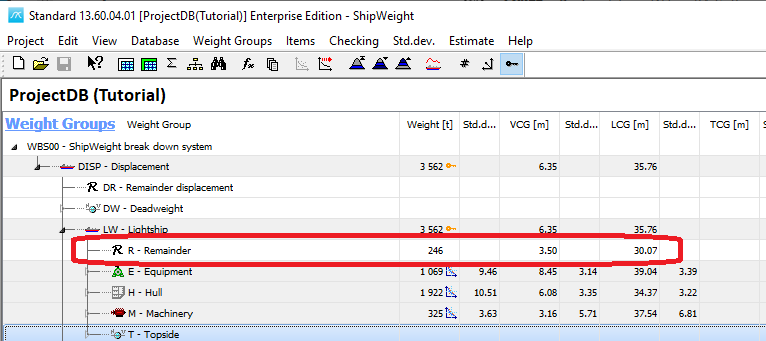
You should now see the results of your estimation of the sublevels. However, note the value in the “Remainder” group as this automatically gets the deviation between your initial estimation and the sum of the sublevel group estimations. This is because you locked the results after the Lightship estimate.
Step 25: Remove the Remainder Value

Unlock the results and delete the Remainder value by clicking on the Remainder weight grid to get it to edit modus and delete the weight value. The results of the Lightship will after this become the sum of the subgroups.
Step 26: Select Your Company Logo for Reports
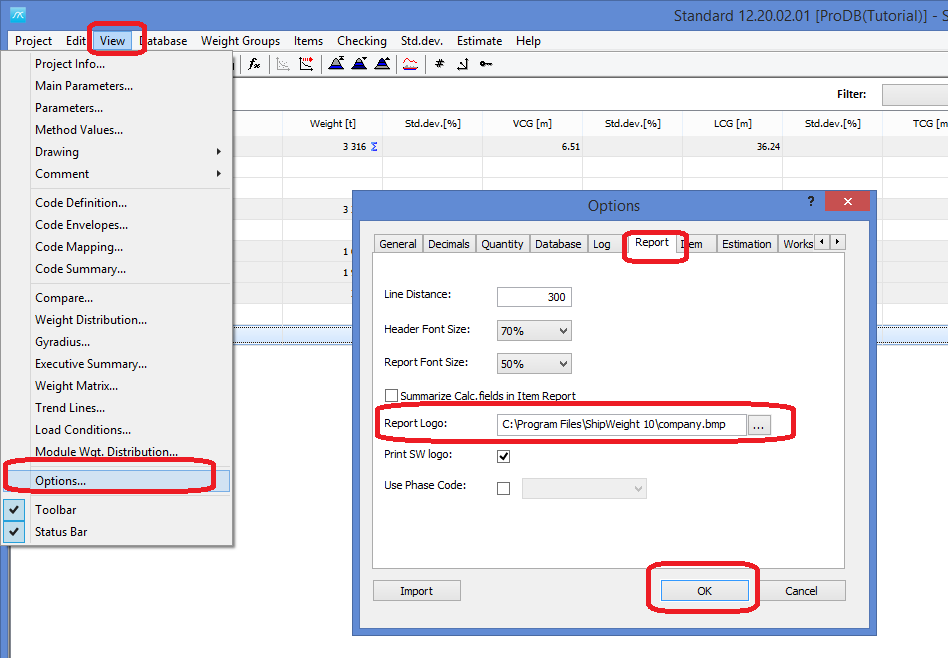
Go to the View menu and open the Options window. Select the “Report” tabsheet and click the browse button […] to select a company logo file. Hit the OK button.
Step 27: Print a Result Report
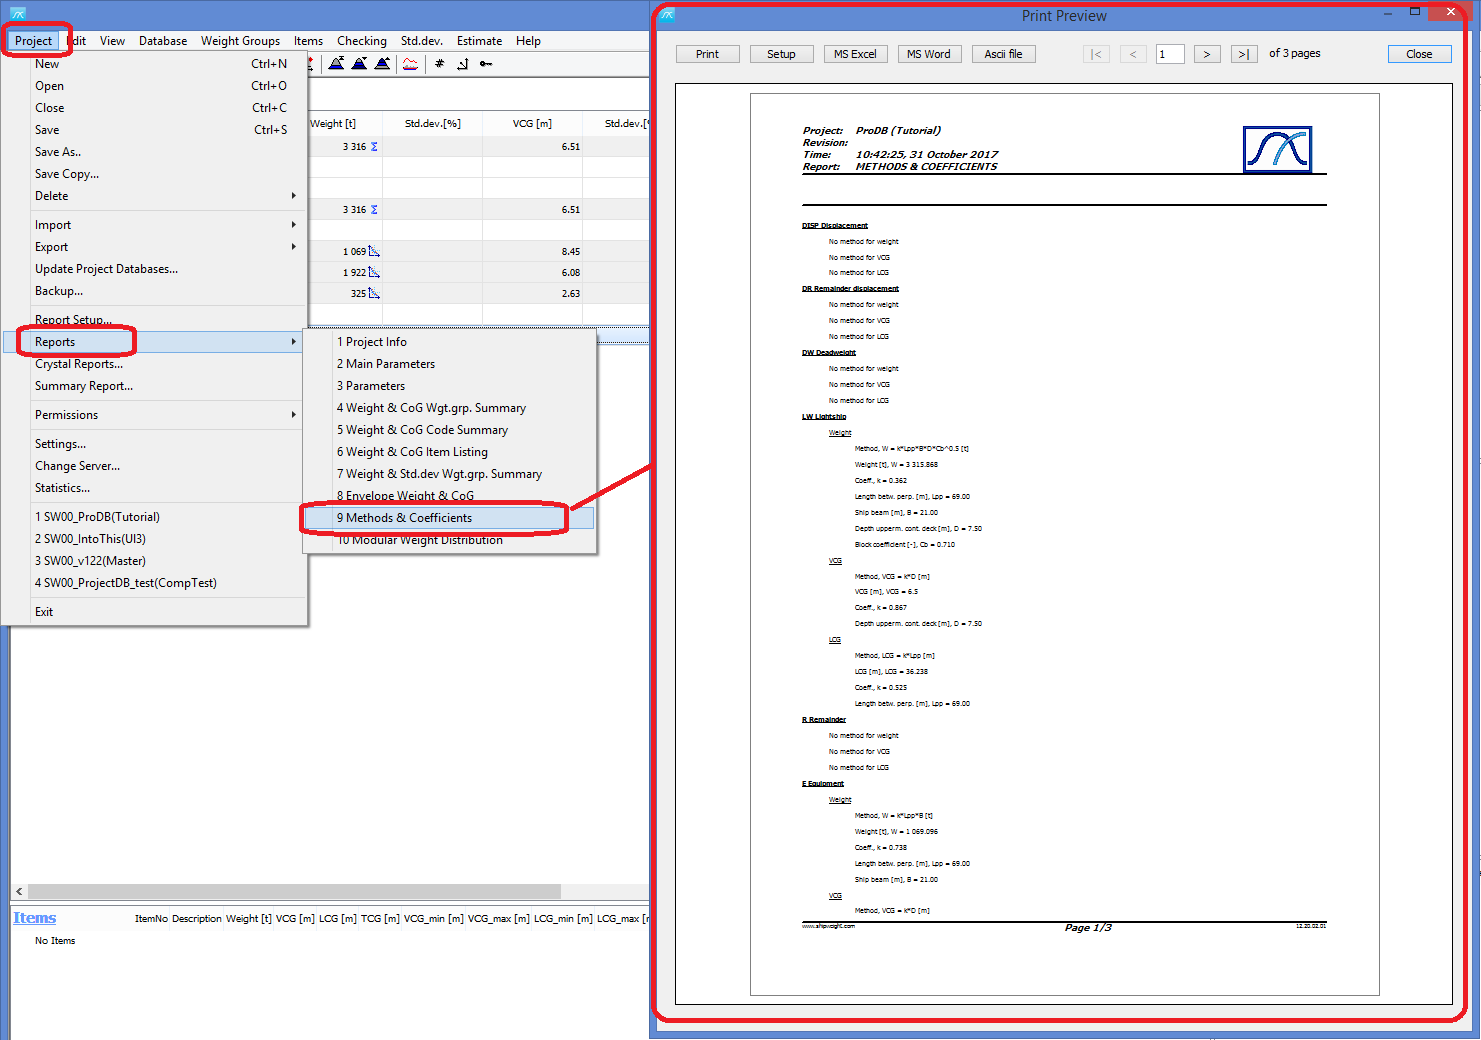
Go to the Project menu, select submenu Reports and select submenu item for report number 9 – “Methods and Coefficients” to produce a report of the estimation you have just finished.
Step 28: Print a Detailed Report
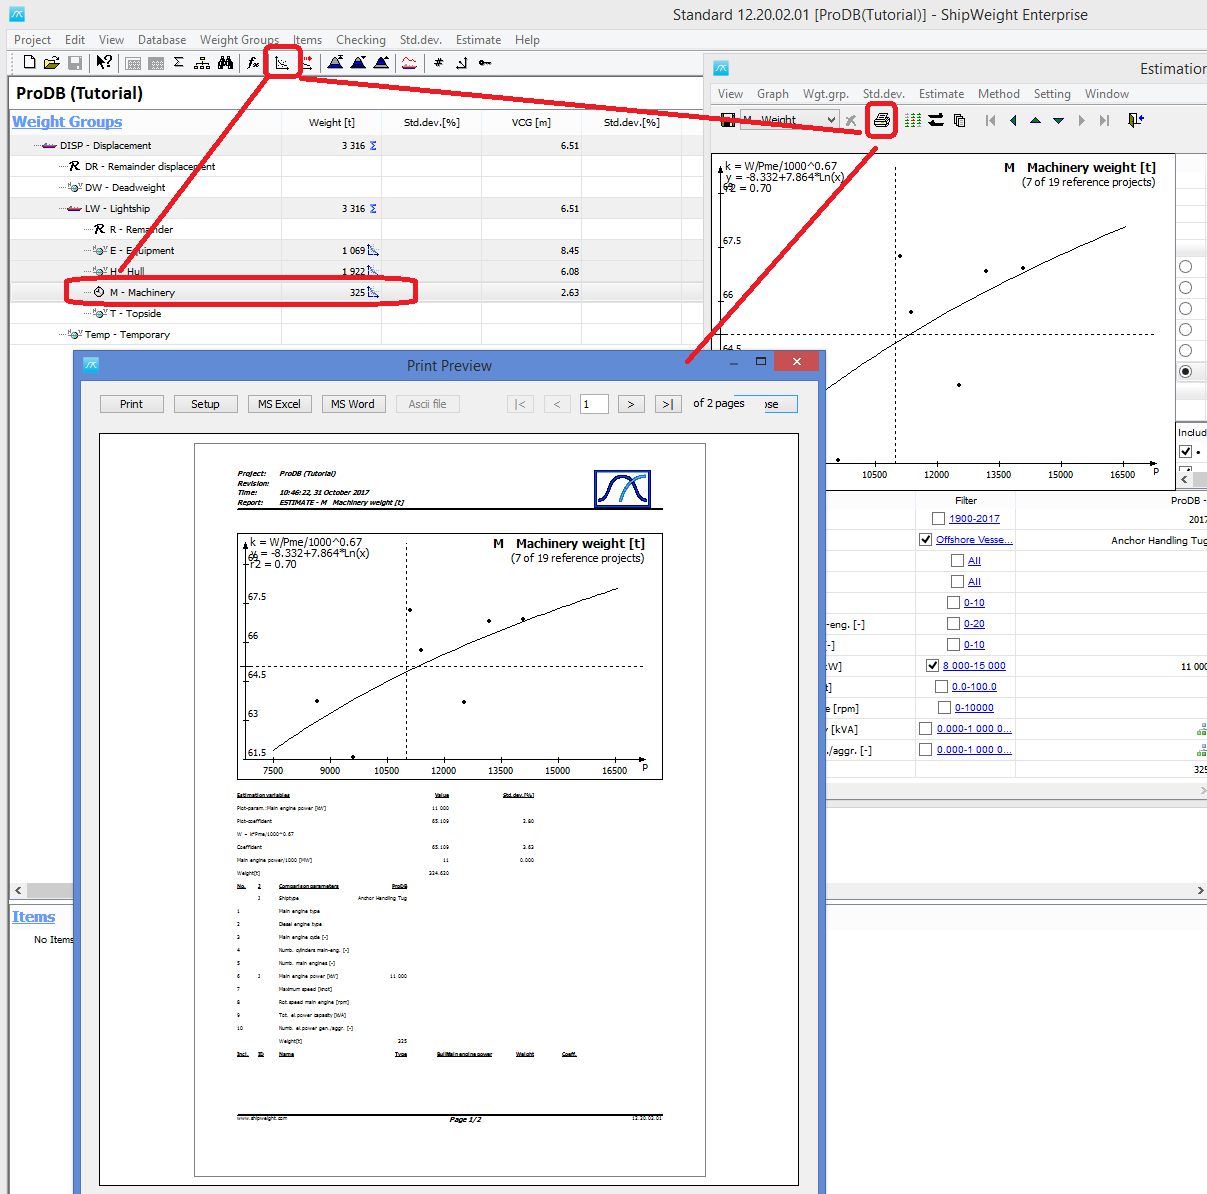
To produce more background information about a specific estimation, select the weight group in the main window, open the estimation window from the toolbar and click the “Print” button. This will produce a more detailed report for the estimation of a particular weight group.